
Creating a truly invisible seam in any form of crochet has so far proven virtually impossible.
Some come close. I like to think my “Infinity stitch” has helped crocheters hide their selvedge seams better over the years.
But in general, the complex texure of crochet fabric doesn’t lend itself to easy, handsewn immitation, so instead I like to throw subtlety to the wind and celebrate my seams by making a feature out of them.
This seaming technique is one of my favourites because it’s stretchy, it follows any colour shifts in your yarn, and it requires less than 6 inches of extra yarn, no matter how long the seam needs to be – so if your yardage is running low, you needn’t worry too much.
I’ve named it the “Herringbone Seam” because the modified slip stitch I use gives a lovely fishbone texture to the resulting join.
Let’s get right into it!
This is the piece of Tunisian Crochet I’ll be using for this tutorial. It’s a sheet of Tunisian Simple Stitch (TSS) and I’ll be seaming the first row to the last row to make a cylinder.

Pep In Your Step Worsted – Colourway: “Millions of Peaches”
We first need to prepare the fabric for seaming.
Run a row of UK dc/ US sc sts along the top of the last row of TSS sts.
Note: For the rest of this tutorial, I’ll refer to this st as a “double crochet” or a “dc”.
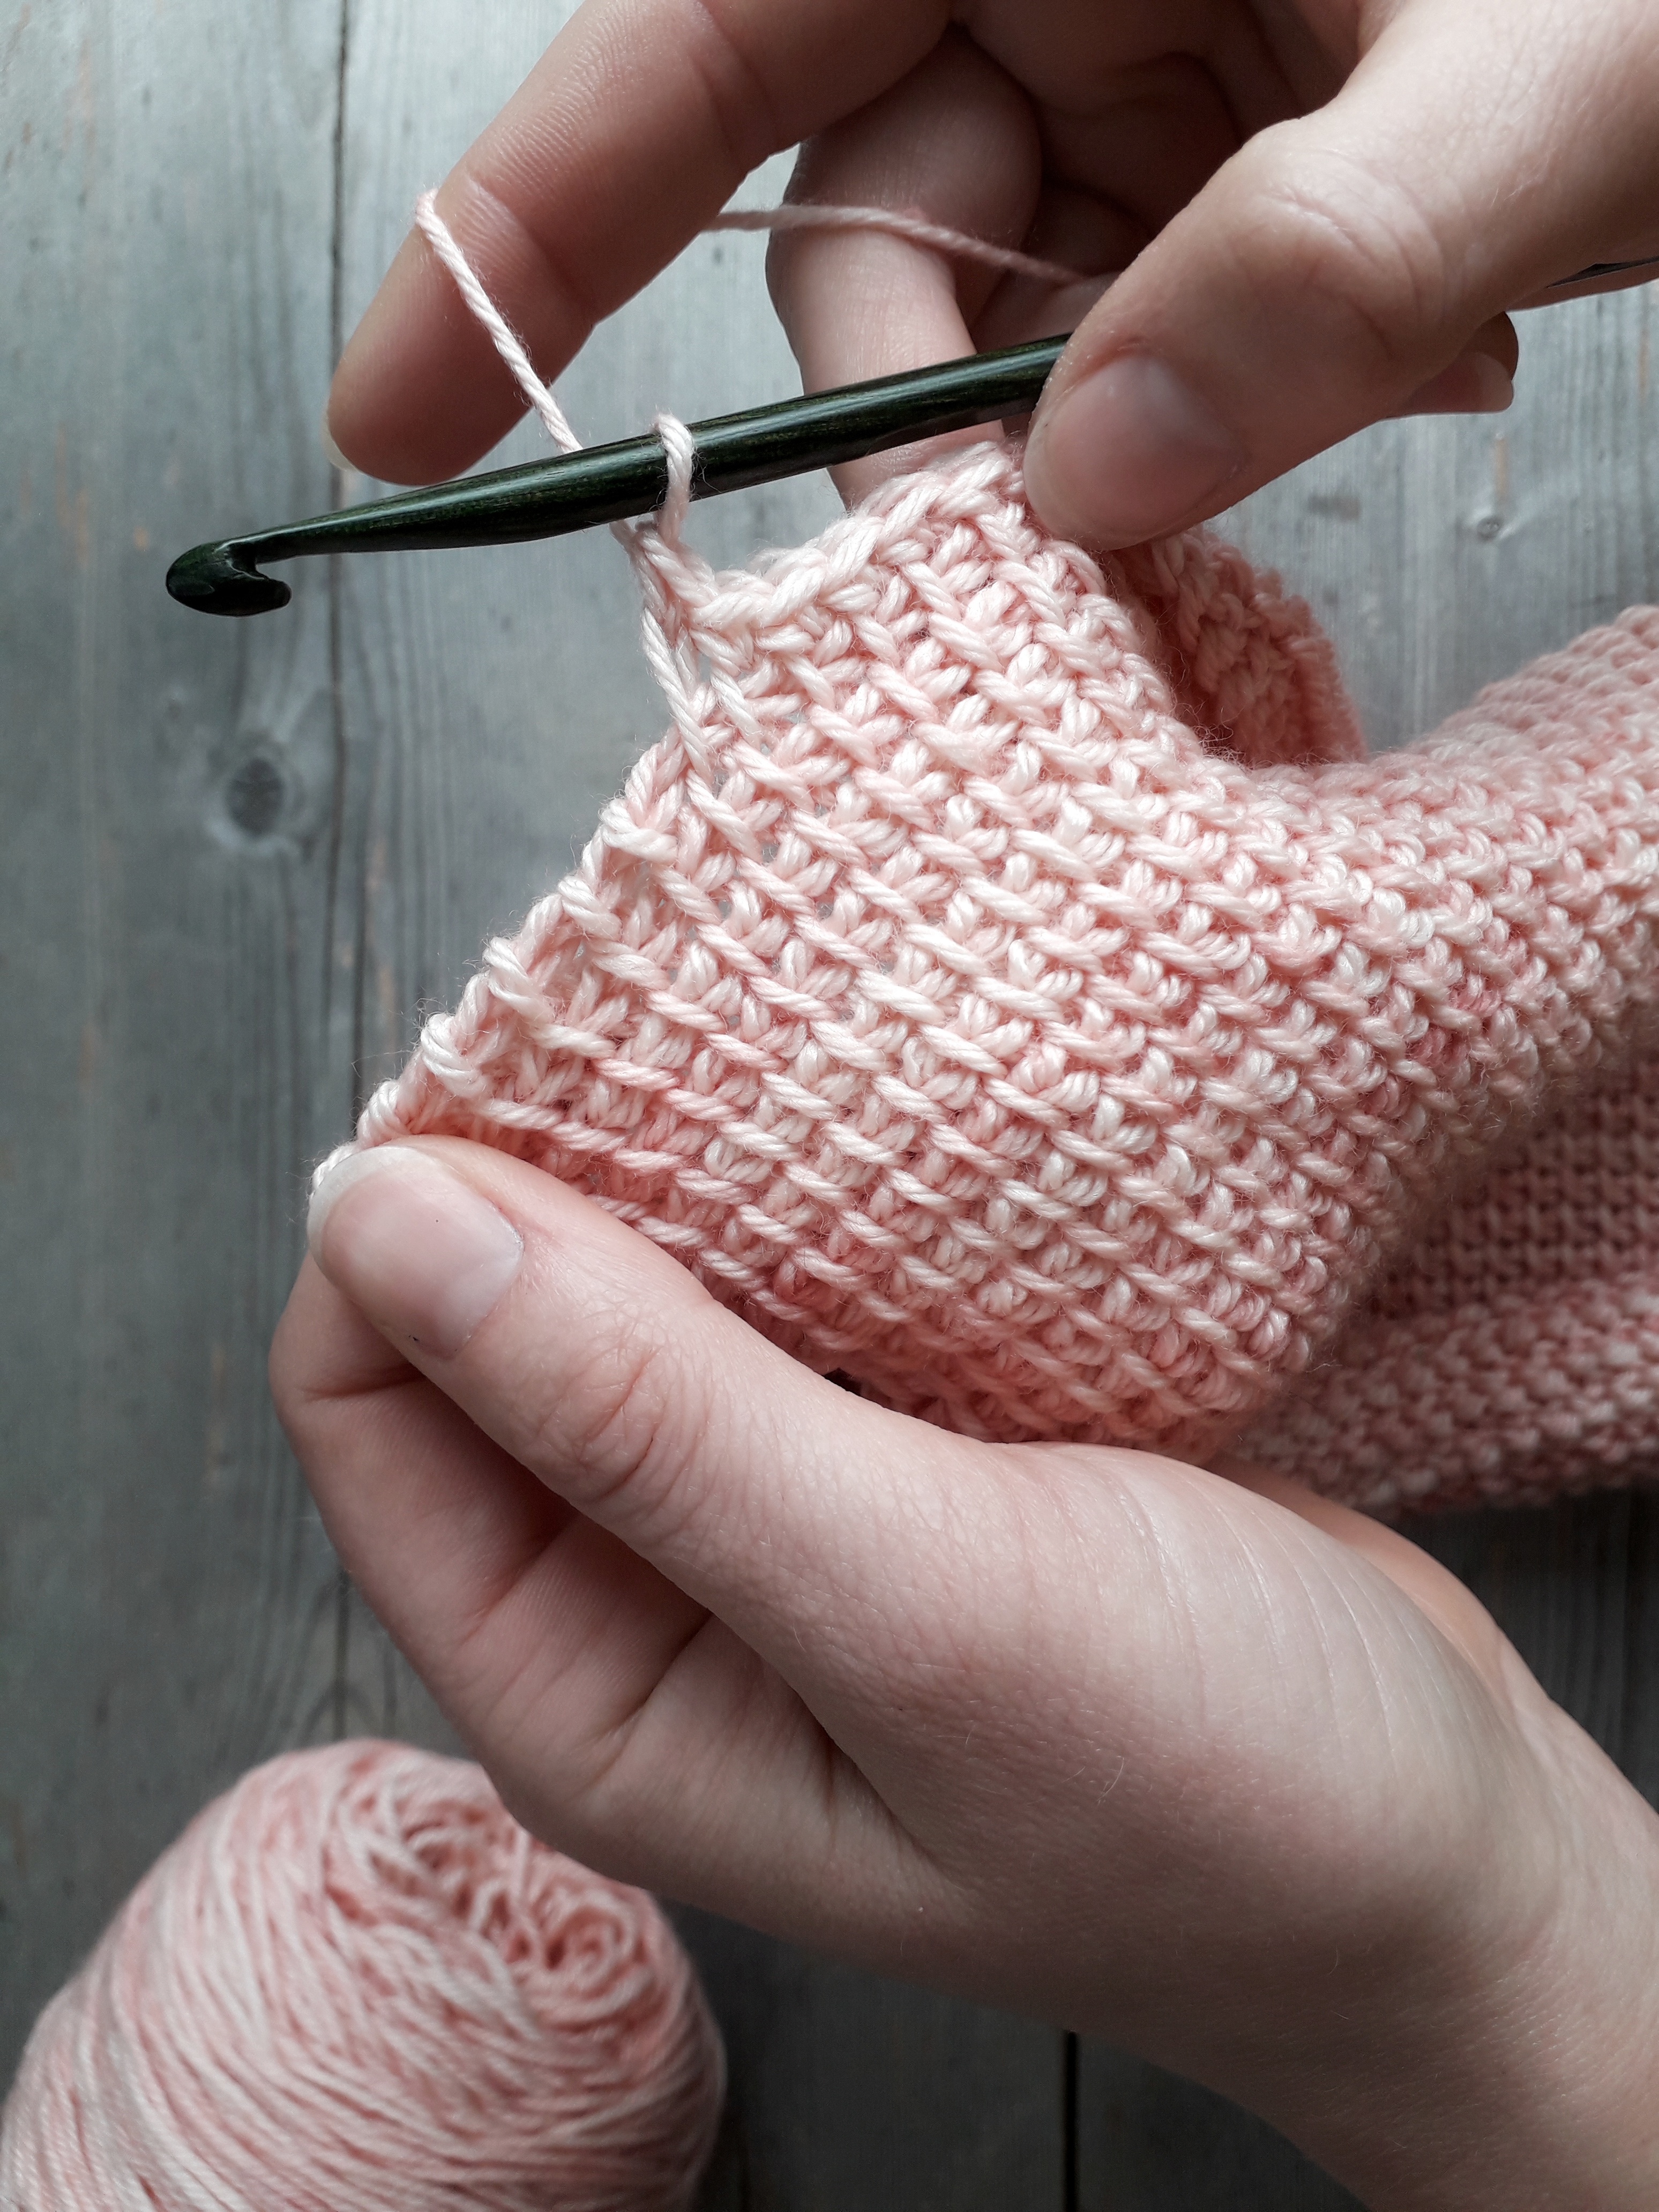
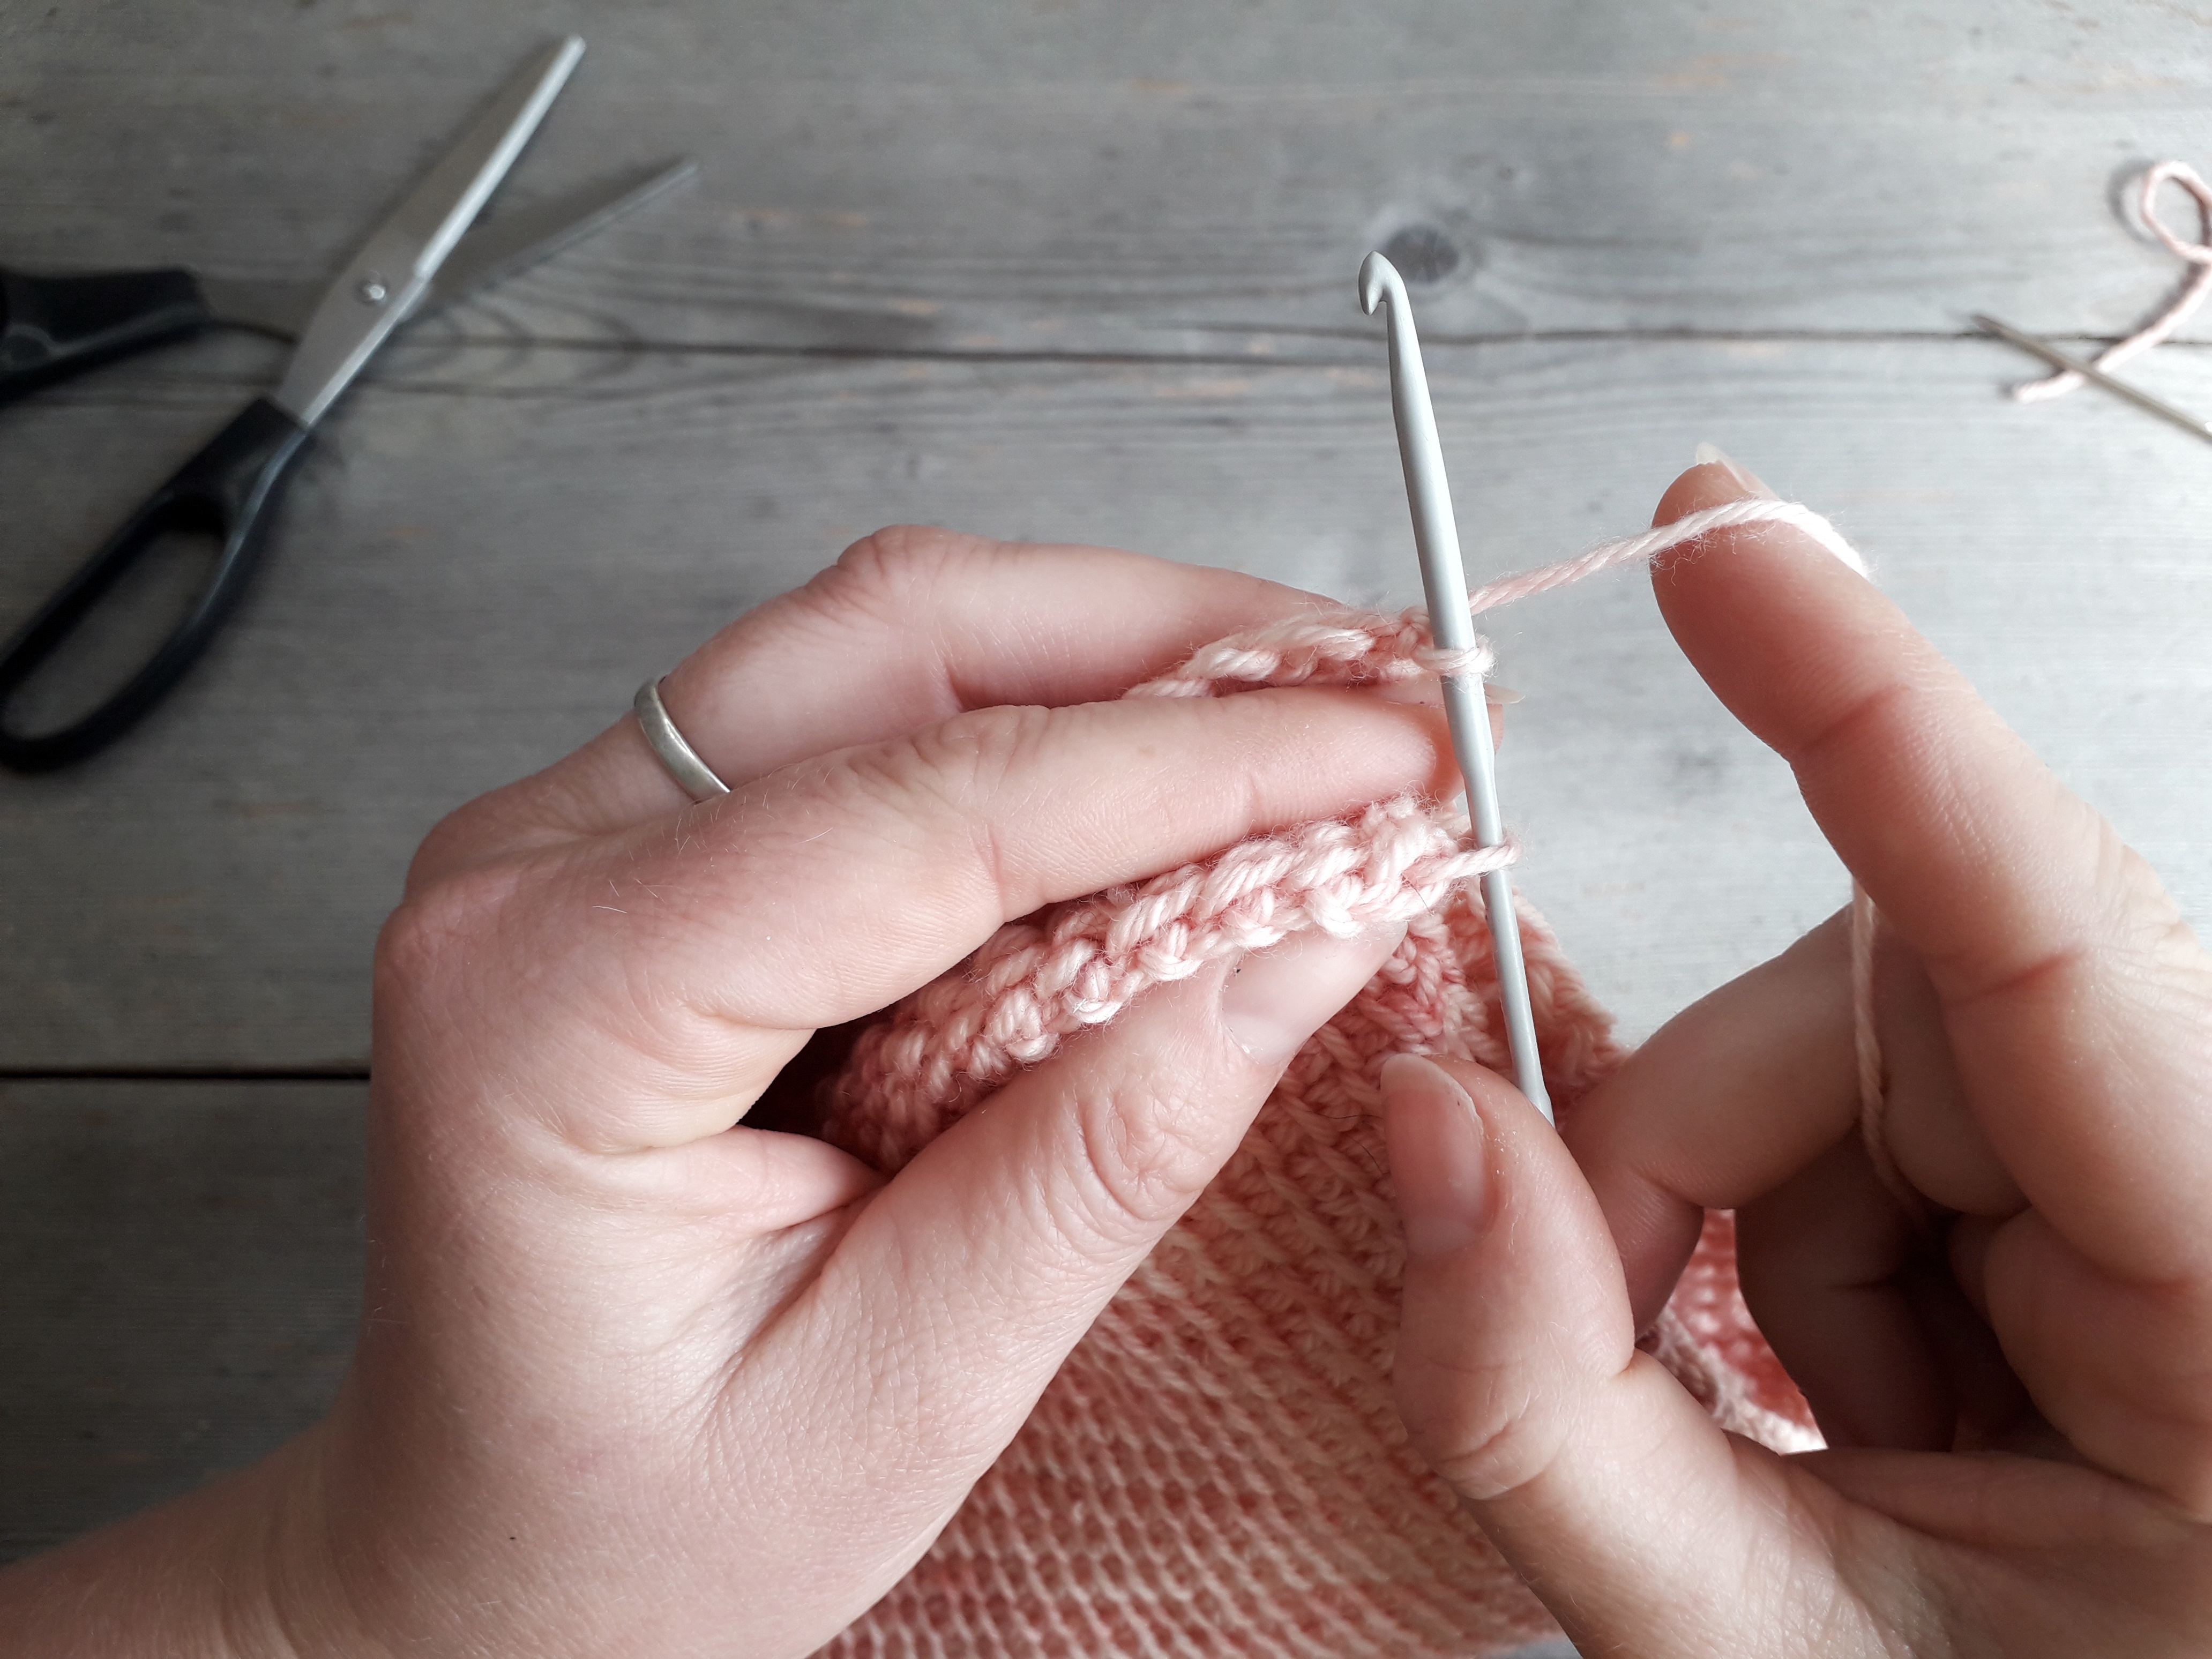
Once you’ve completed a row of double crochet stitches, add a slip stitch to the chain at the end of the row.
If you have trouble finding the chain, draw your pinched fingers diagonally across your fabric towards the corner. The last loop you catch hold of at the corner is the chain (pictured below).
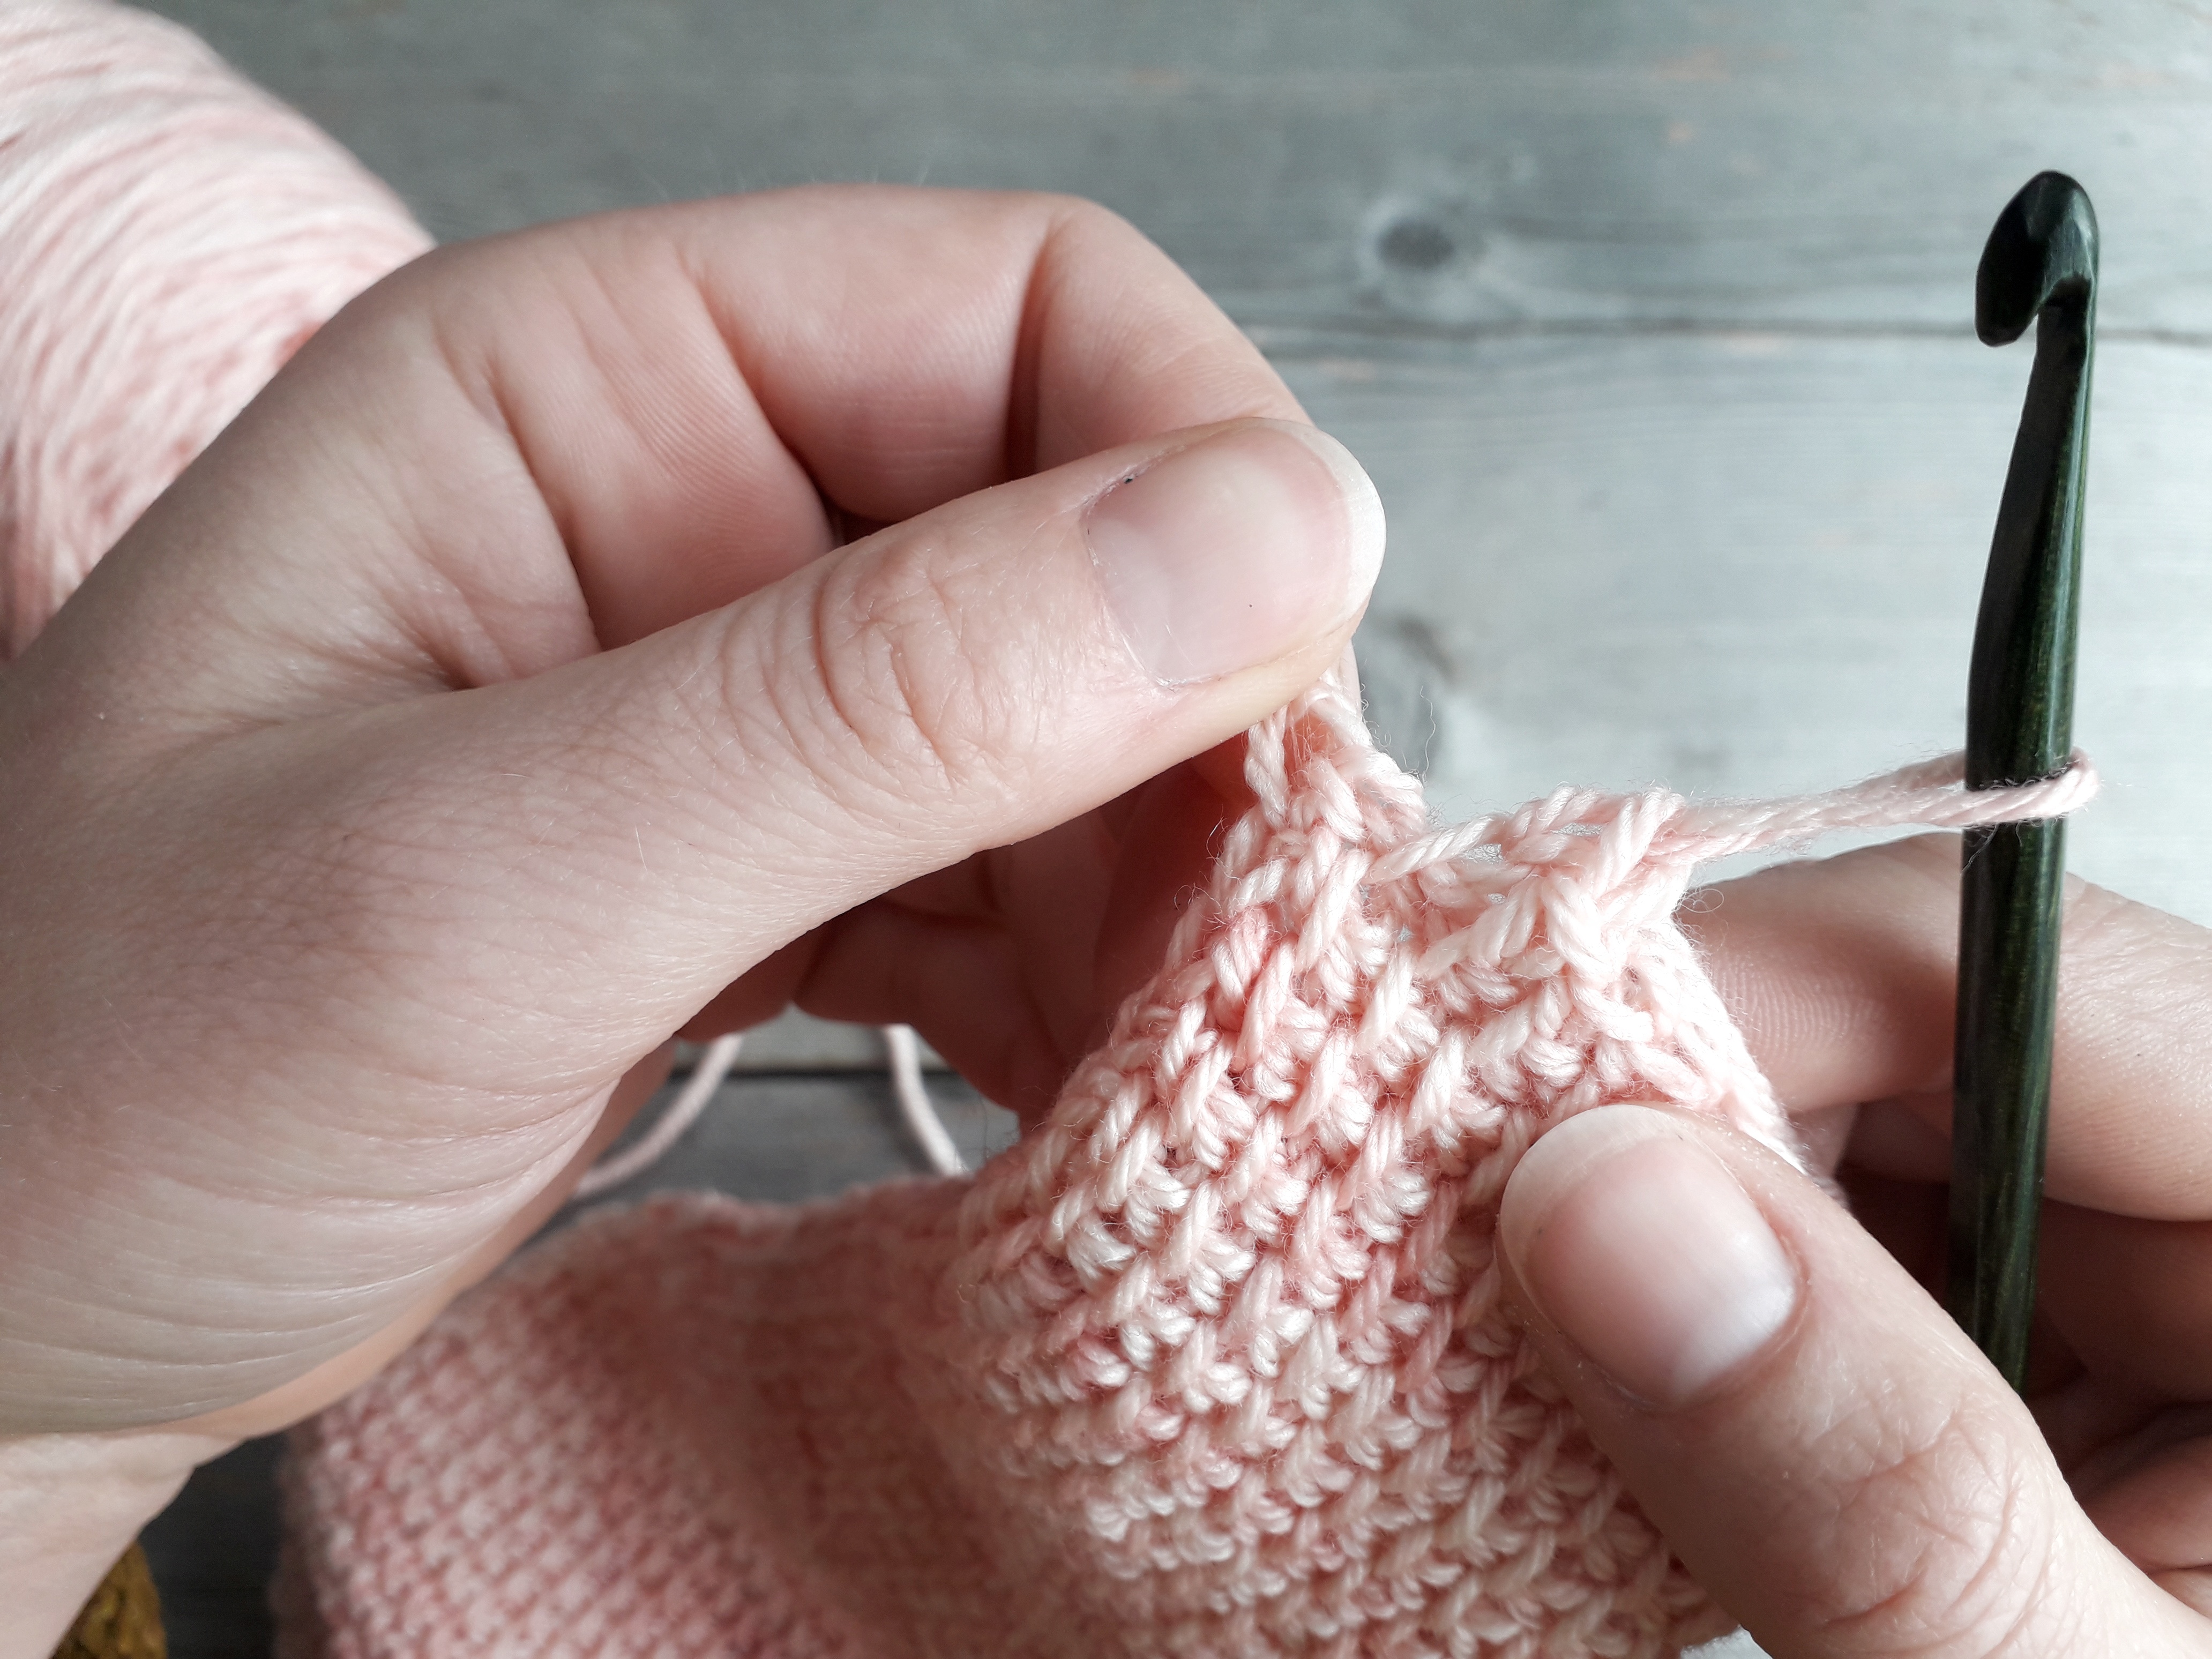
Once the slip stitch is in place, make the loop on your hook larger, and remove the hook. DO NOT bind off.
Take hold of the loop and pull firmly on both sides (pictured below).
You will notice the slip stitch tightens up as you pull. This is an old Irish Crochet Lace trick and it neatens and sharpens up your corner.
This seam is easier to work up if you use a smaller hook.
I made this fabric with a 5.5mm hook and worsted weight yarn, so I’m seaming with a 3 mm hook.
With the wrong sides of your fabric facing in, fold fabric in half so that the first and last rows are parallel.
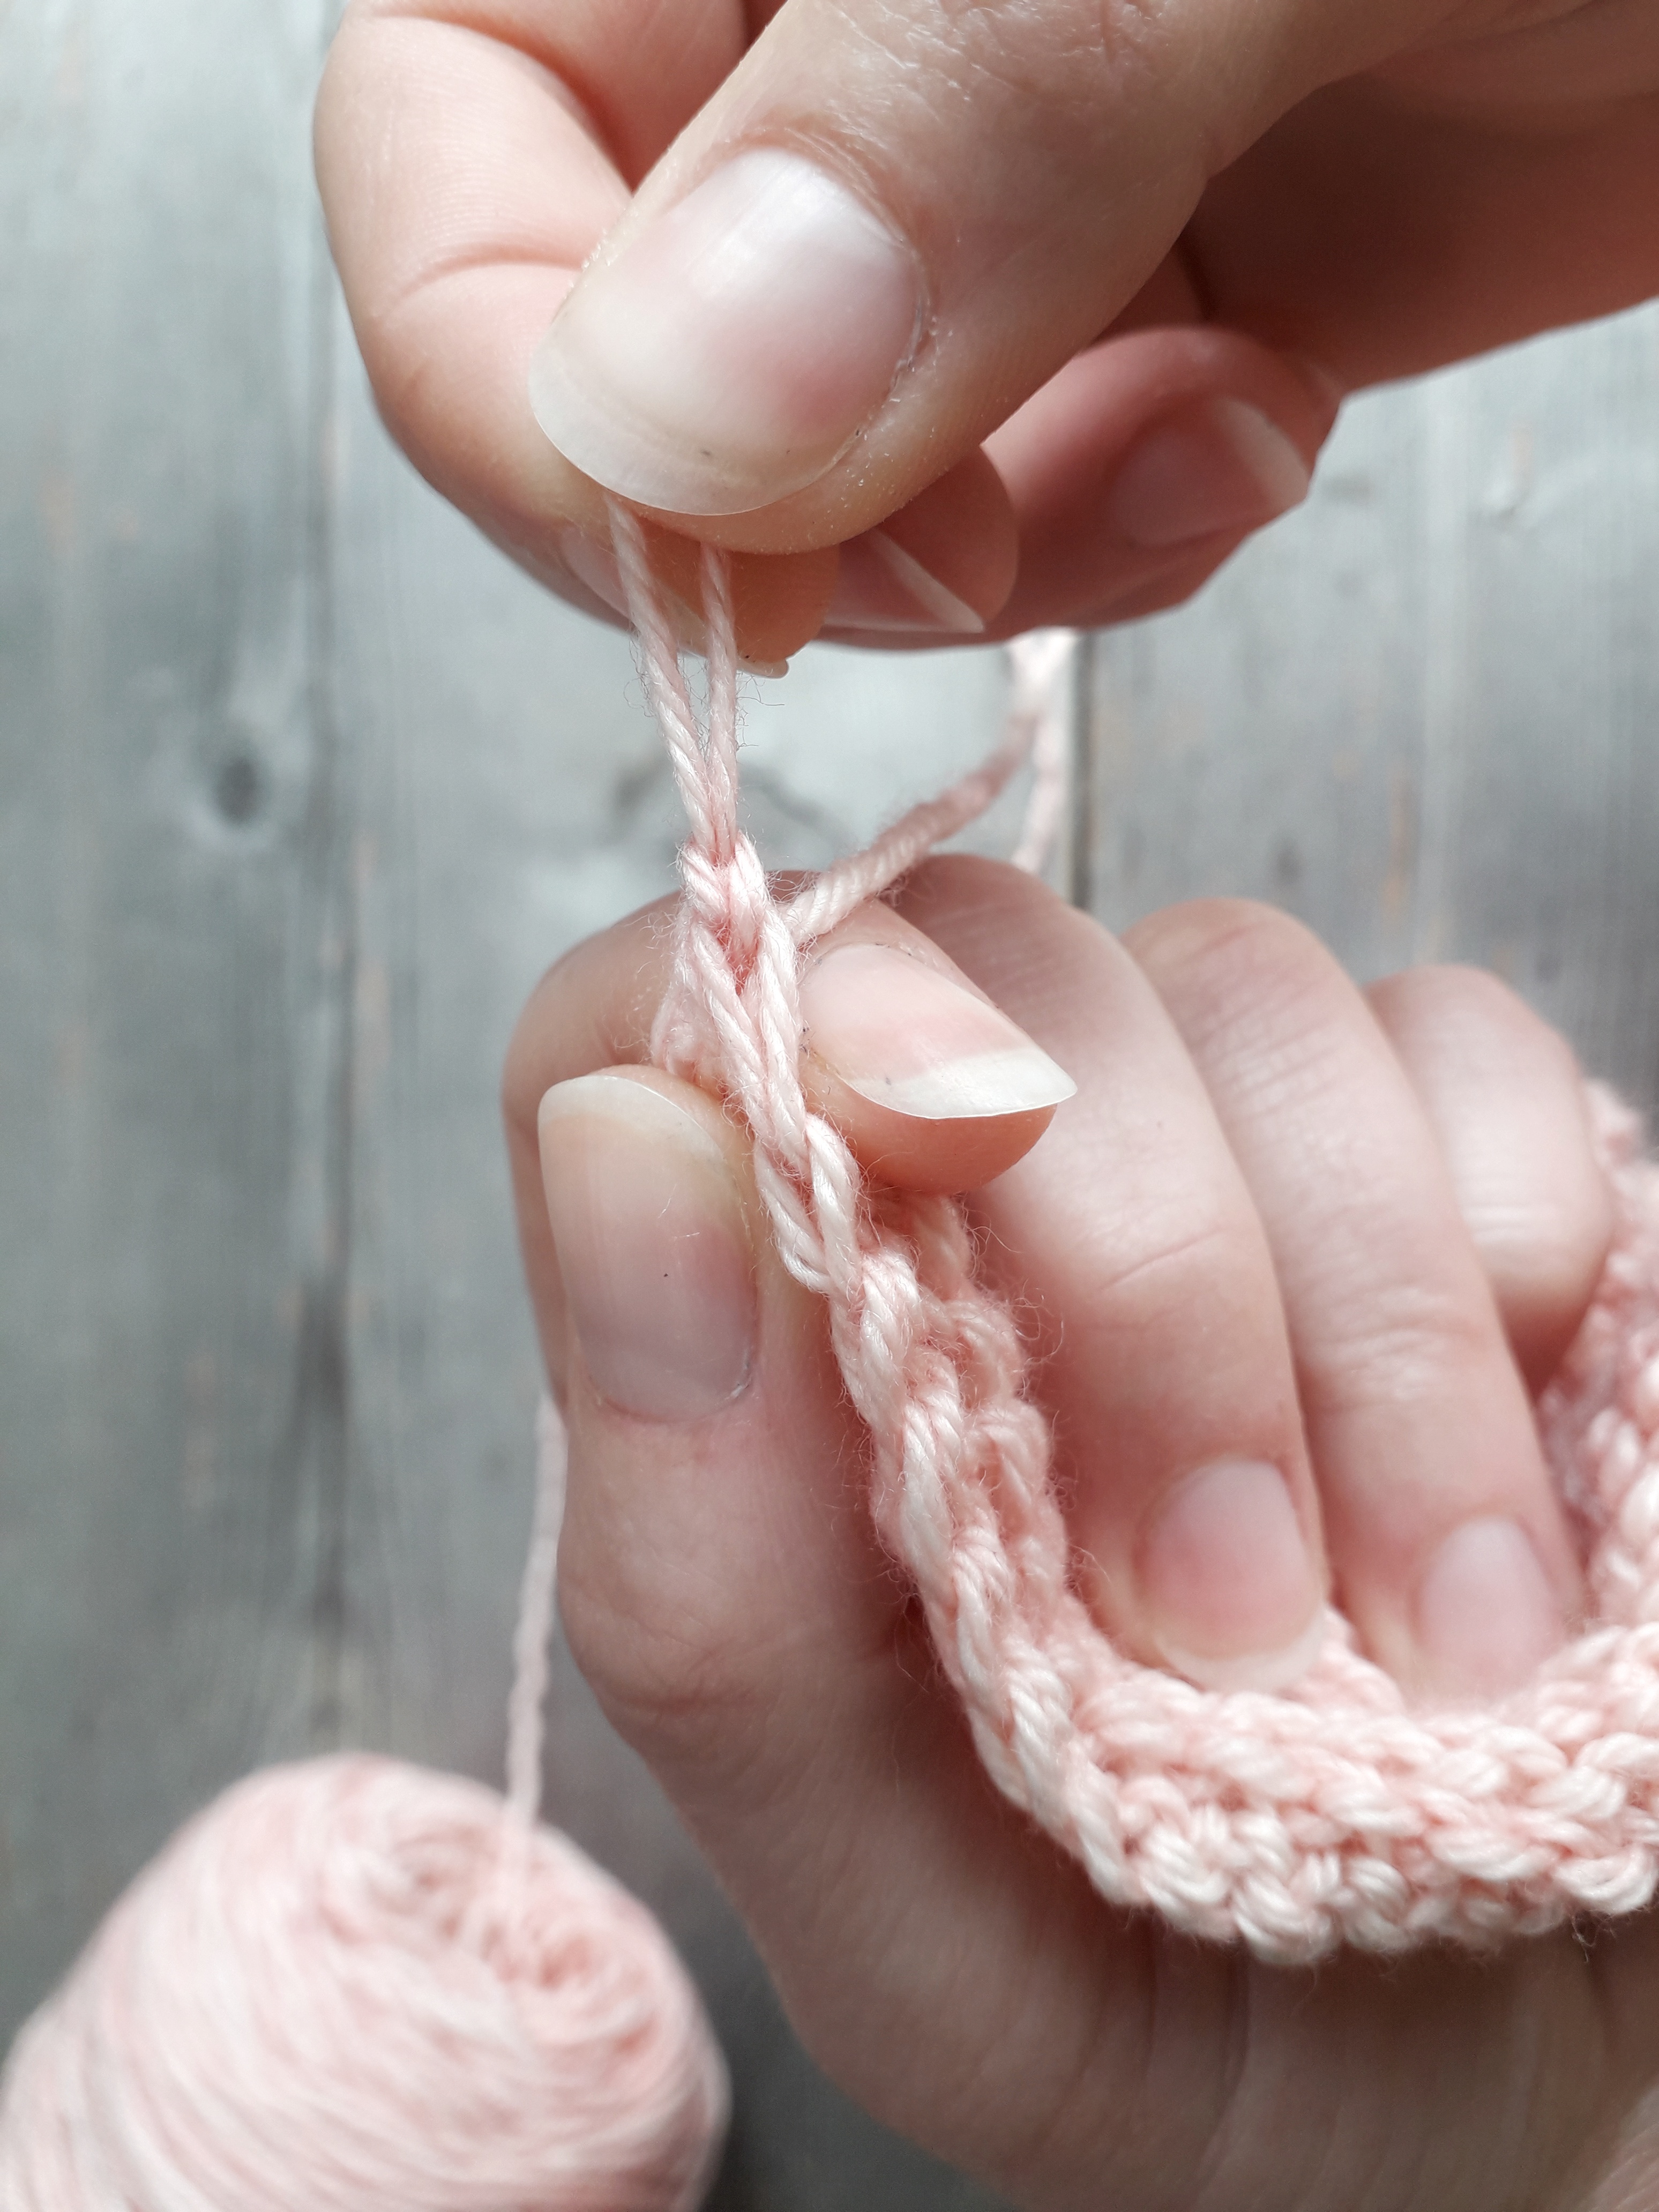
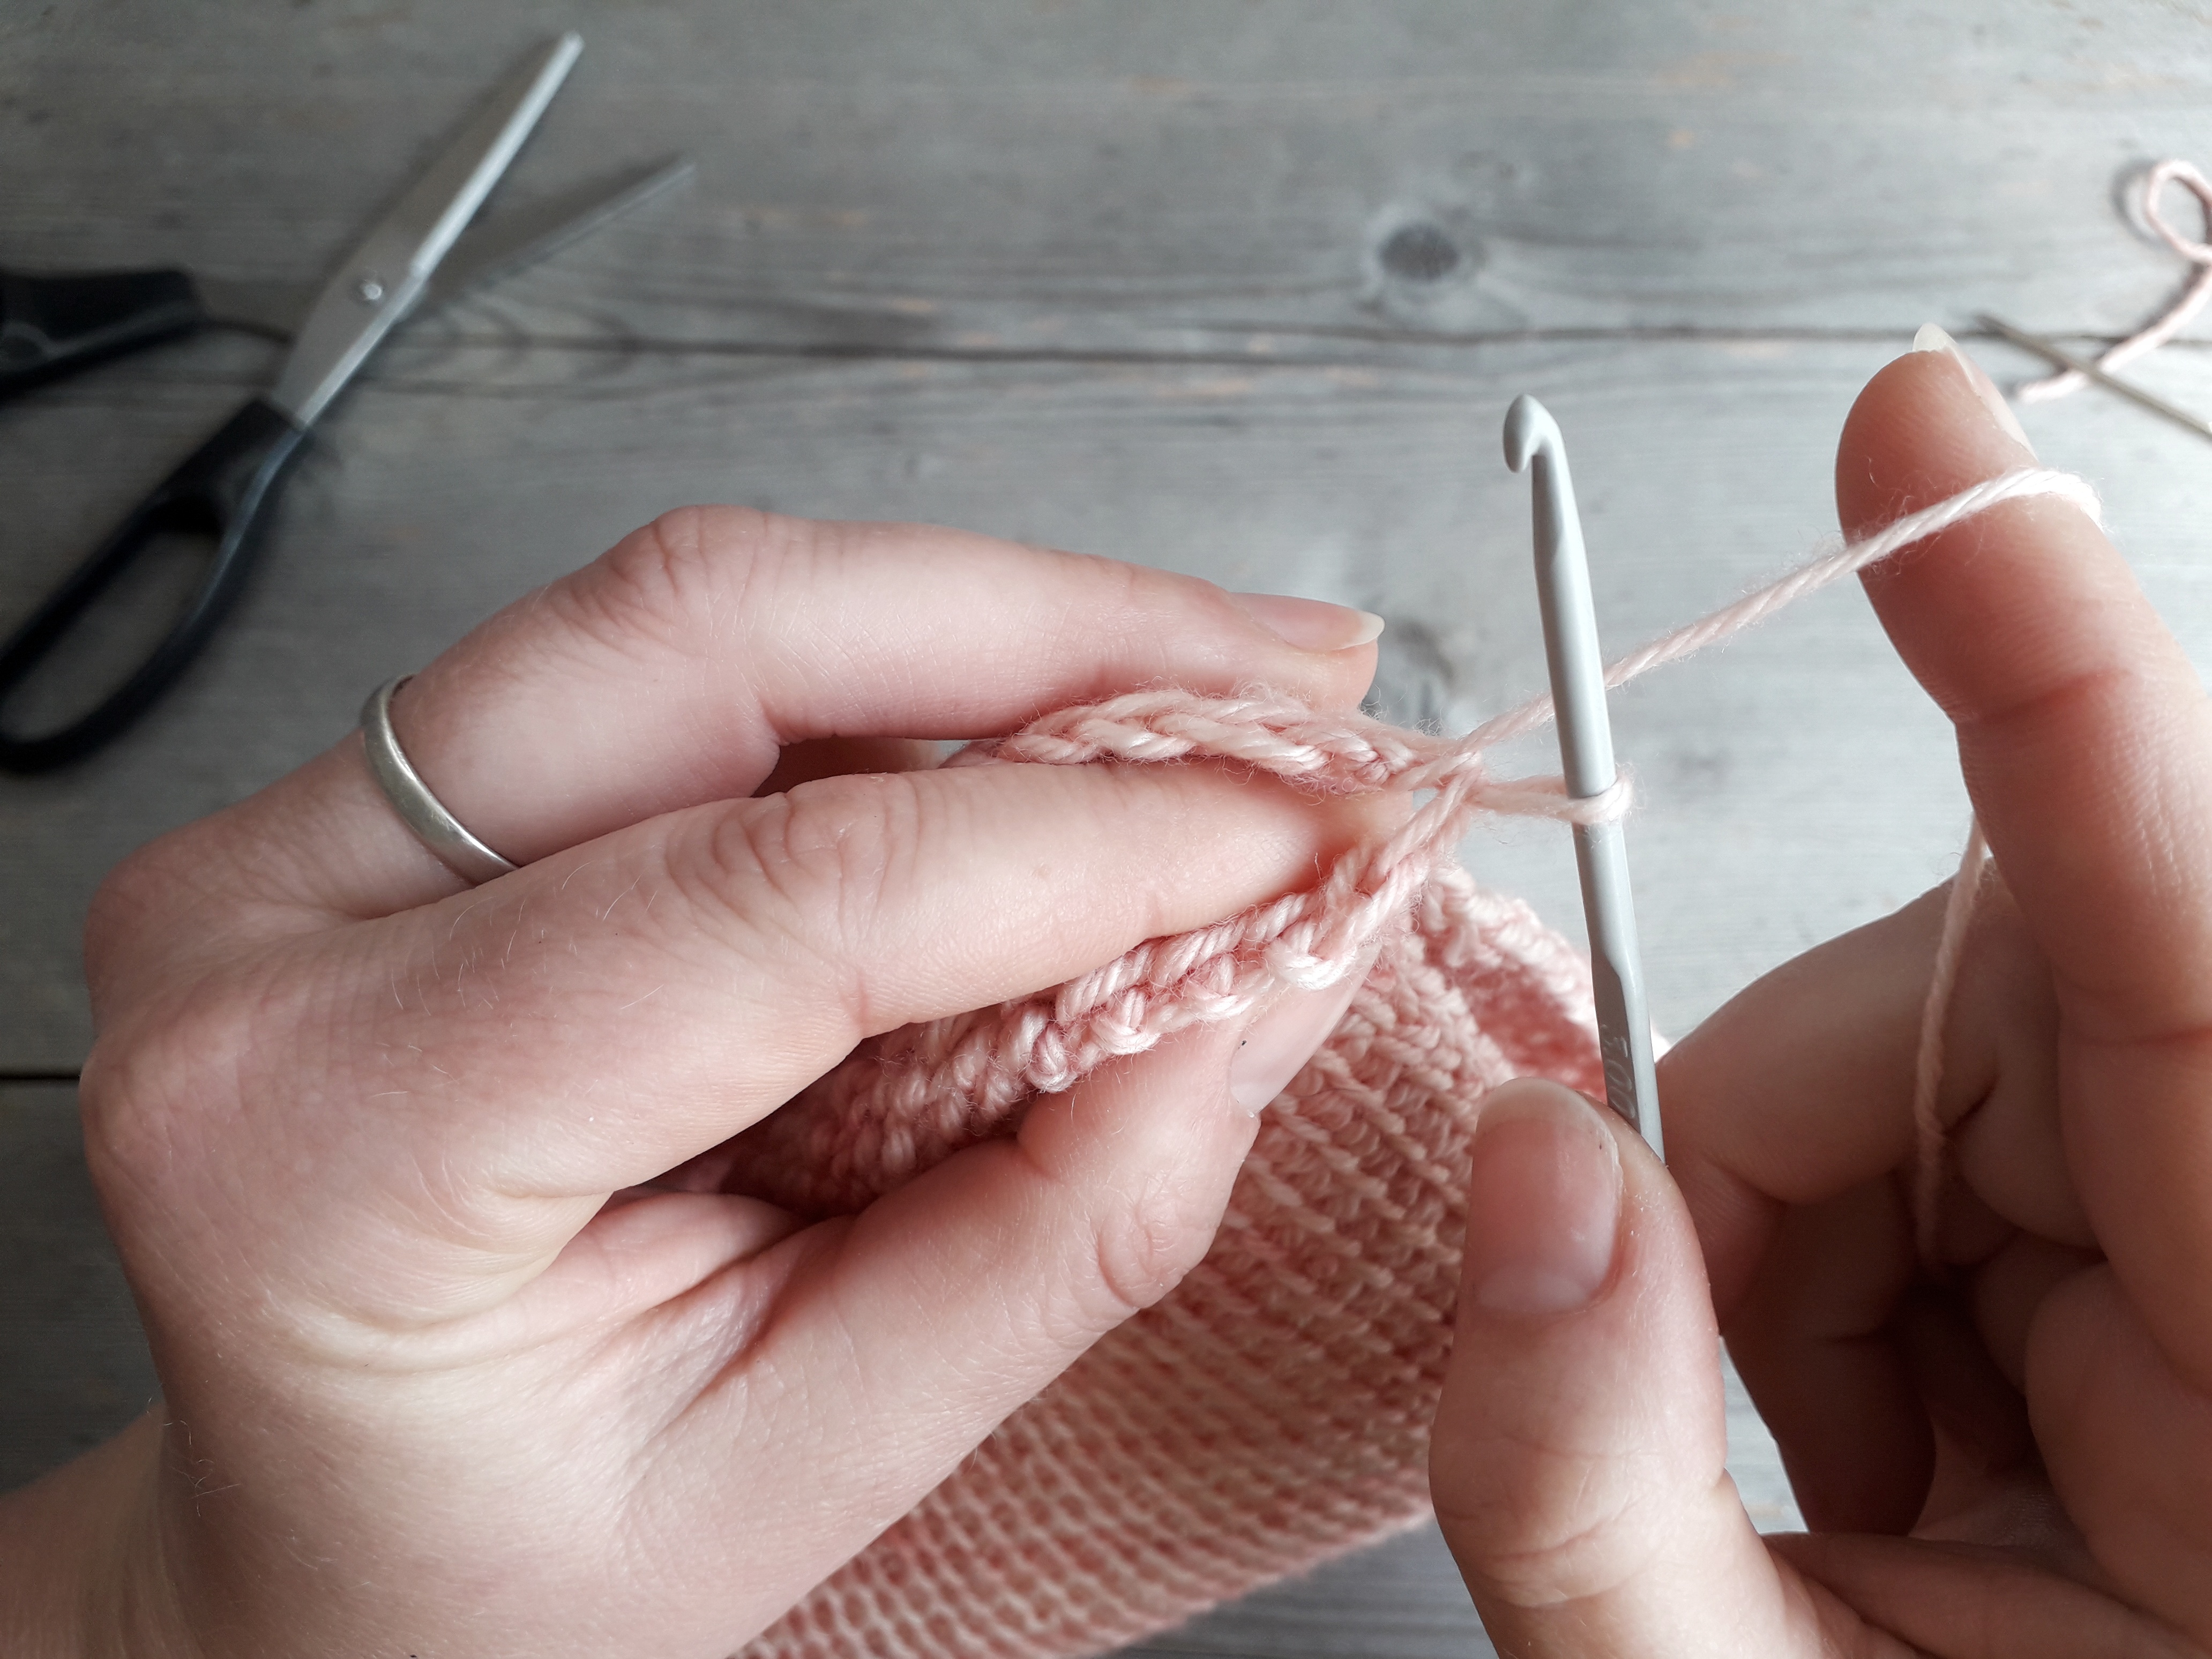
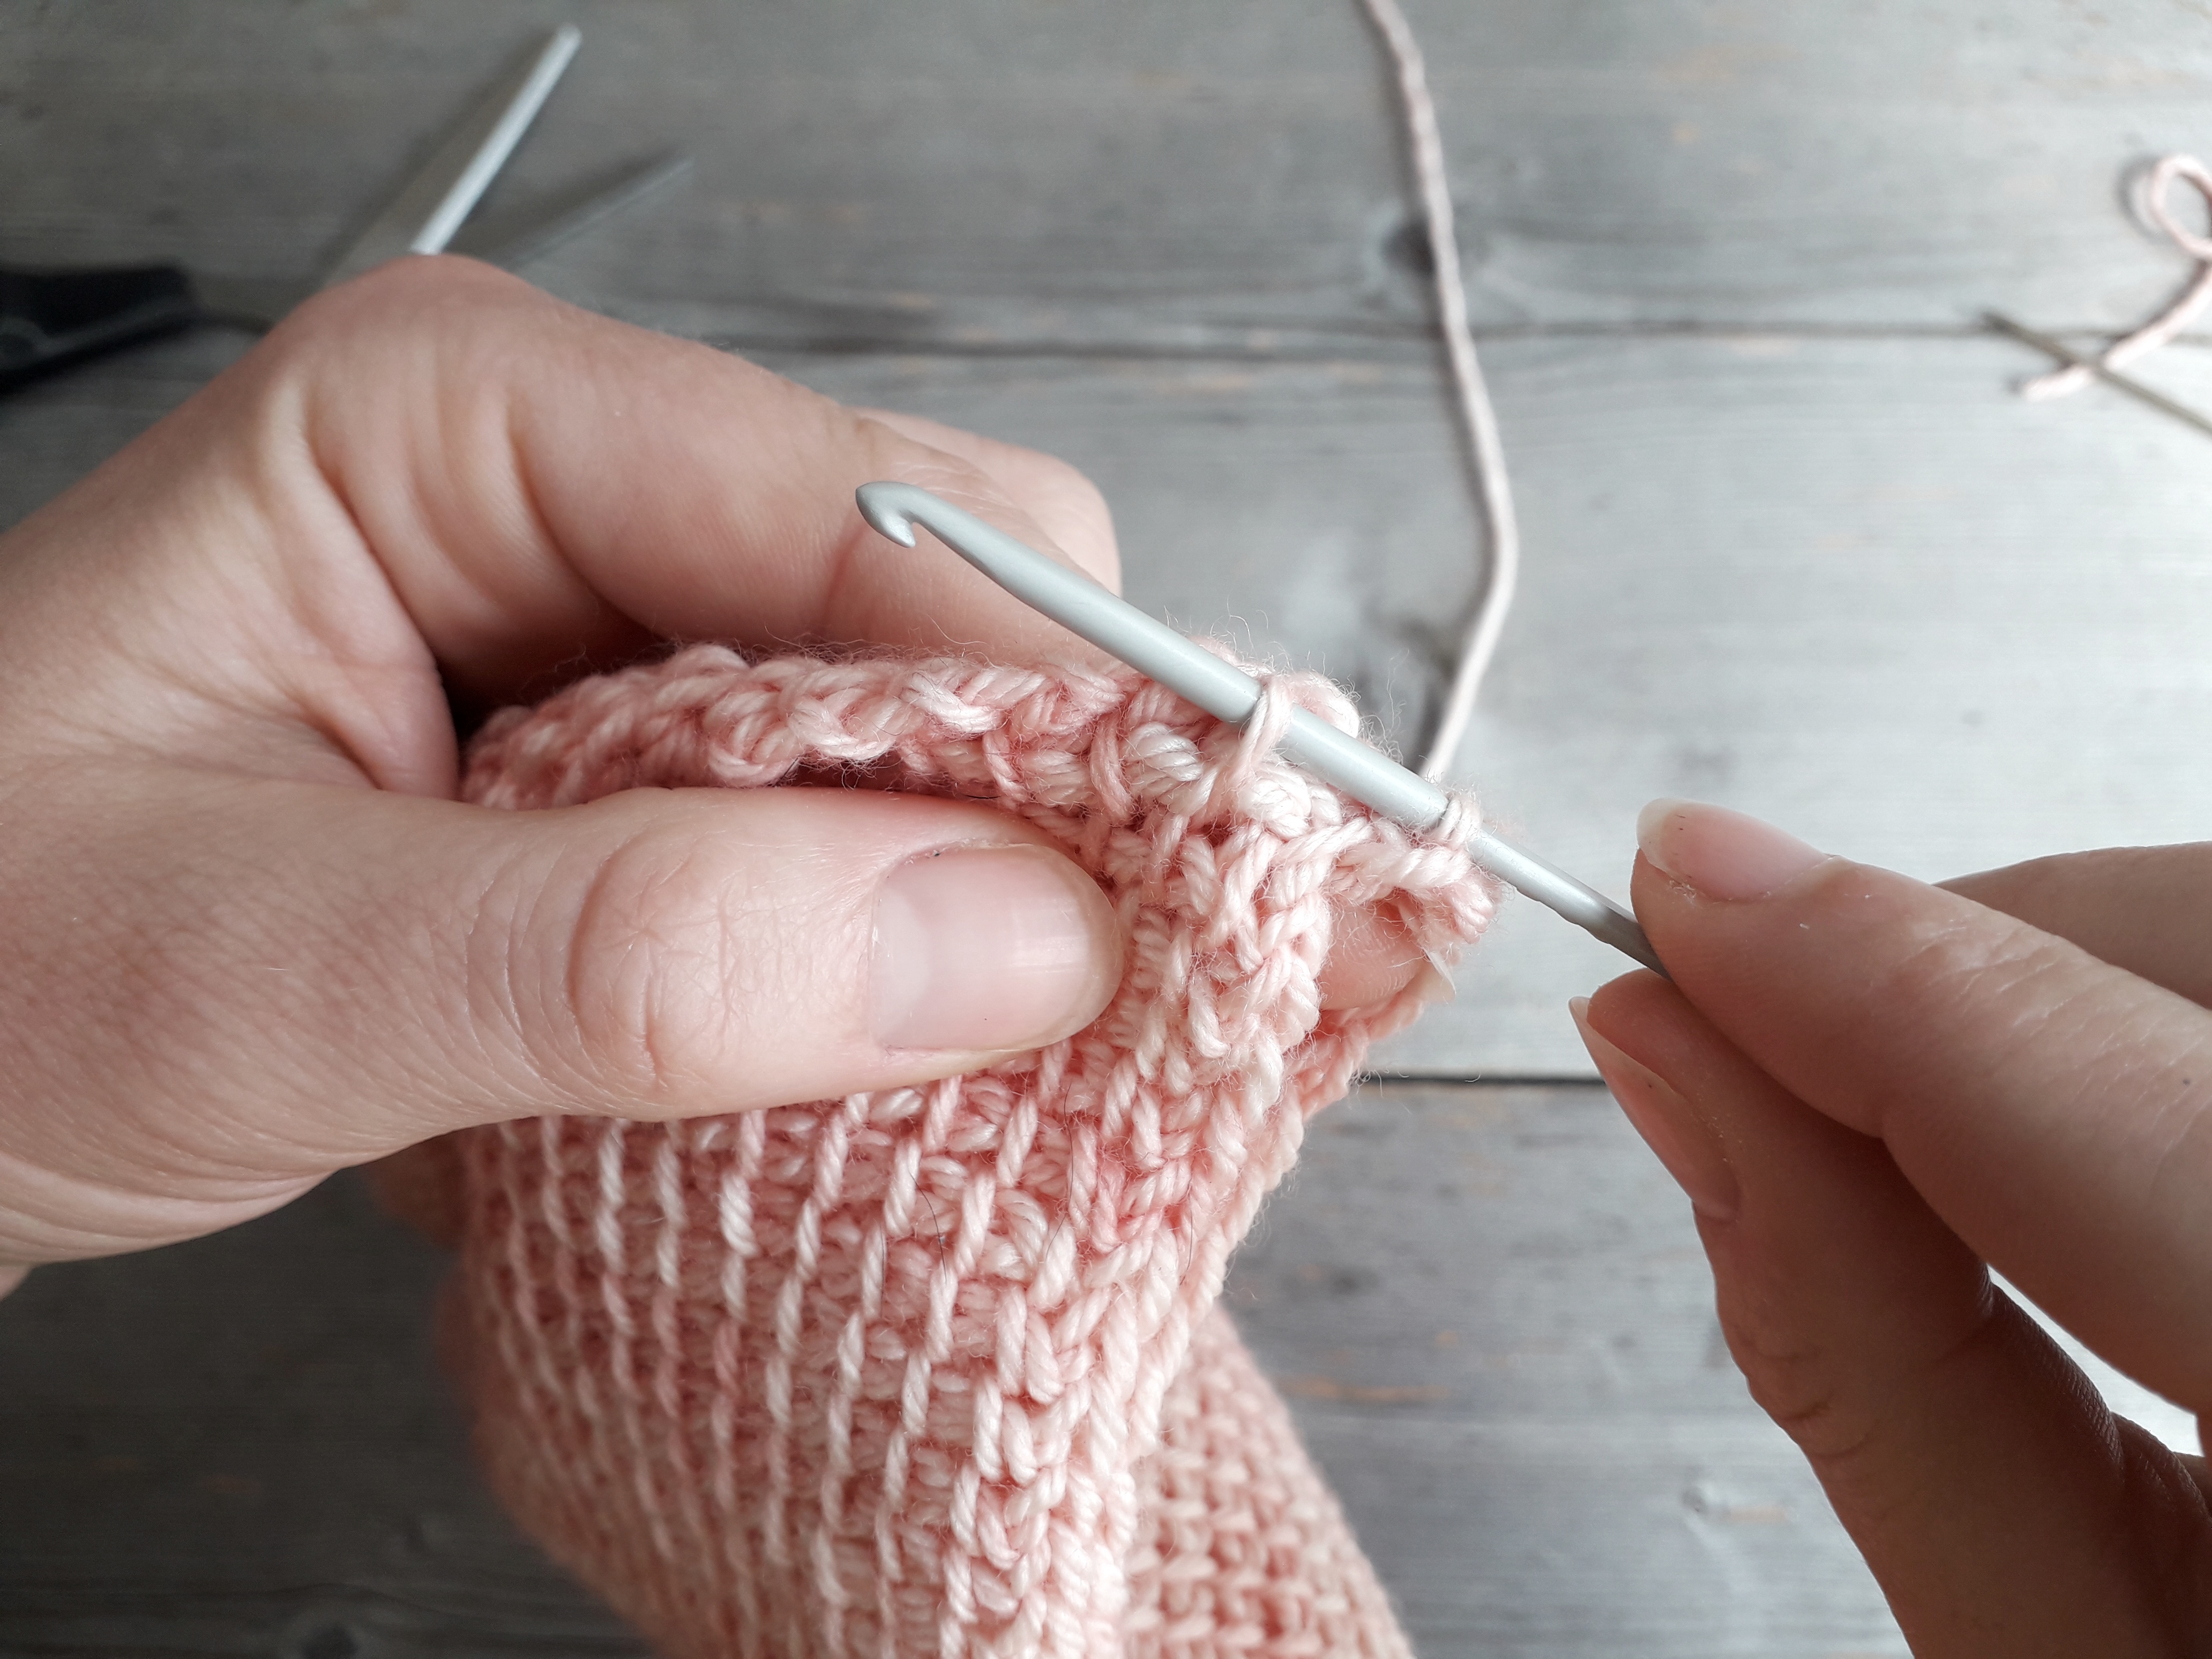
With the first row closer to you, insert hook into chain at the corner. Then, pick up the loop attached to the ball (pictured below).
Draw loop through chain (pictured below).
Cut yarn and leave a tail. This tail will be woven in at the very end. For now, leave it be.
Here is where the seaming fun begins!
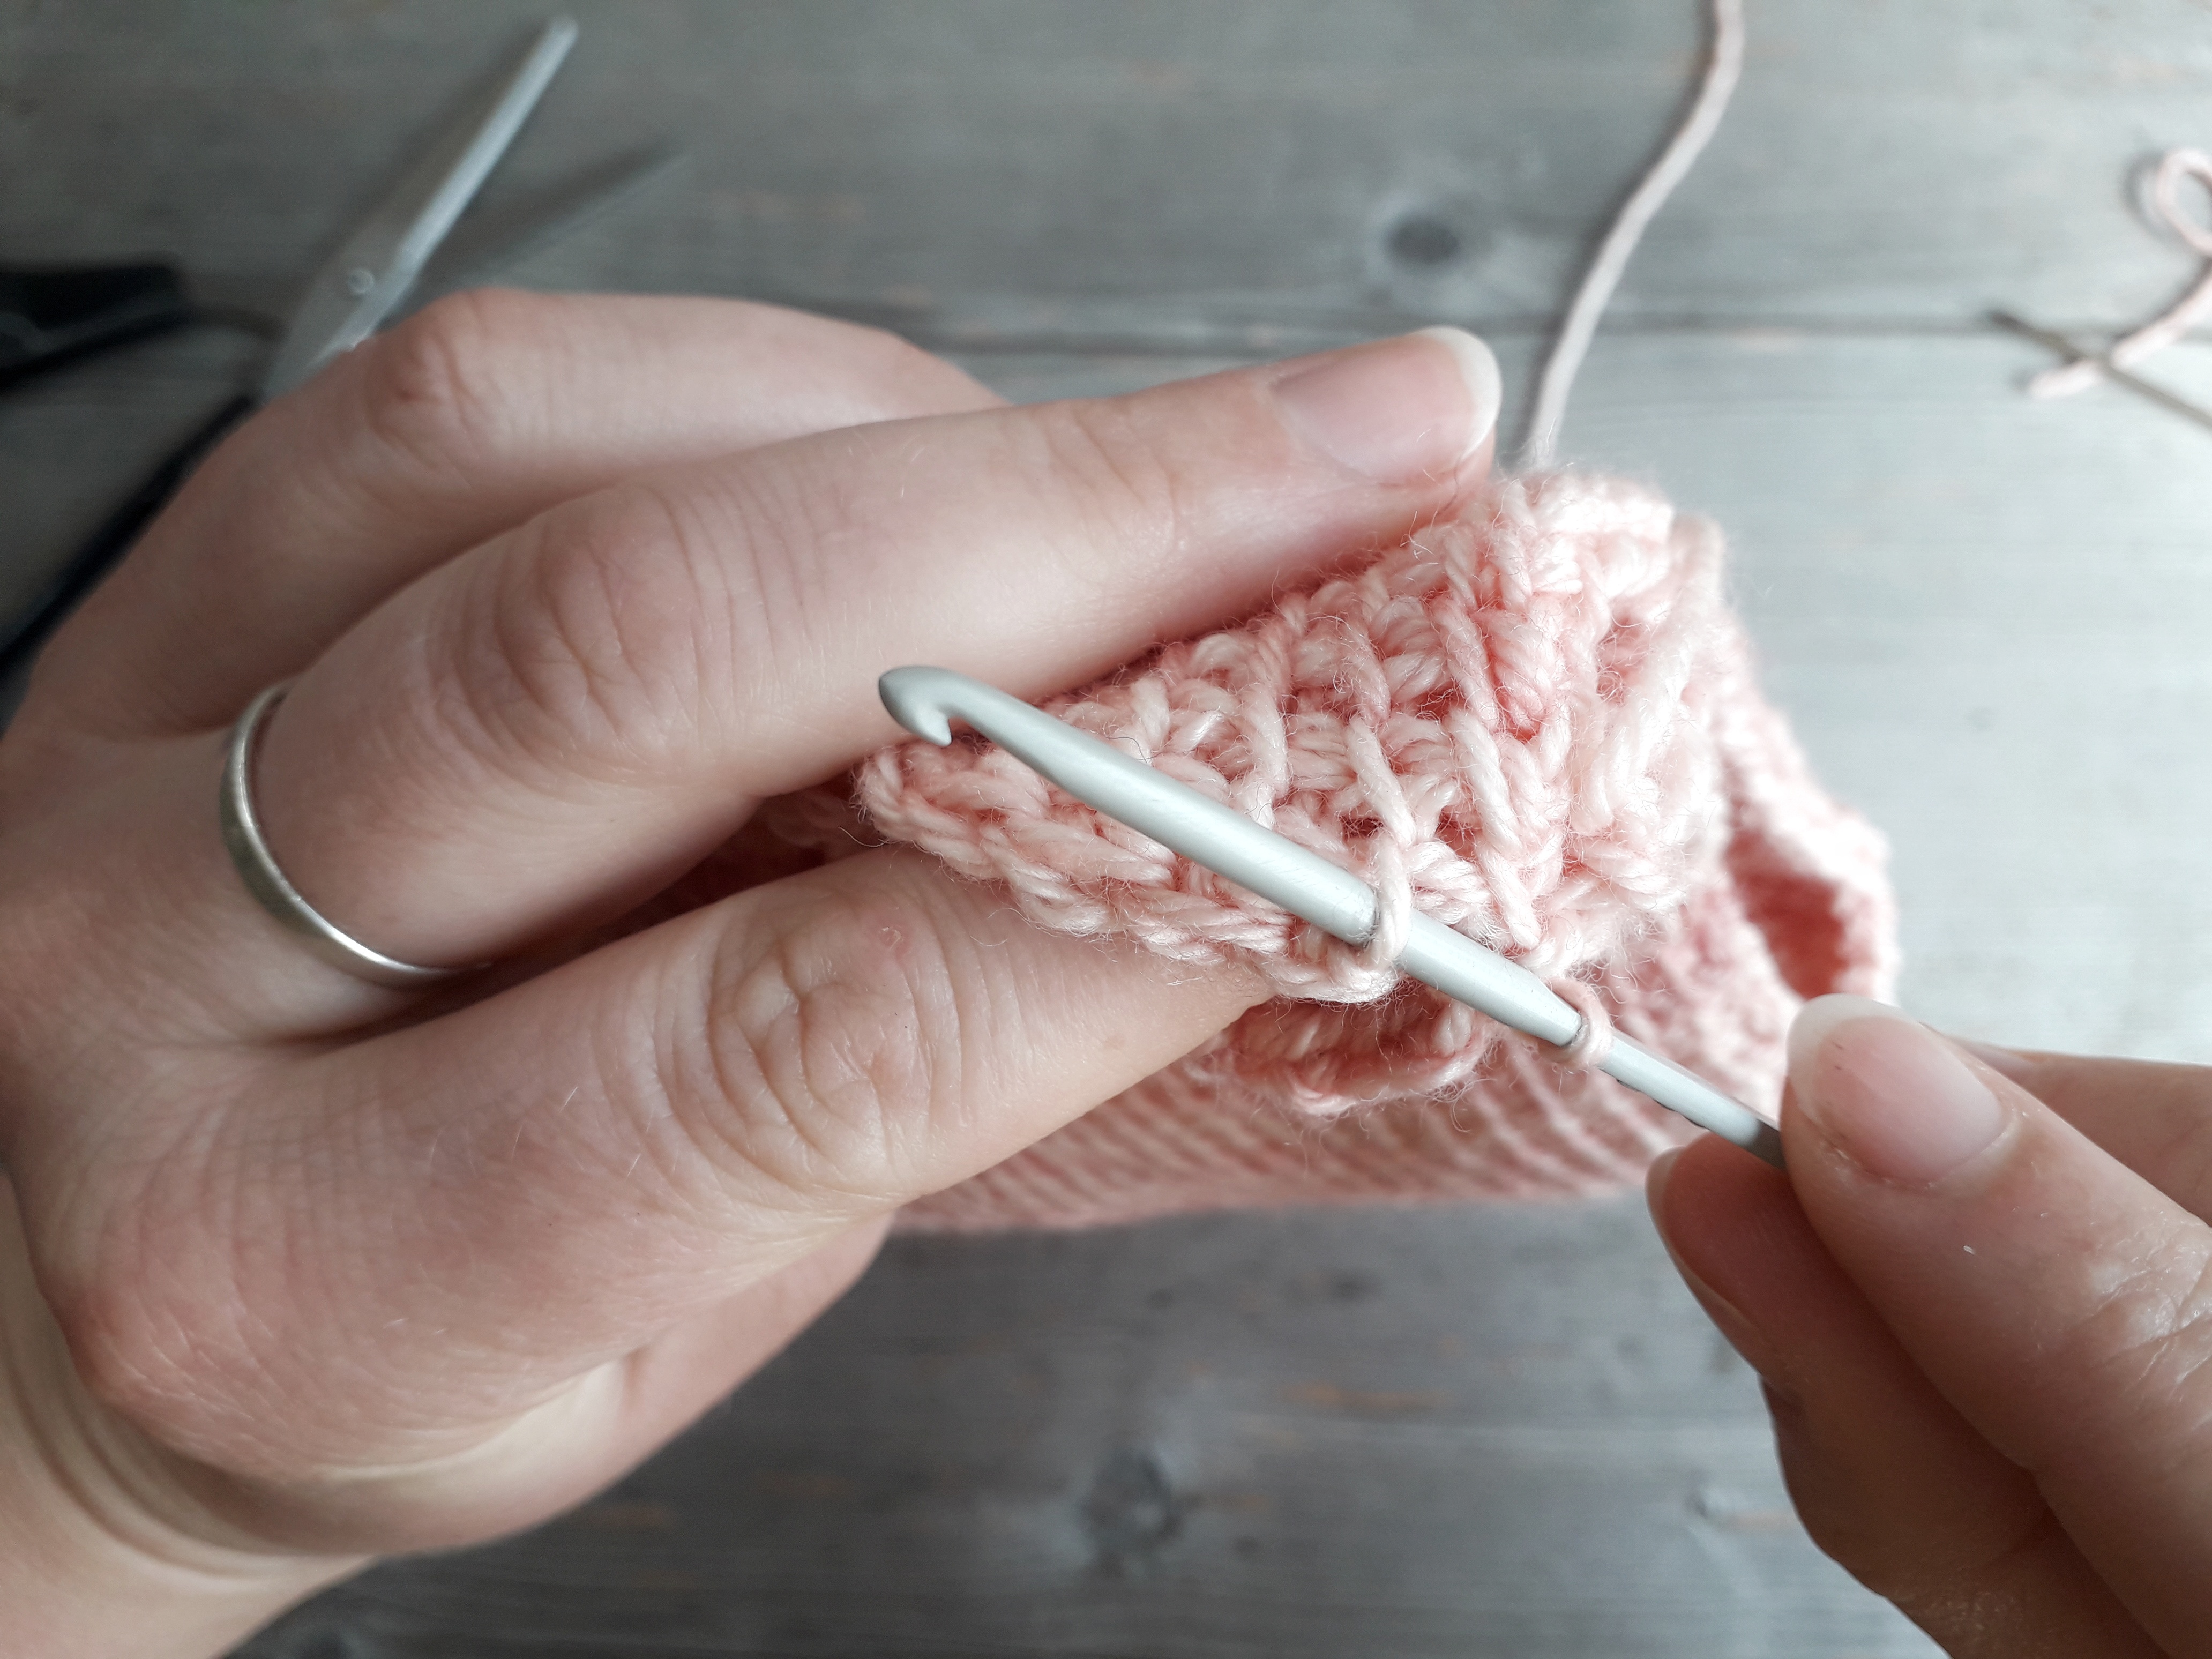
Insert hook into the first line along on the fabric closest to you (pictured below).
Then draw the line through the loop already on your hook – 1 loop on hook.
Don’t worry if it feels a little tight, that’ll even out as you work.
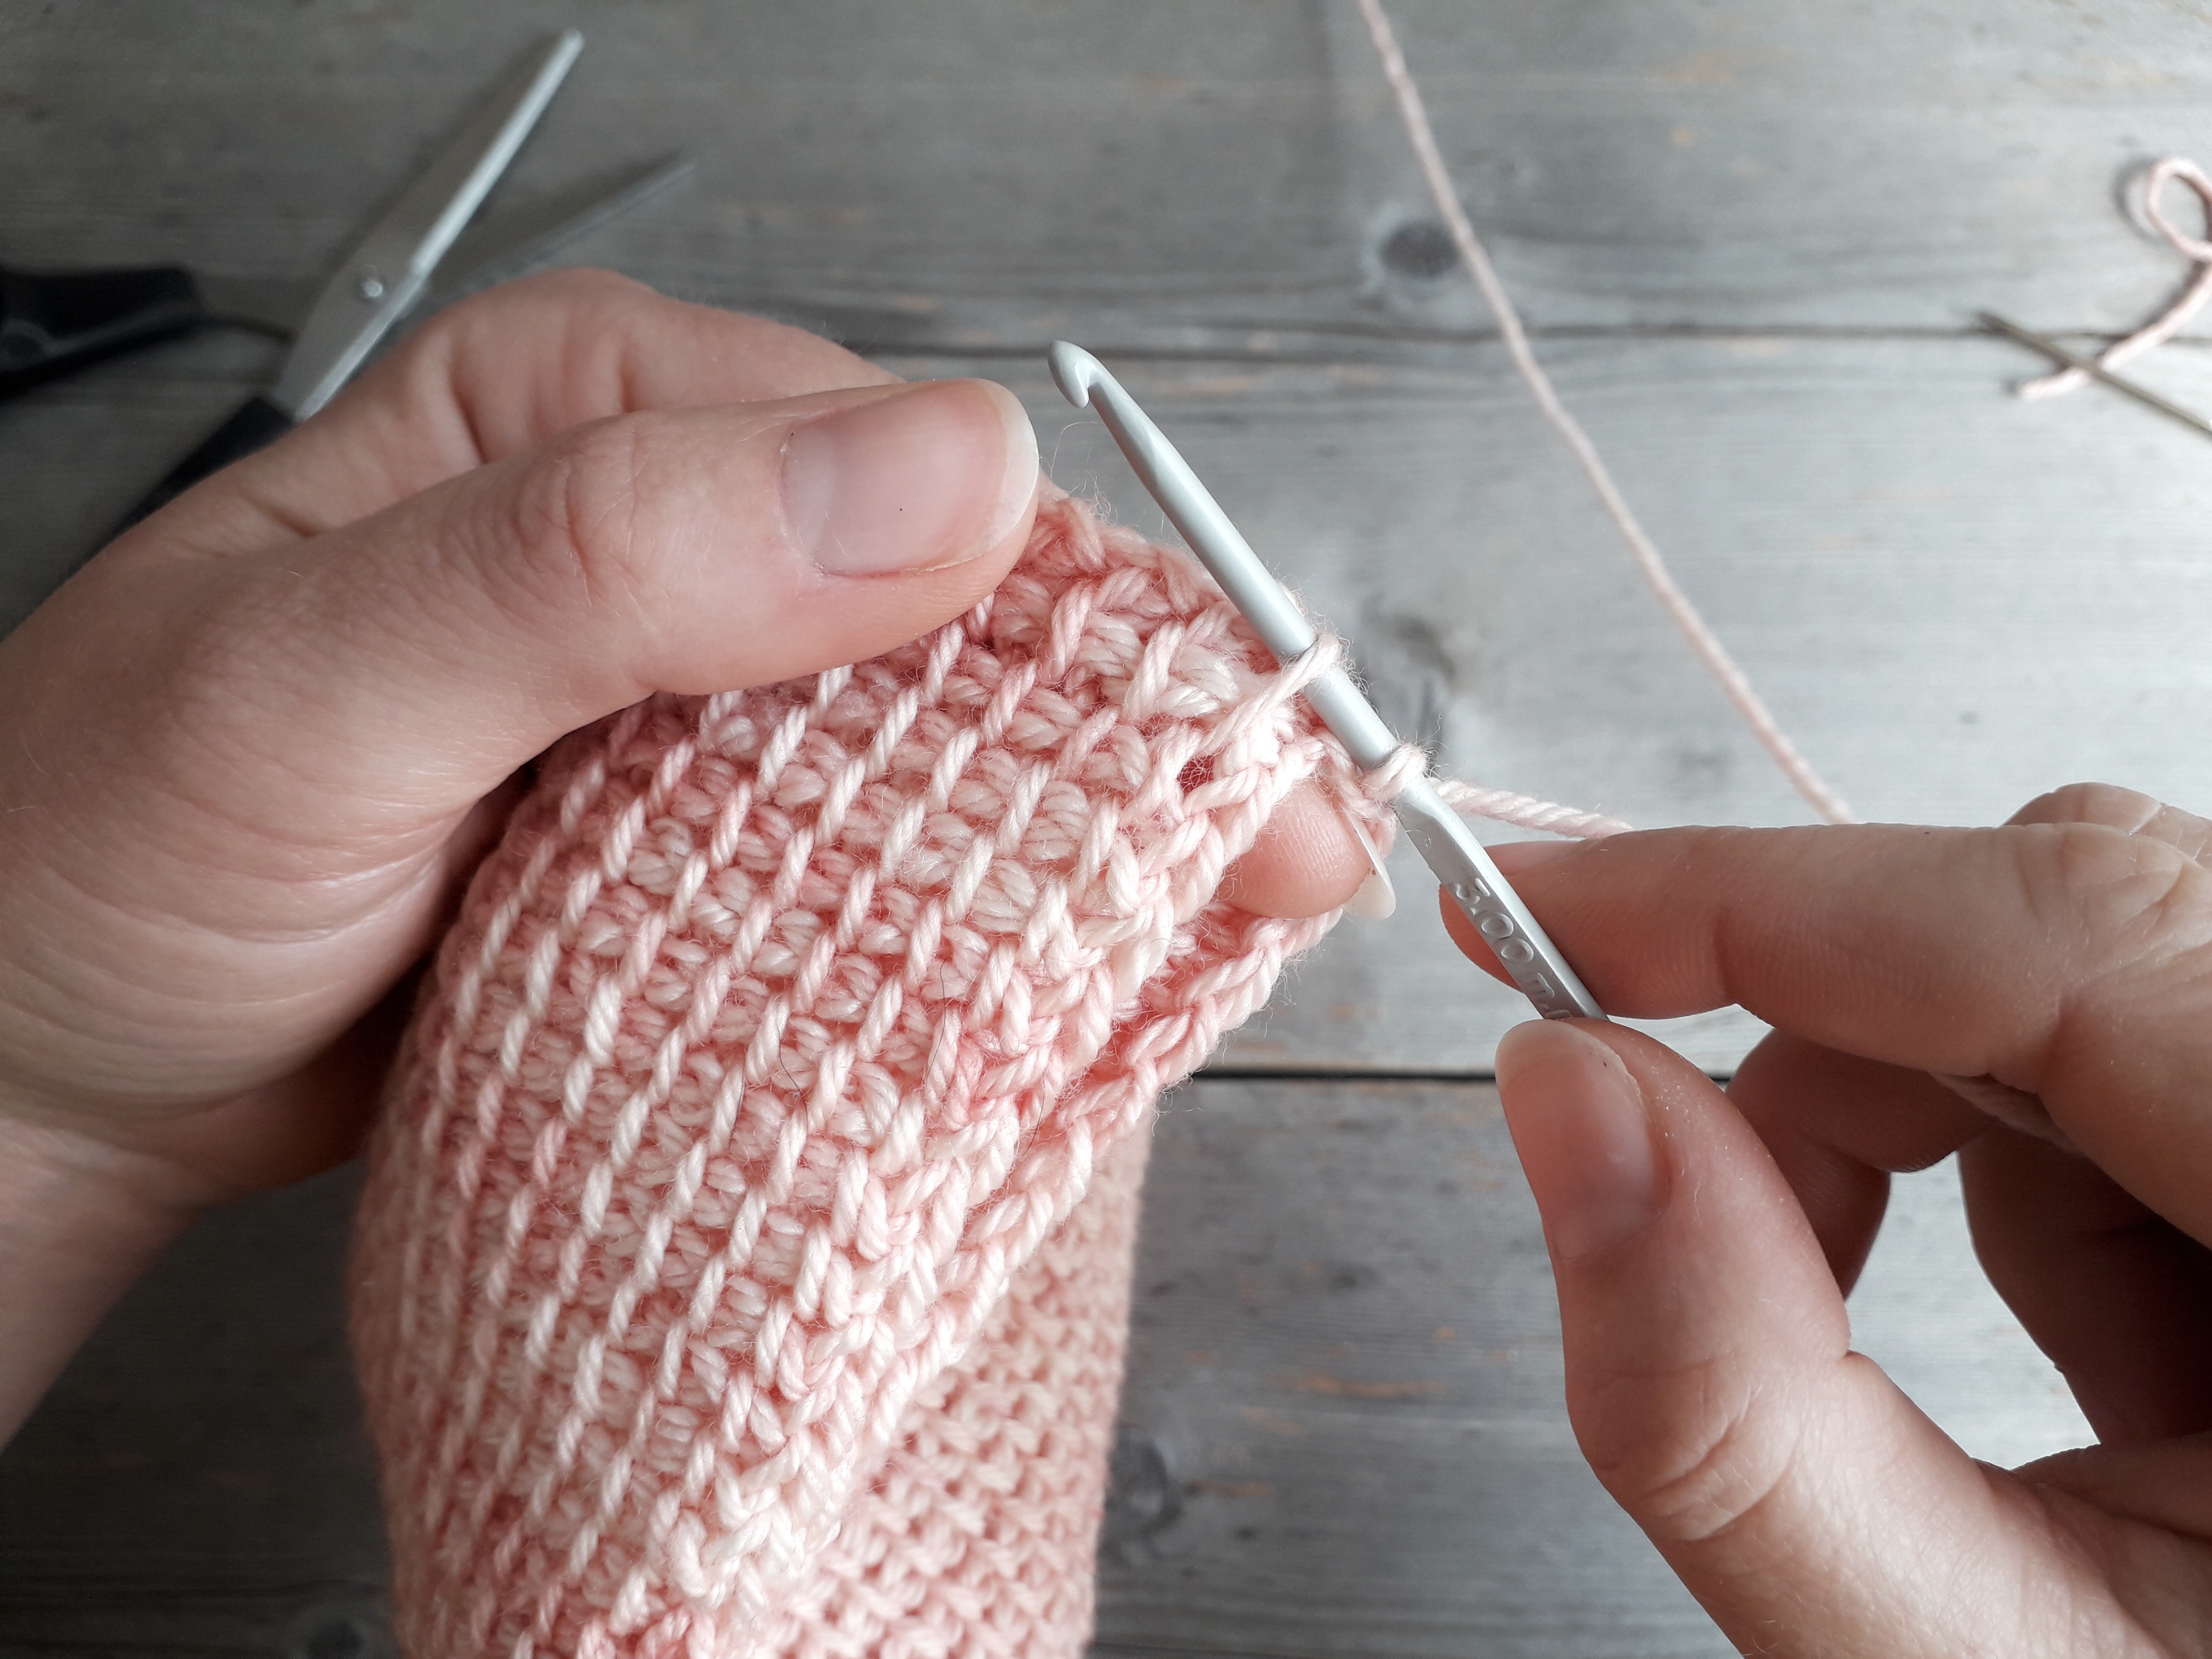
Then, insert your hook into the first line along on the fabric farthest from you (pictured below).
Draw the line through the loop already on your hook – 1 loop on hook.
Continue picking up lines and drawing them through to loop on your hook, alternating from front to back.
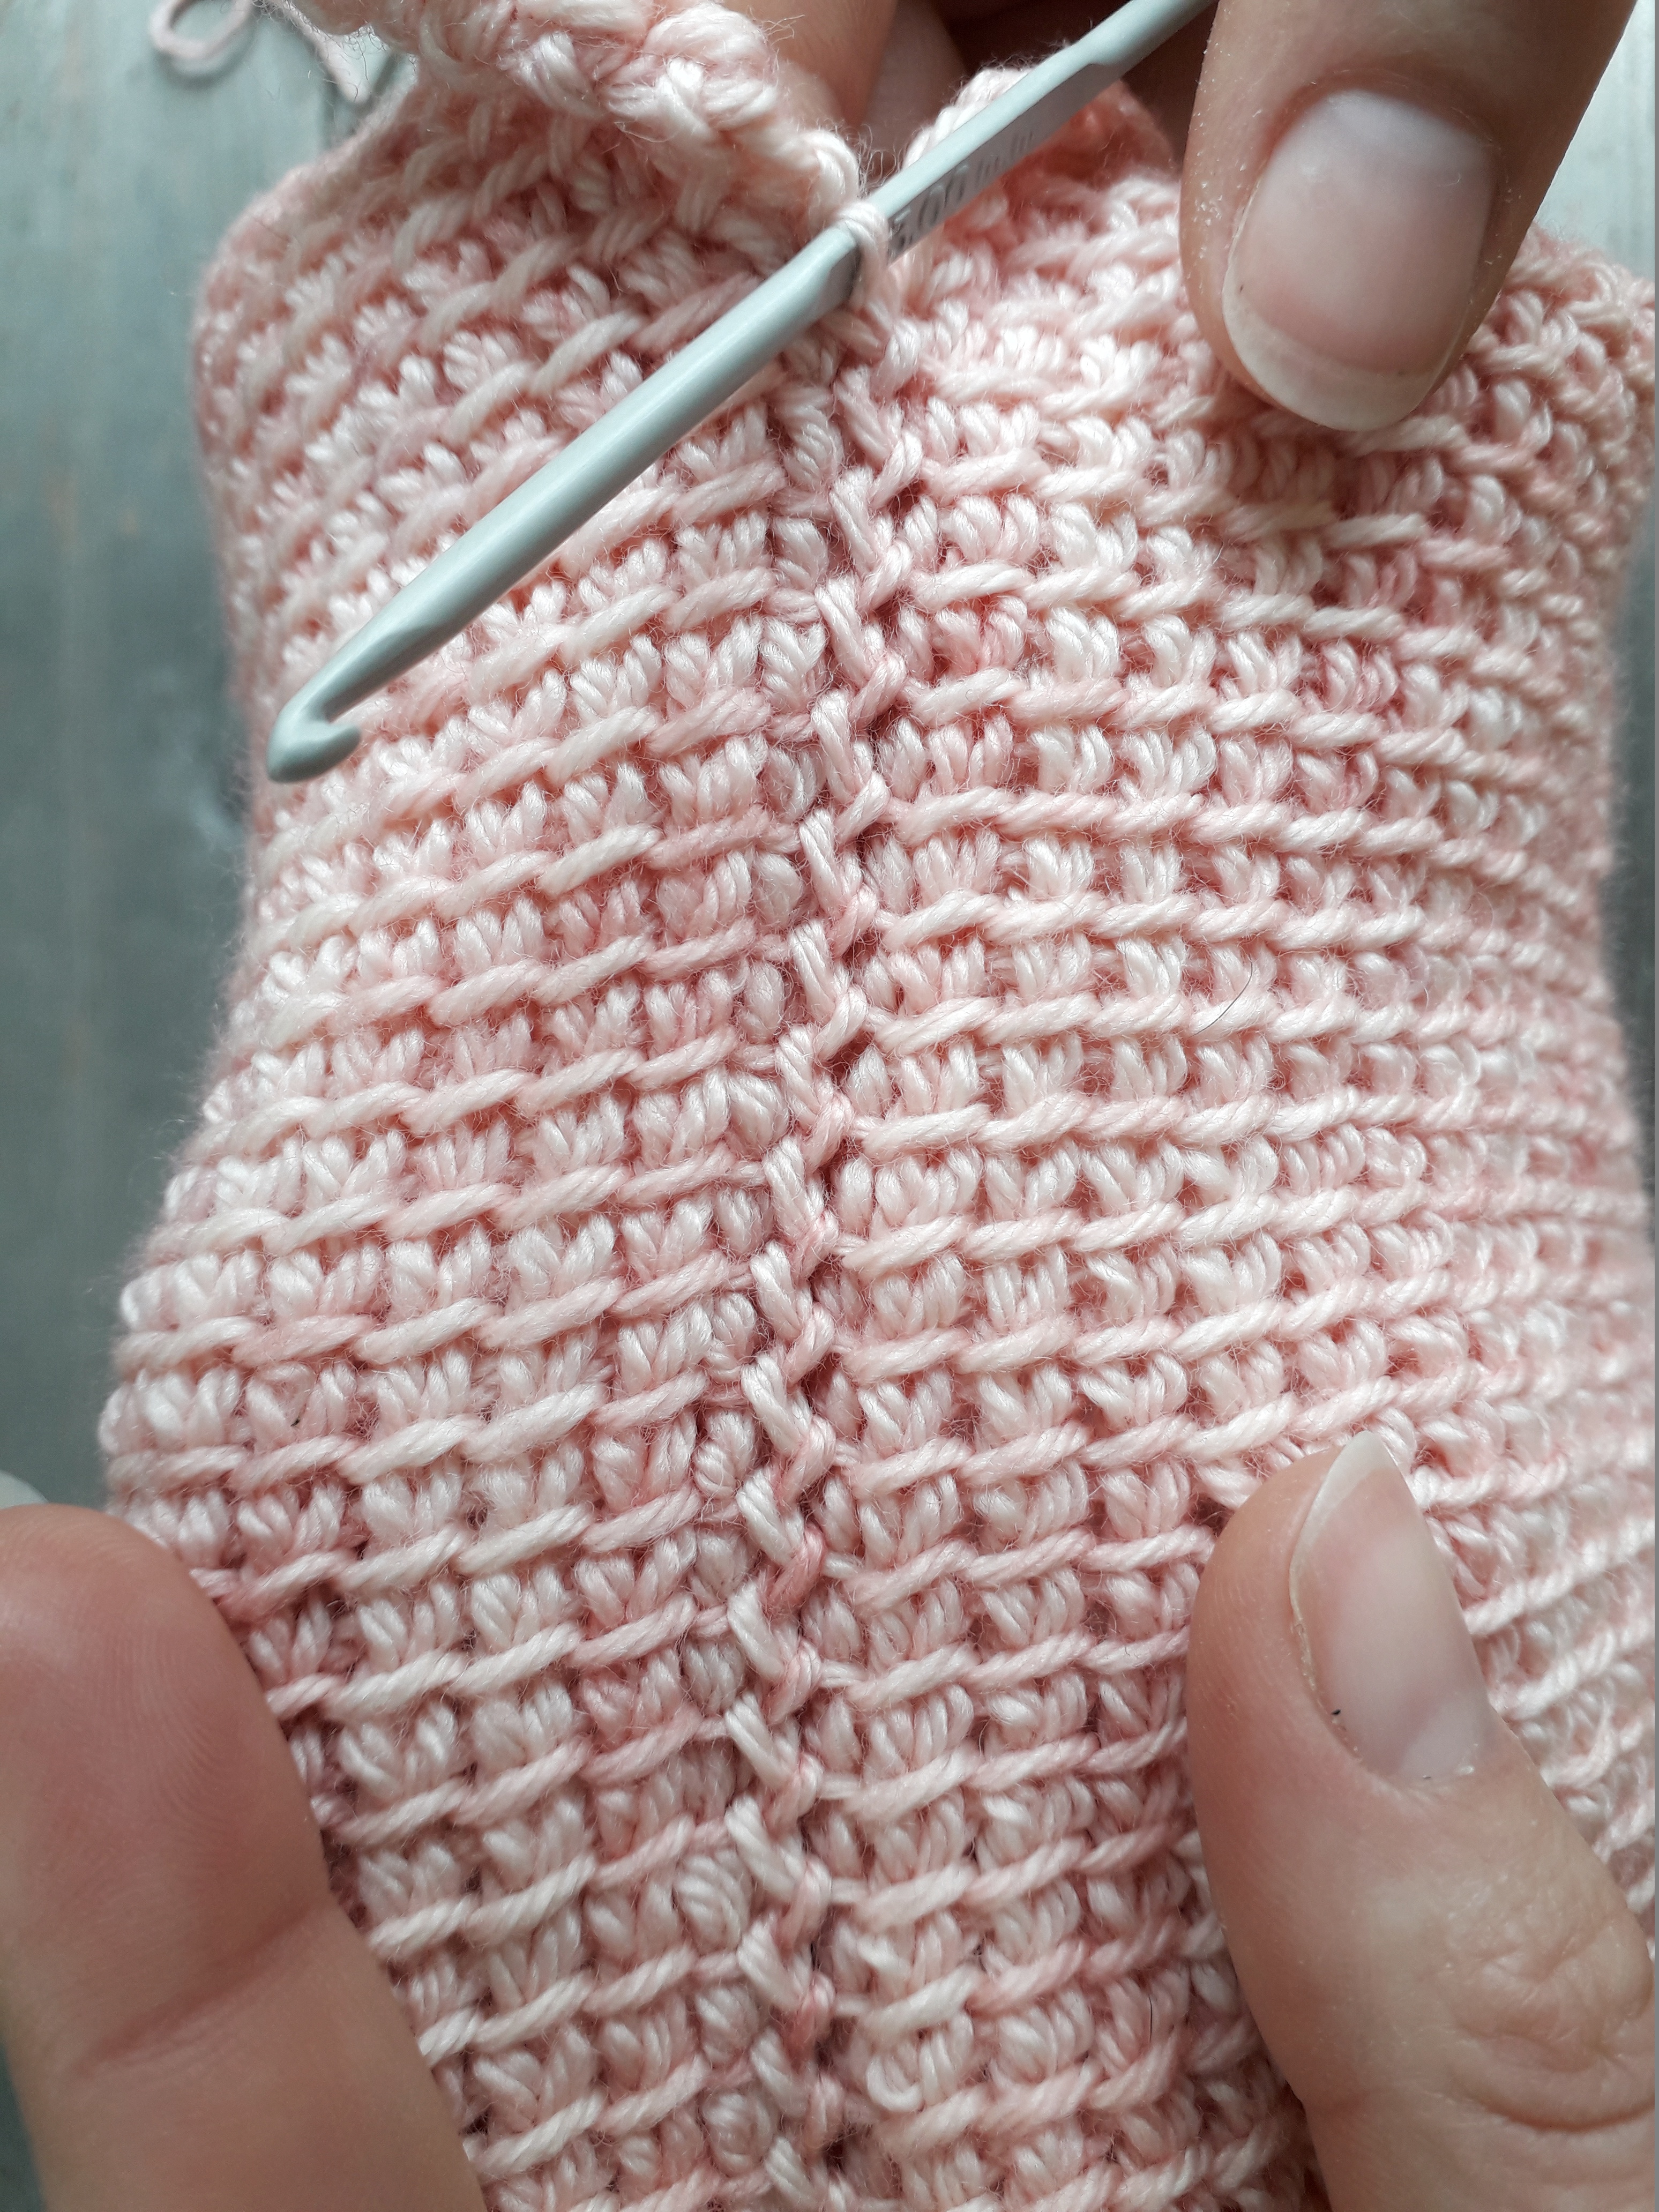
It may appear as if the seam is a bit tight when compared to the surrounding fabric, but it all settles down once the seam is complete.
This is what the seam will look like when worked up correctly.
Once all the lines have been used up, there is till a slight gap at the top of the seam to be considered.
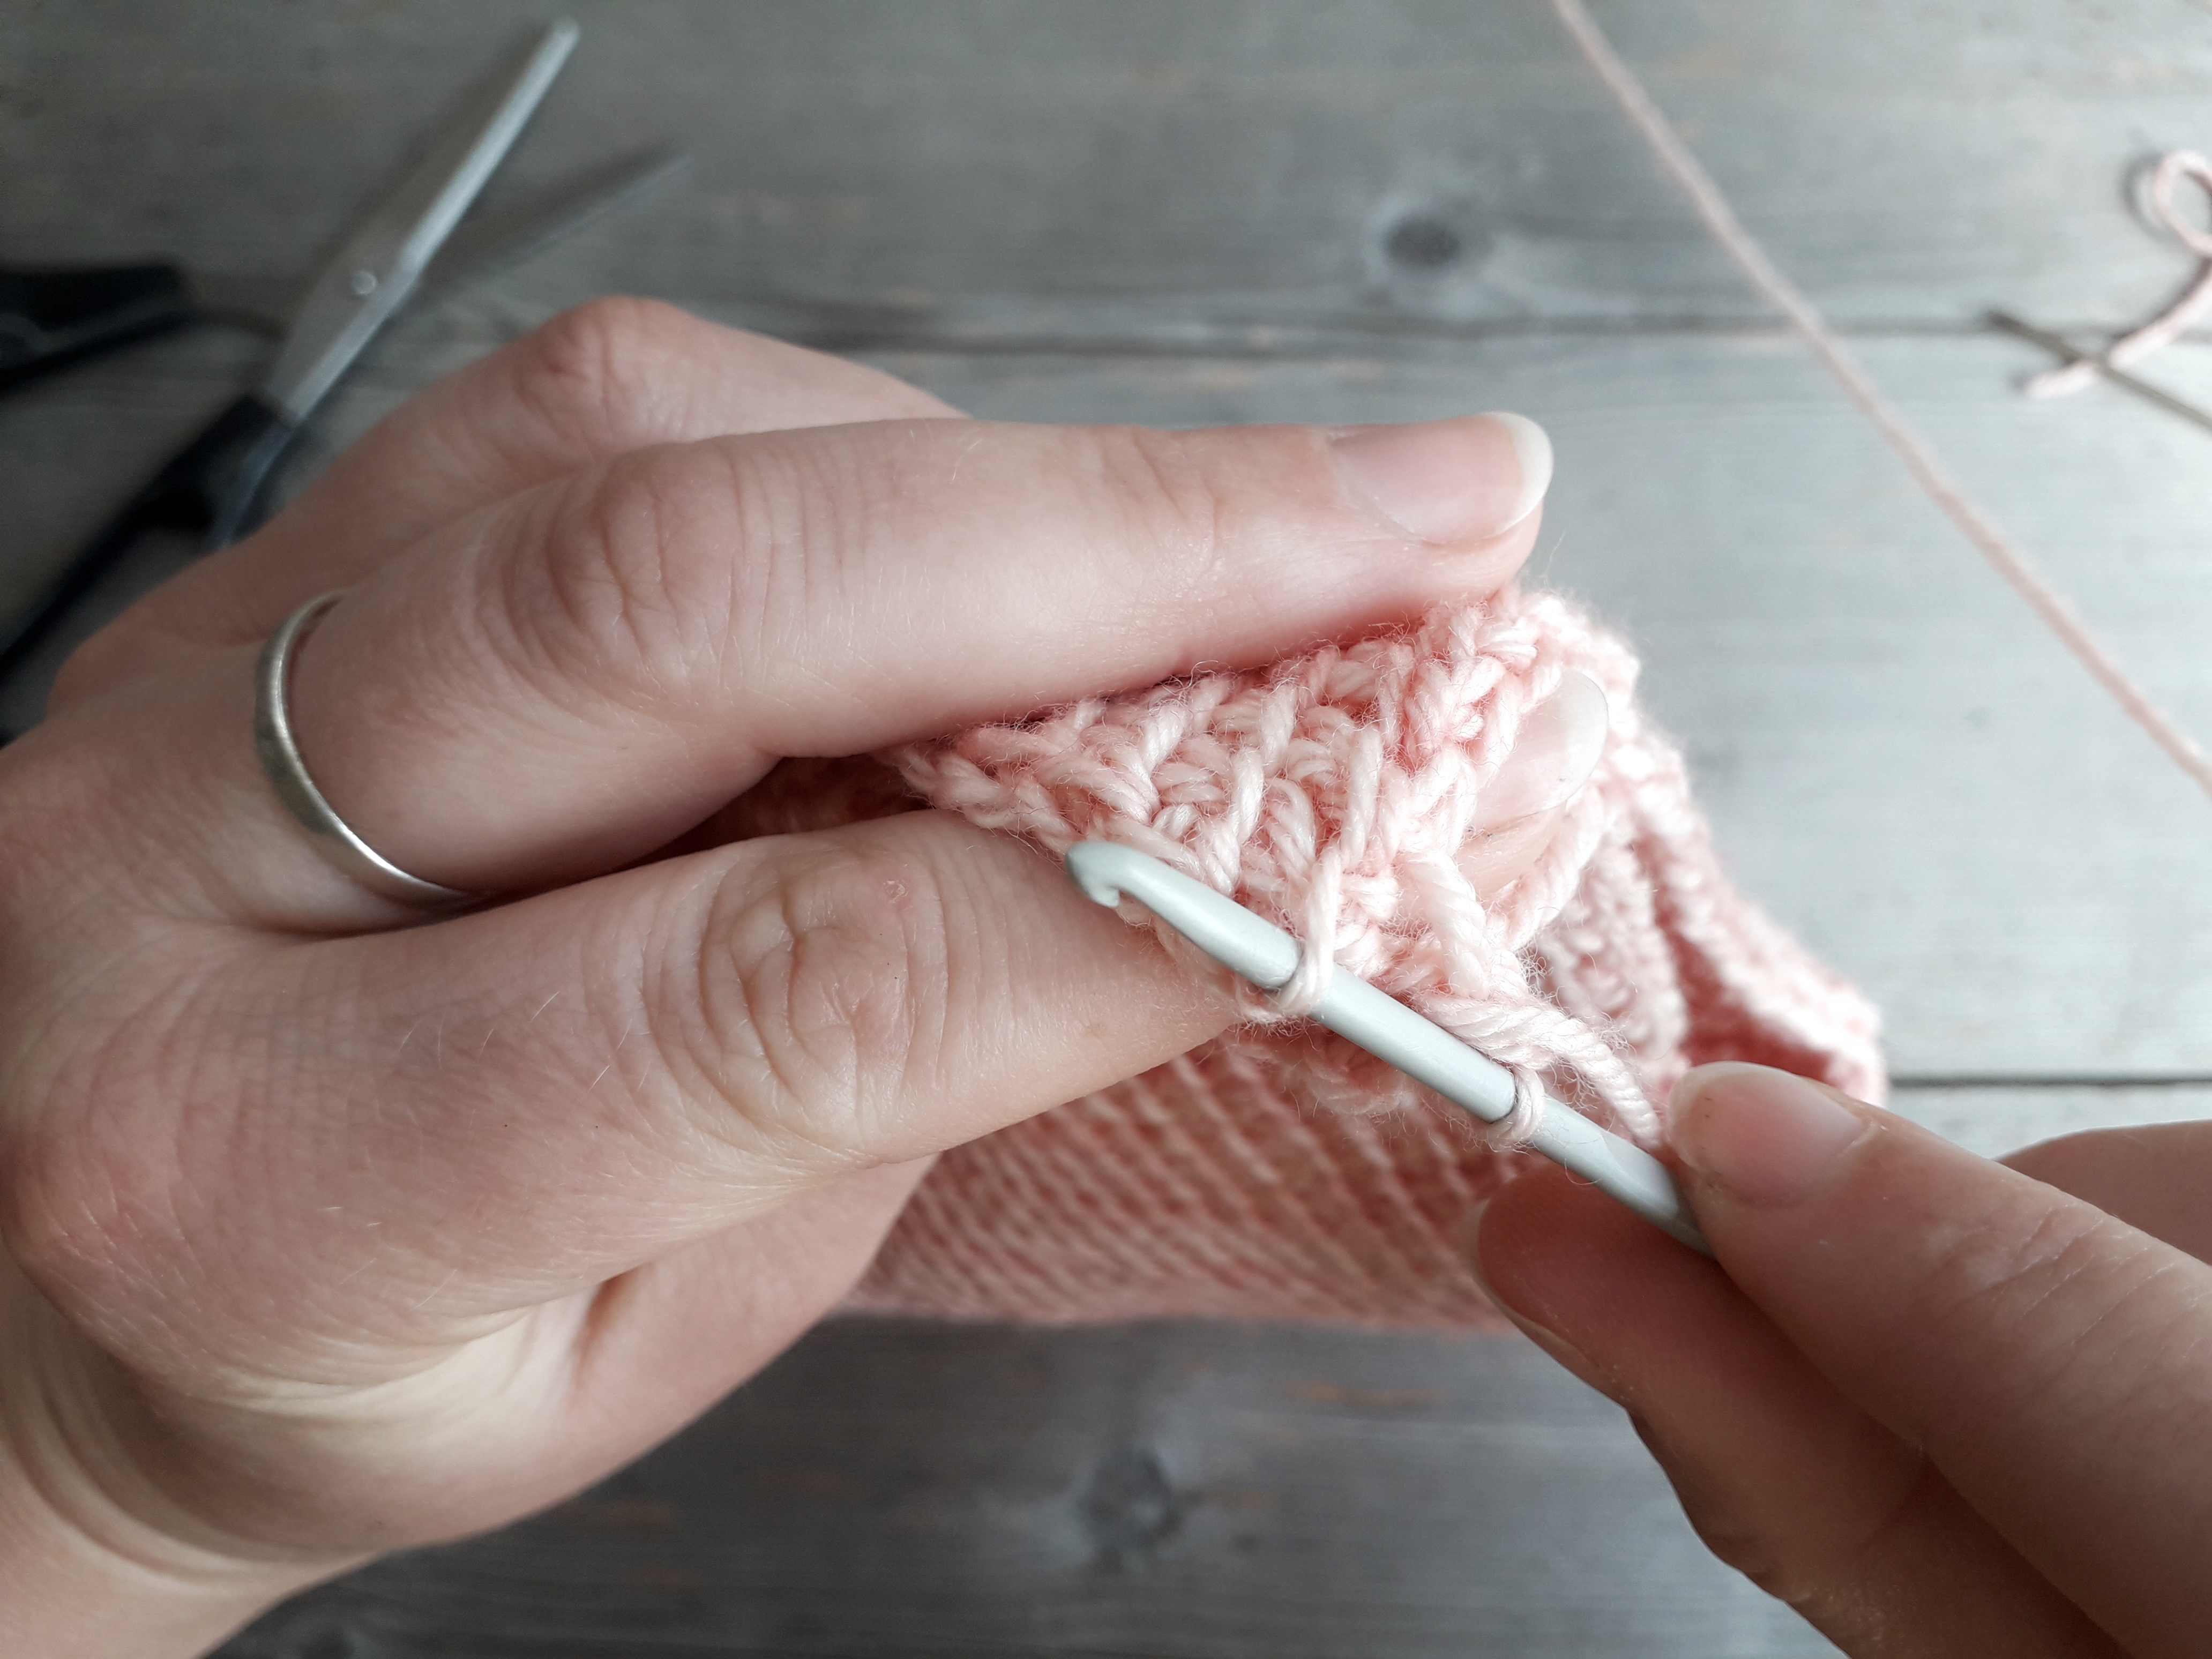
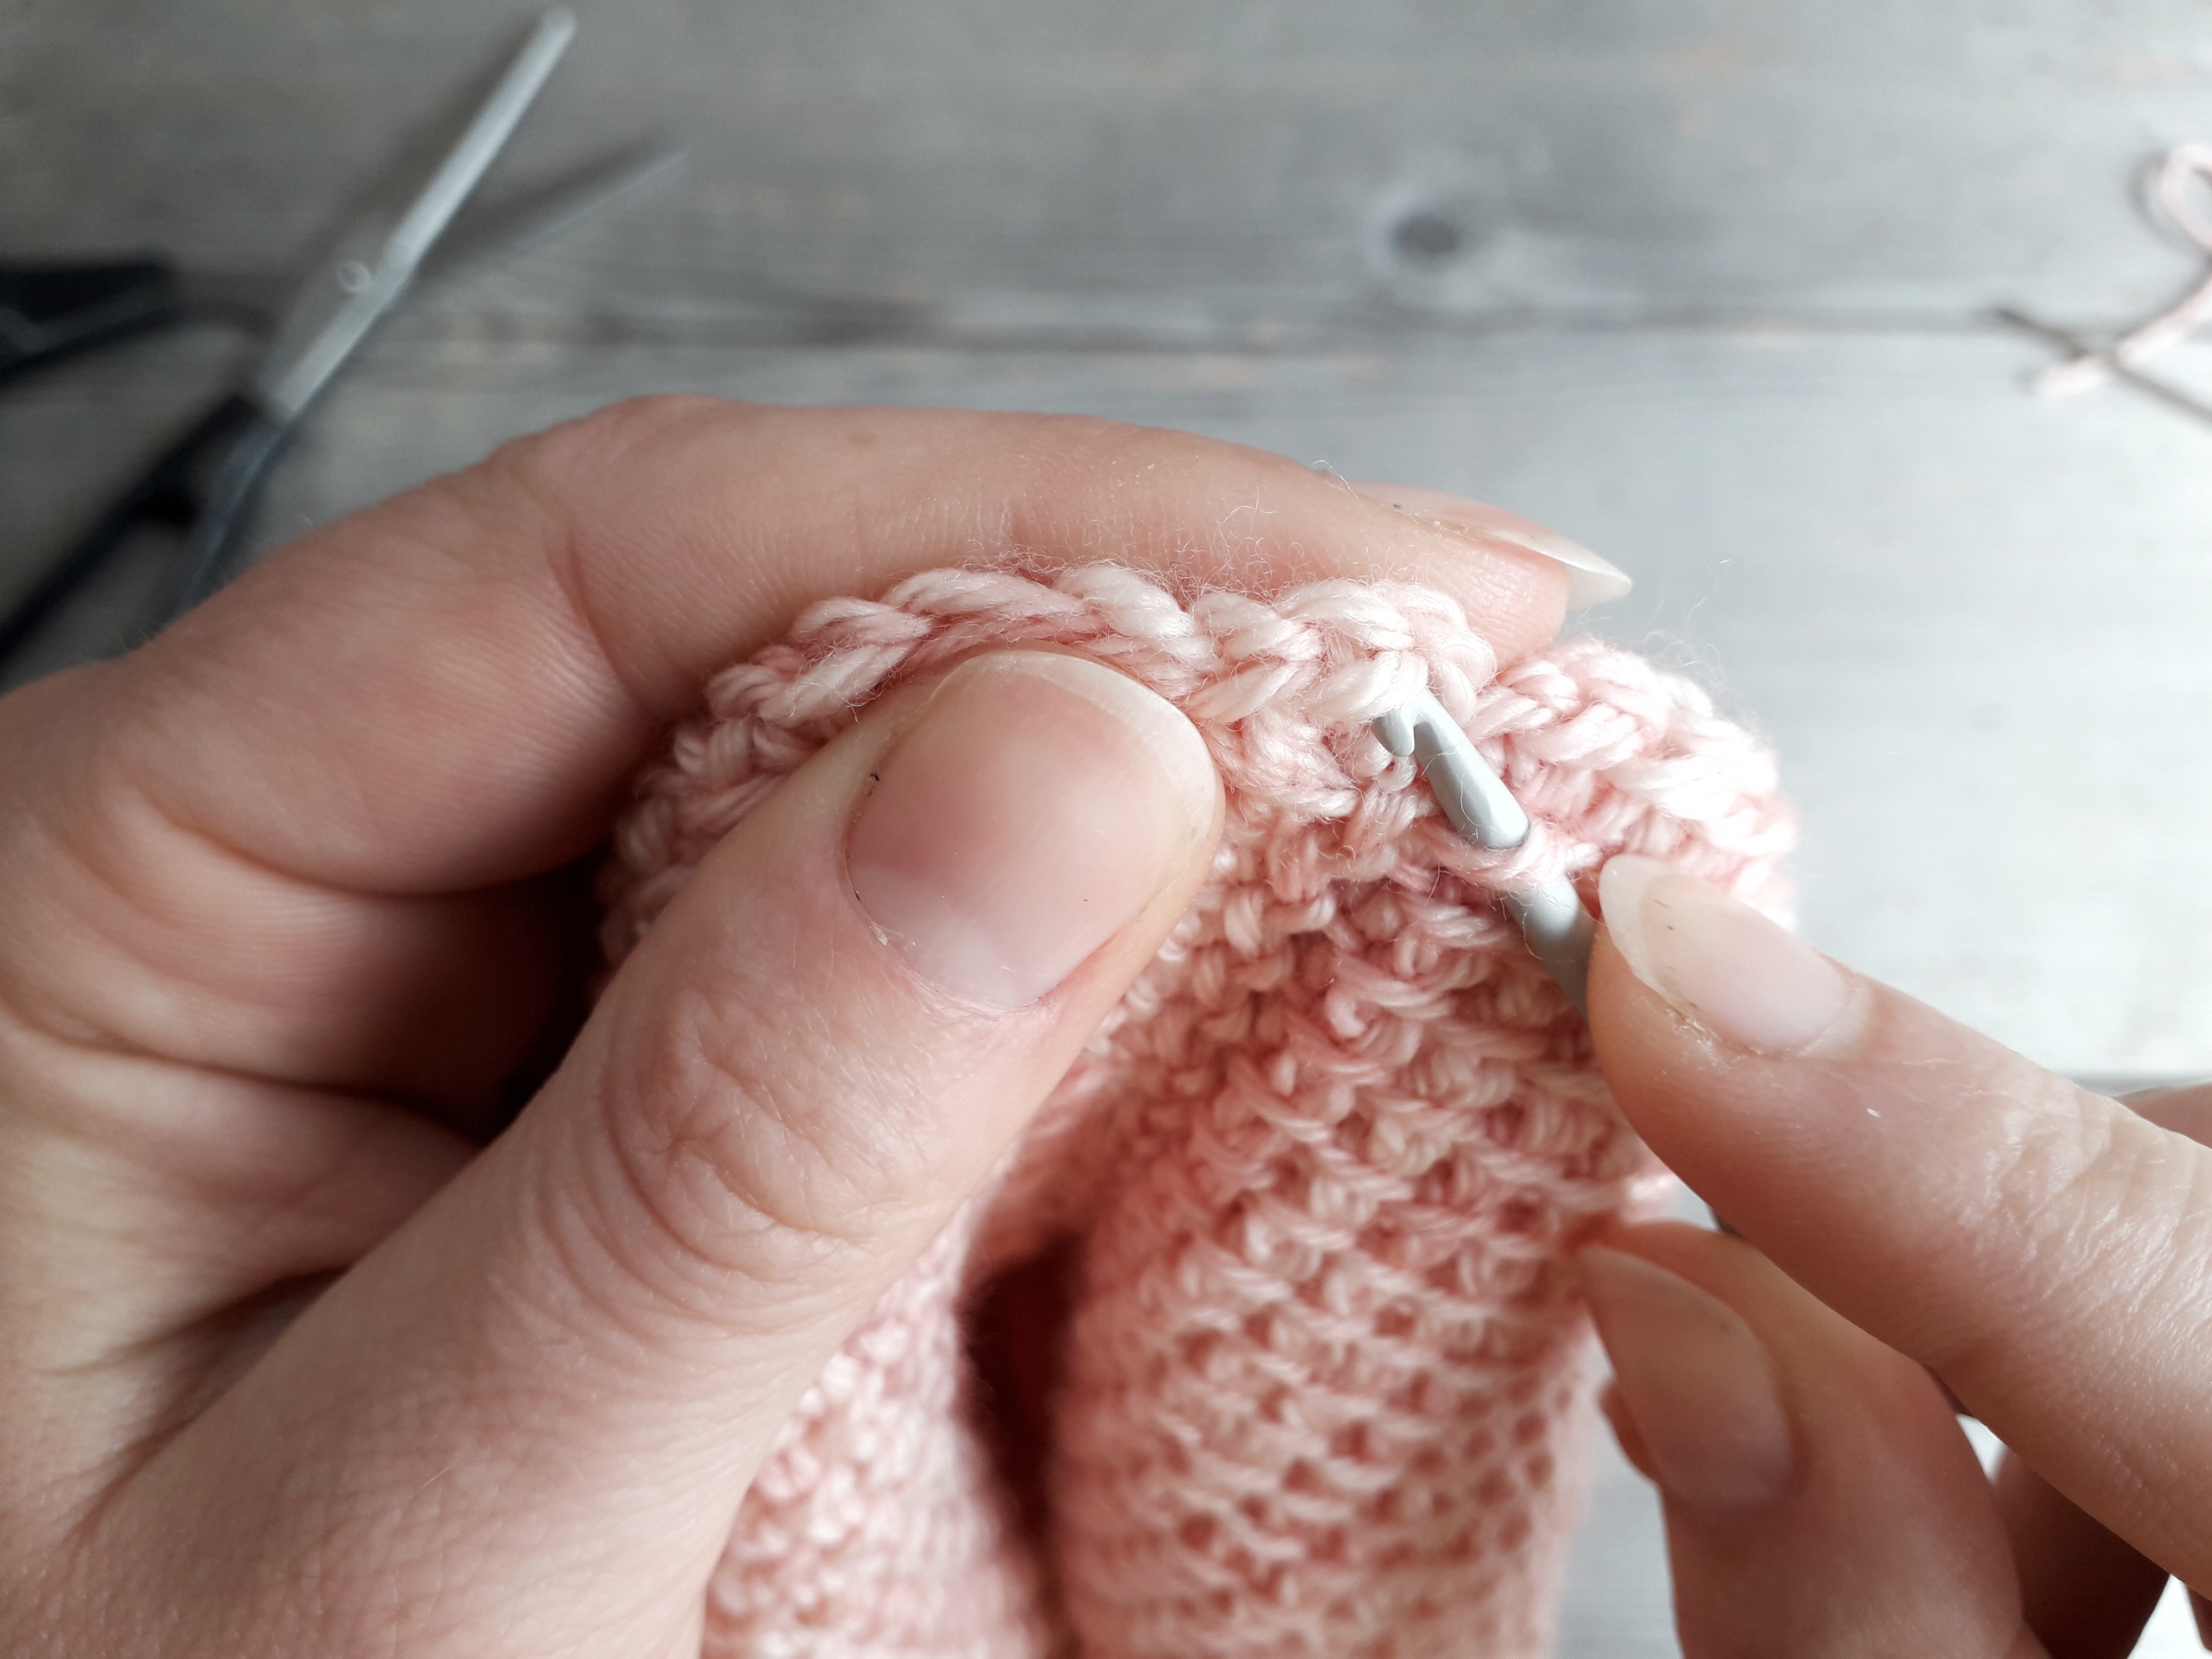
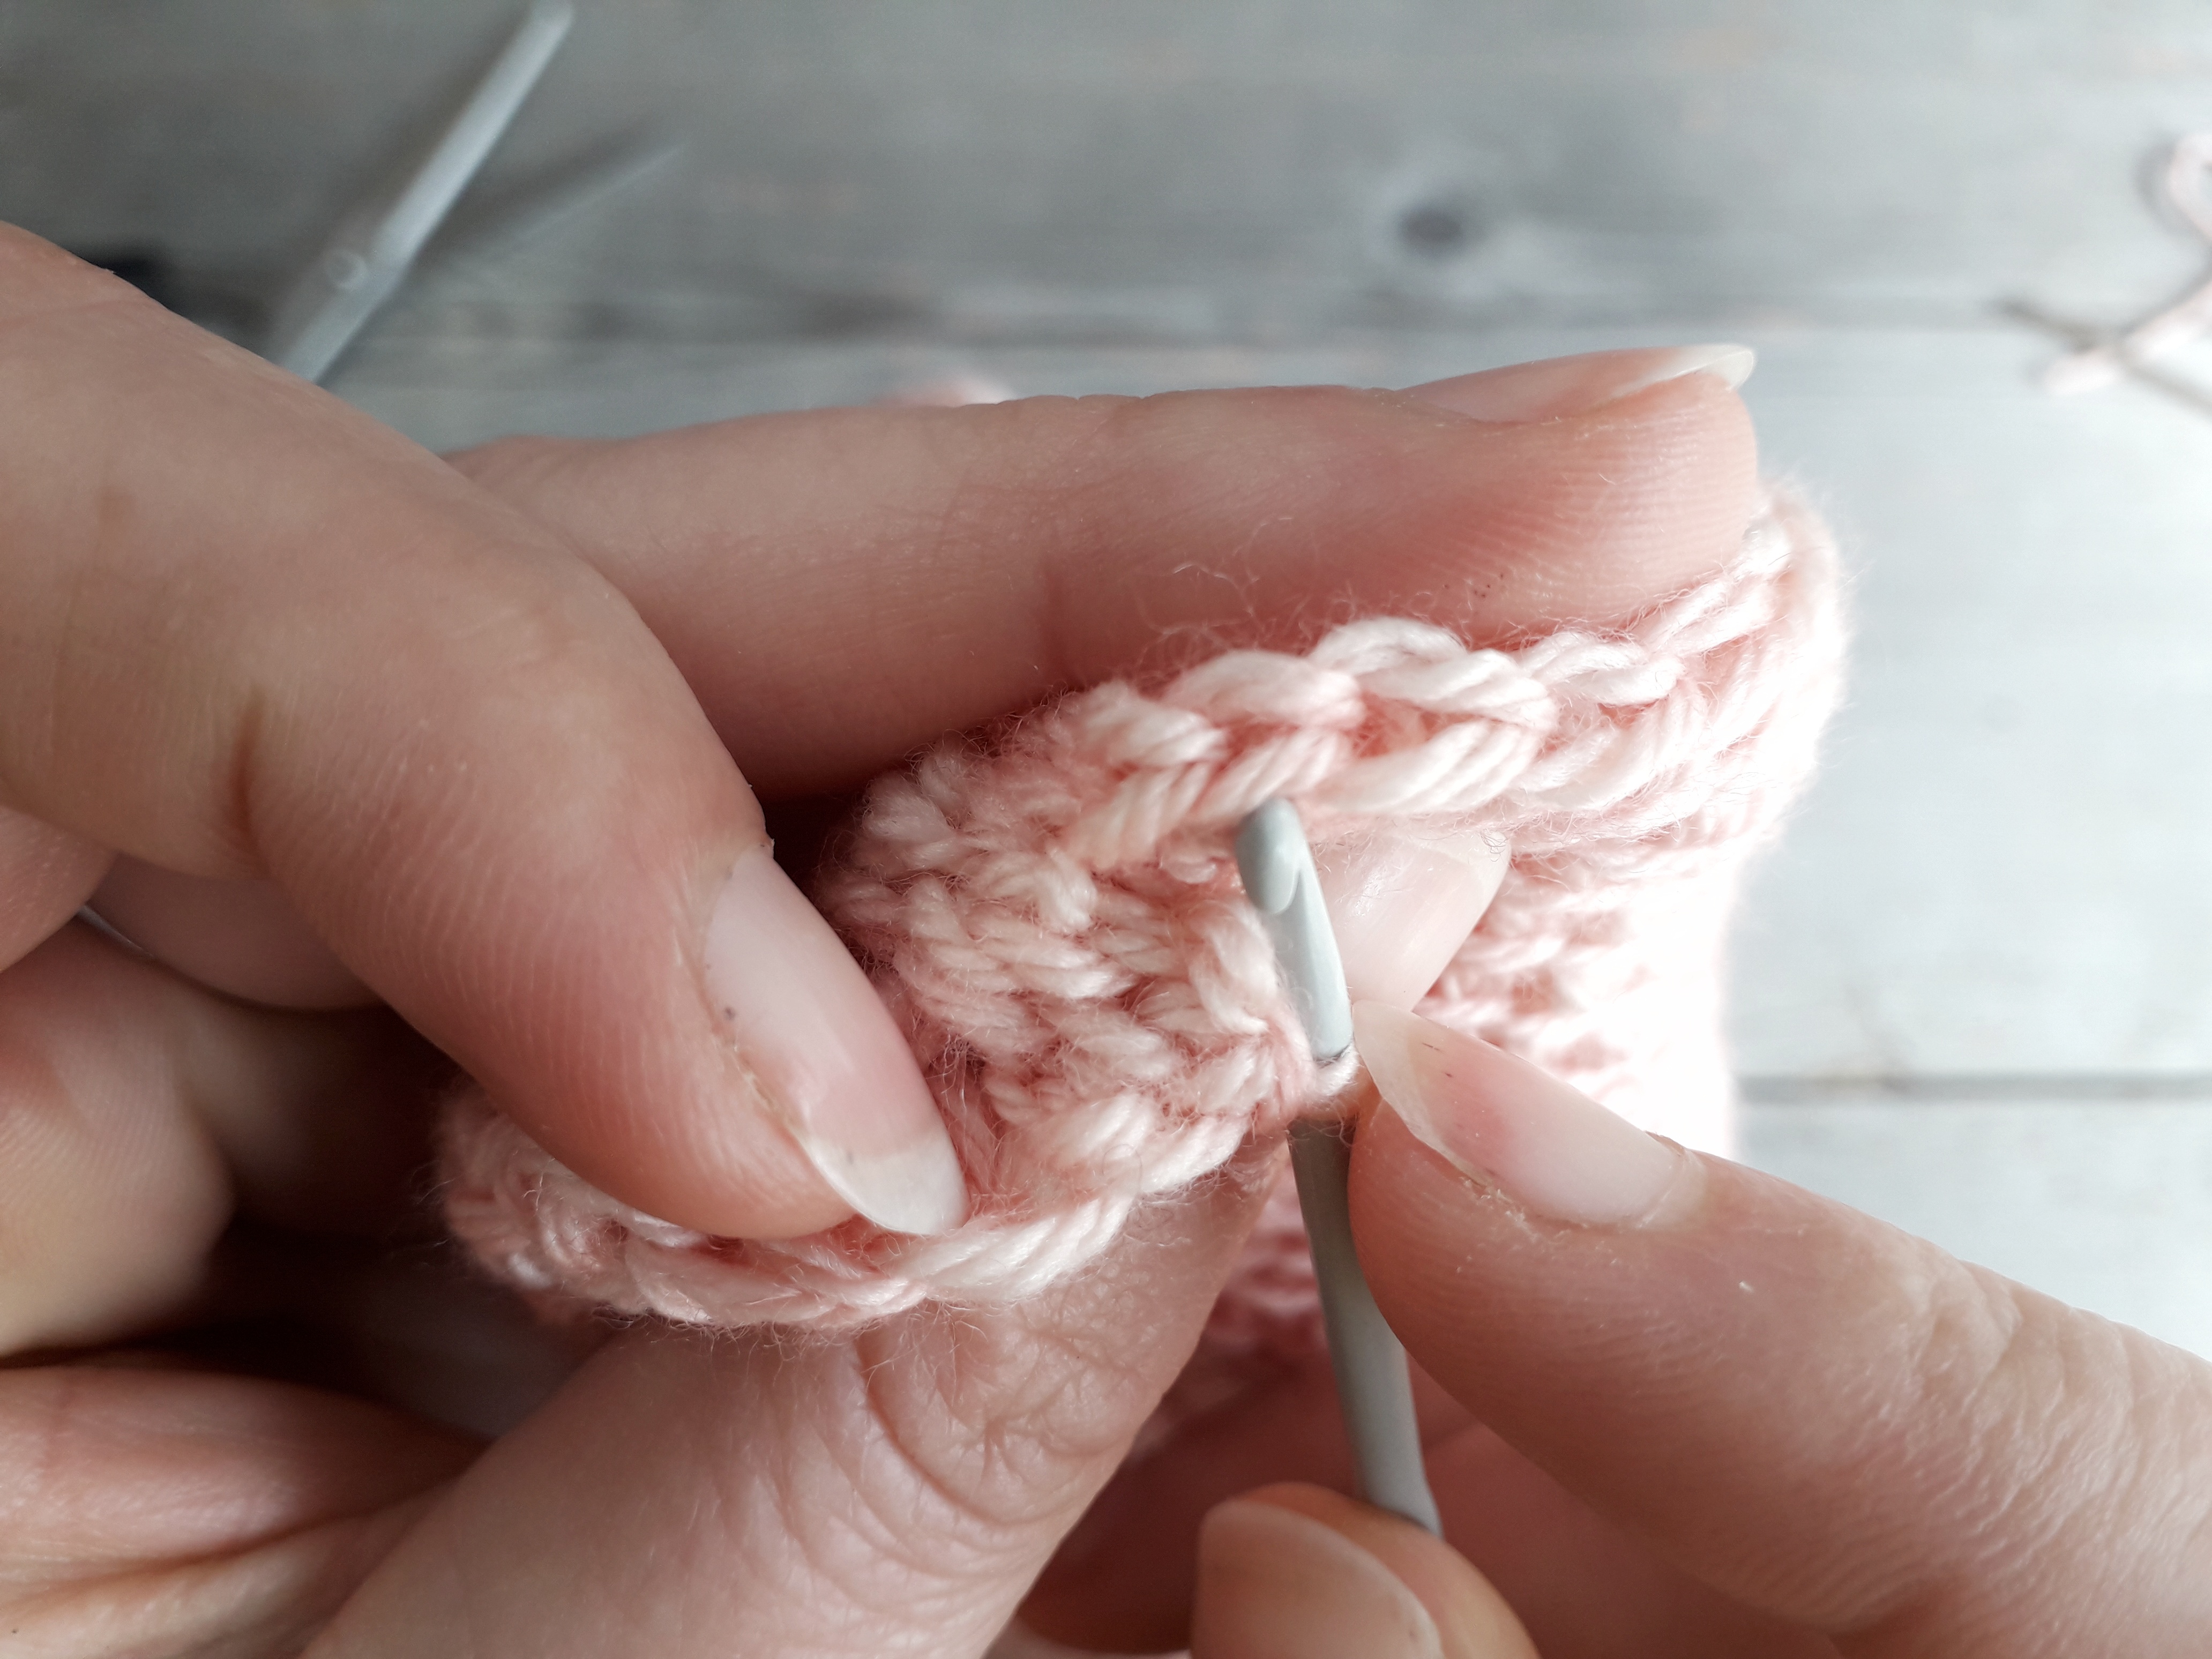
There will be a V on the corner of either side. Insert hook into the V on the fabric closest to you (pictured below).
Then draw both sides of that V through the loop already on your hook – it’ll look like there’s now two loops on your hook.
Do the same thing with the V on the fabric farthest from you (pictured below).
Draw both sides of that V through the loops already on your hook.
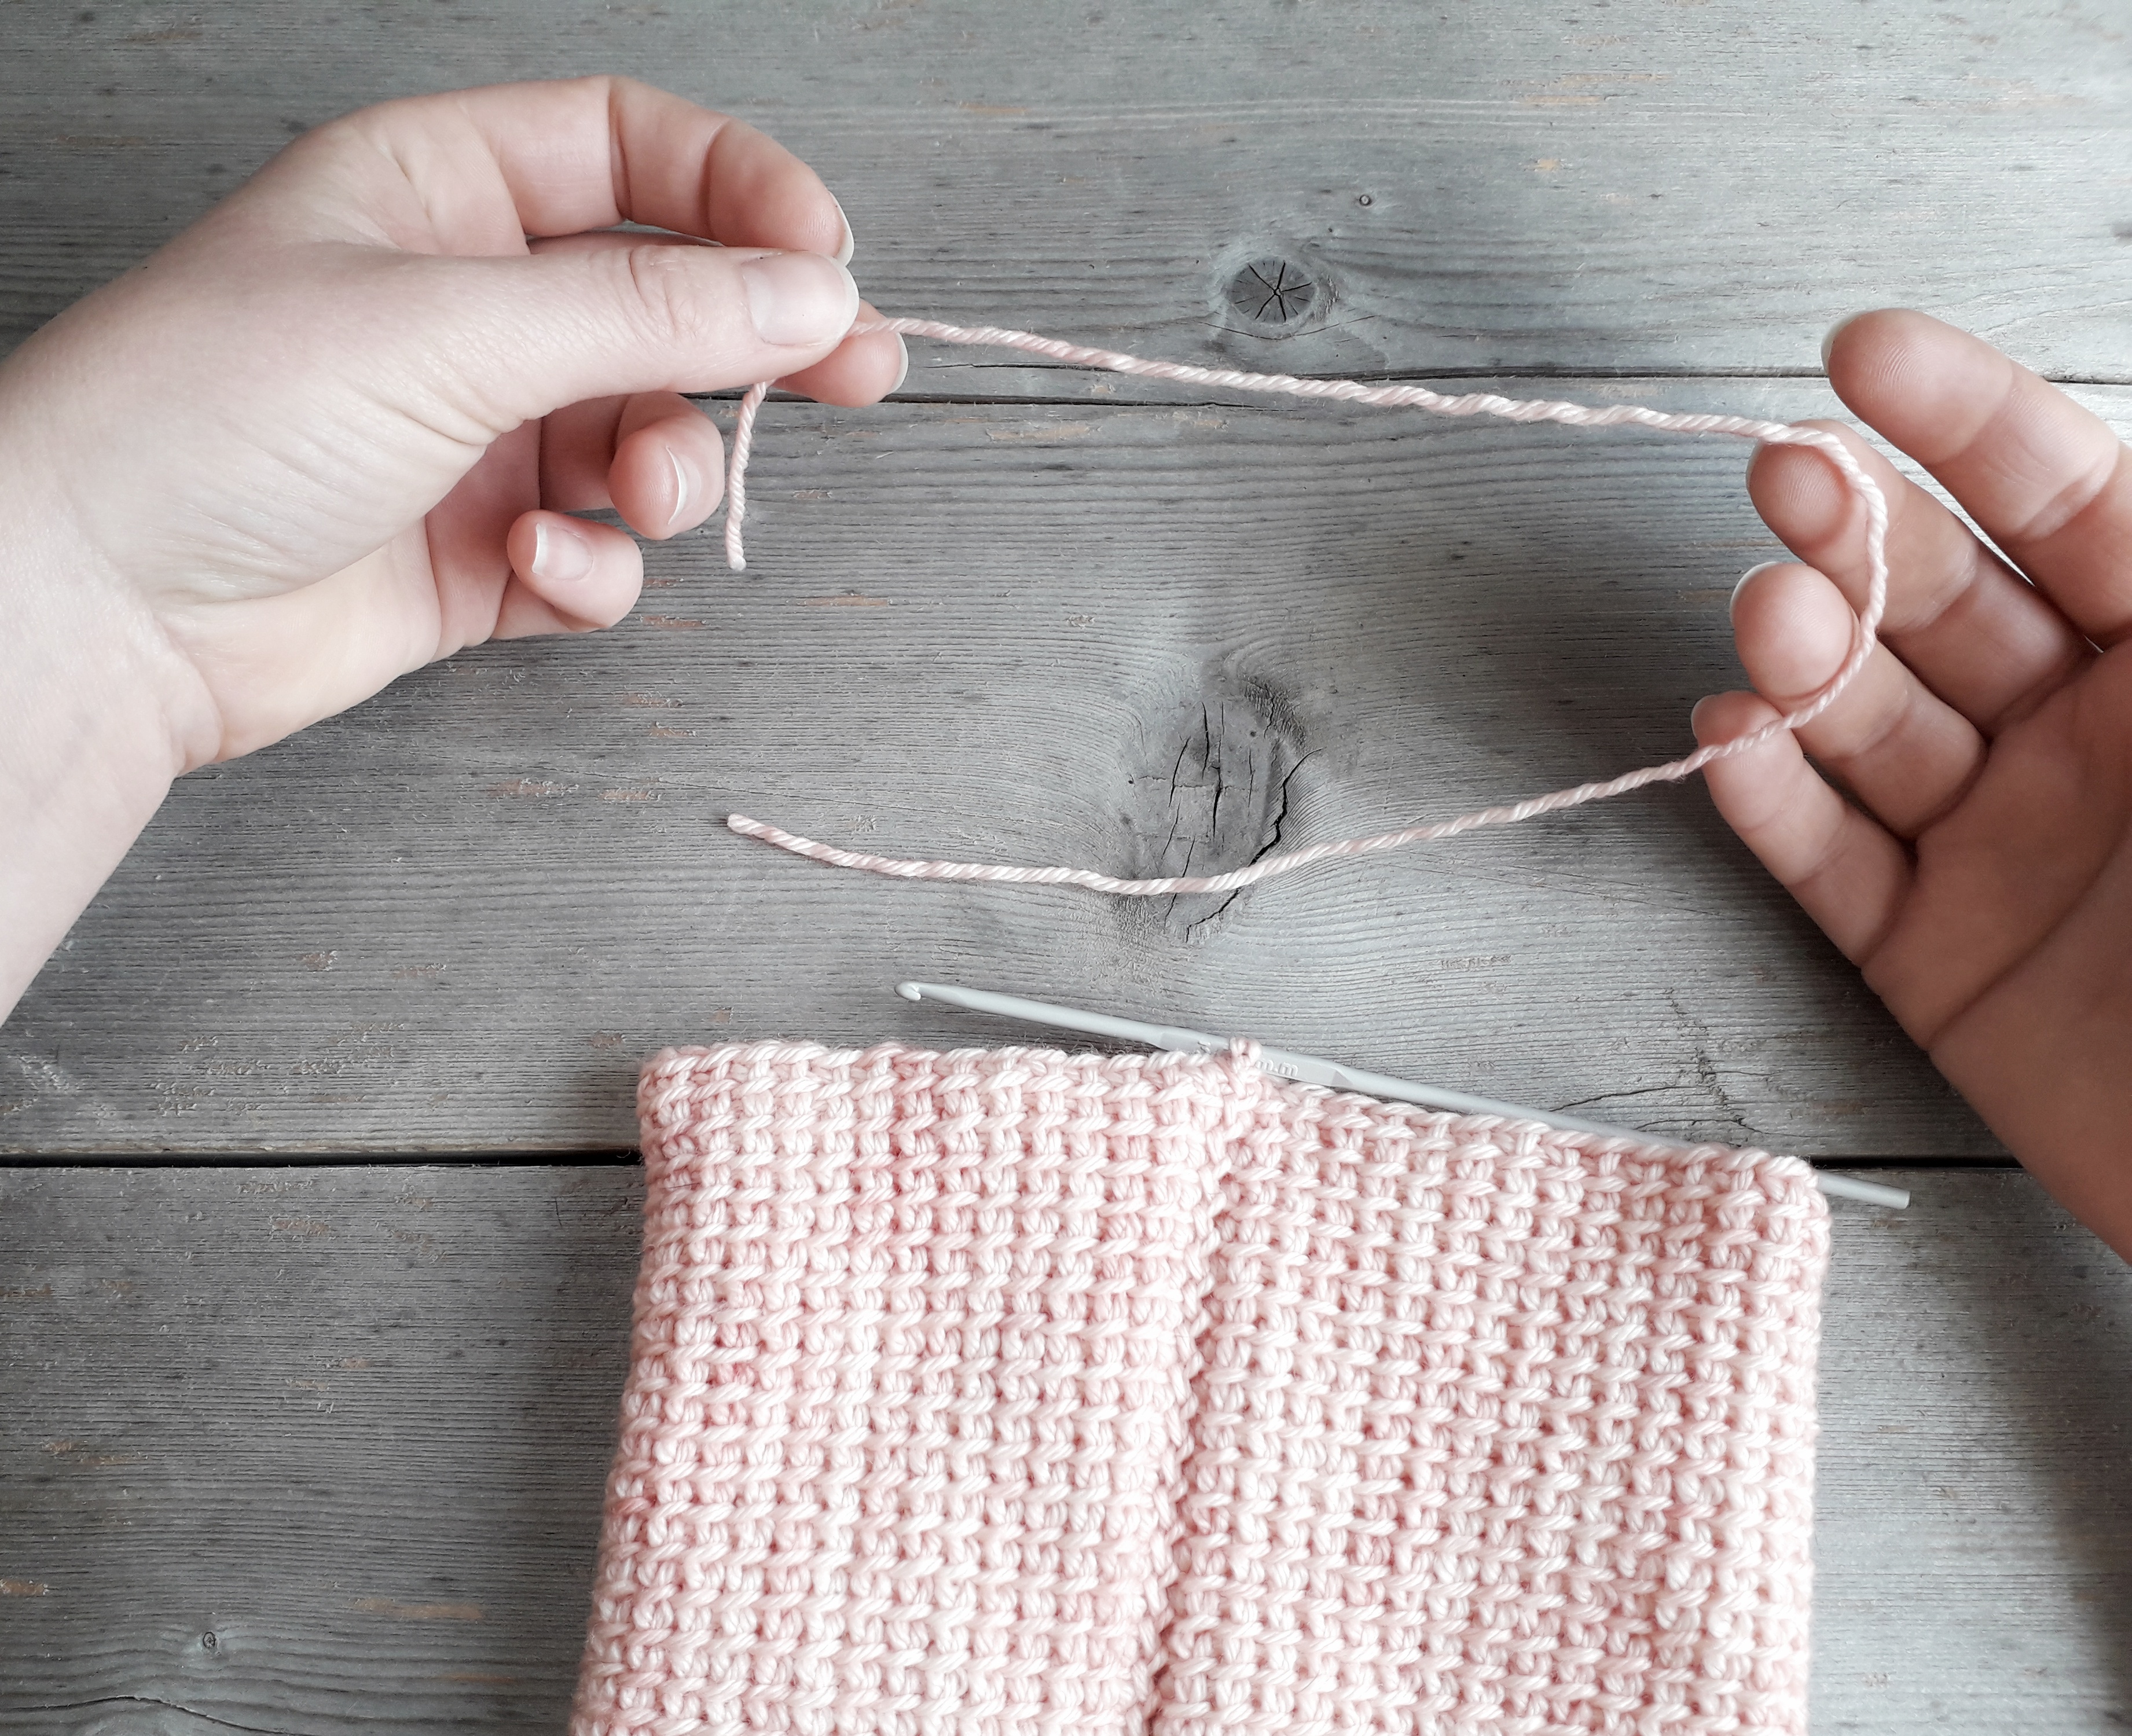
You will no doubt have noticed this seam has no strand of yarn to bind off or sew in and no way yet to stop your seam from undoing itself at a moment’s notice if you remover the hook.
We’ll solve that problem now by cutting a short strand of yarn (pictured below).
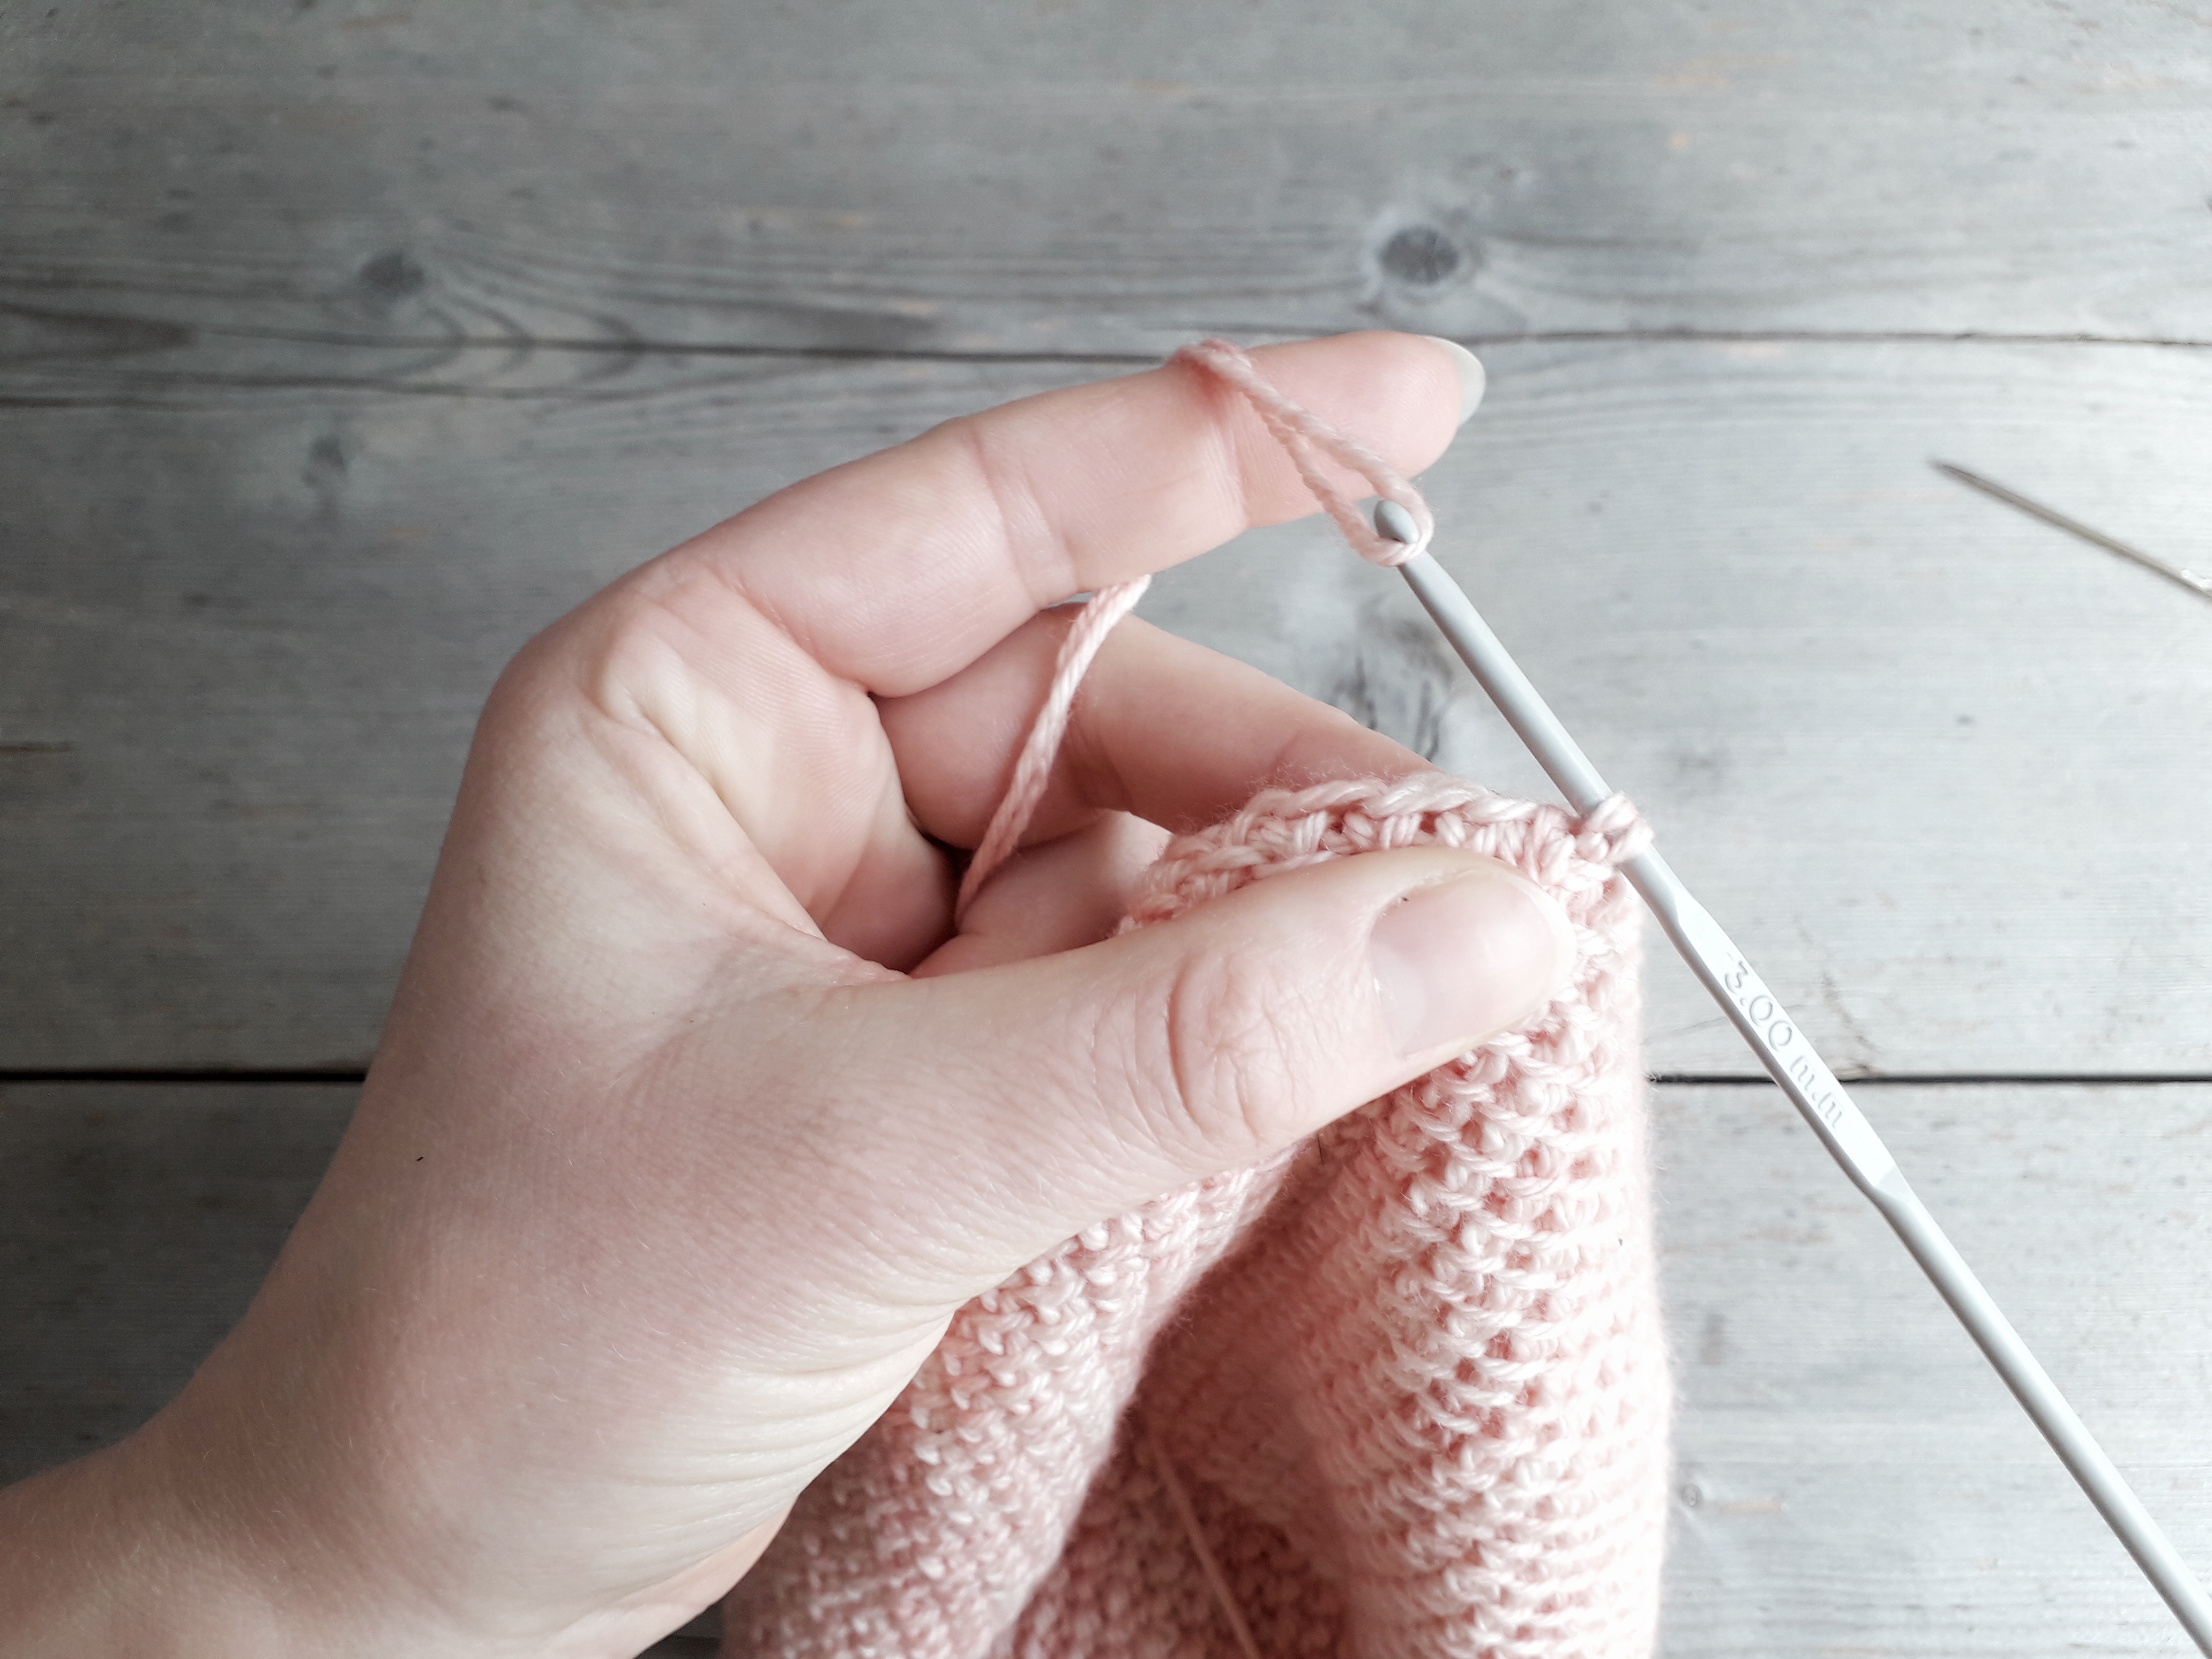
Loop the strand of yarn over the hook, pull it through the loops already on your hook.
Remove hook.
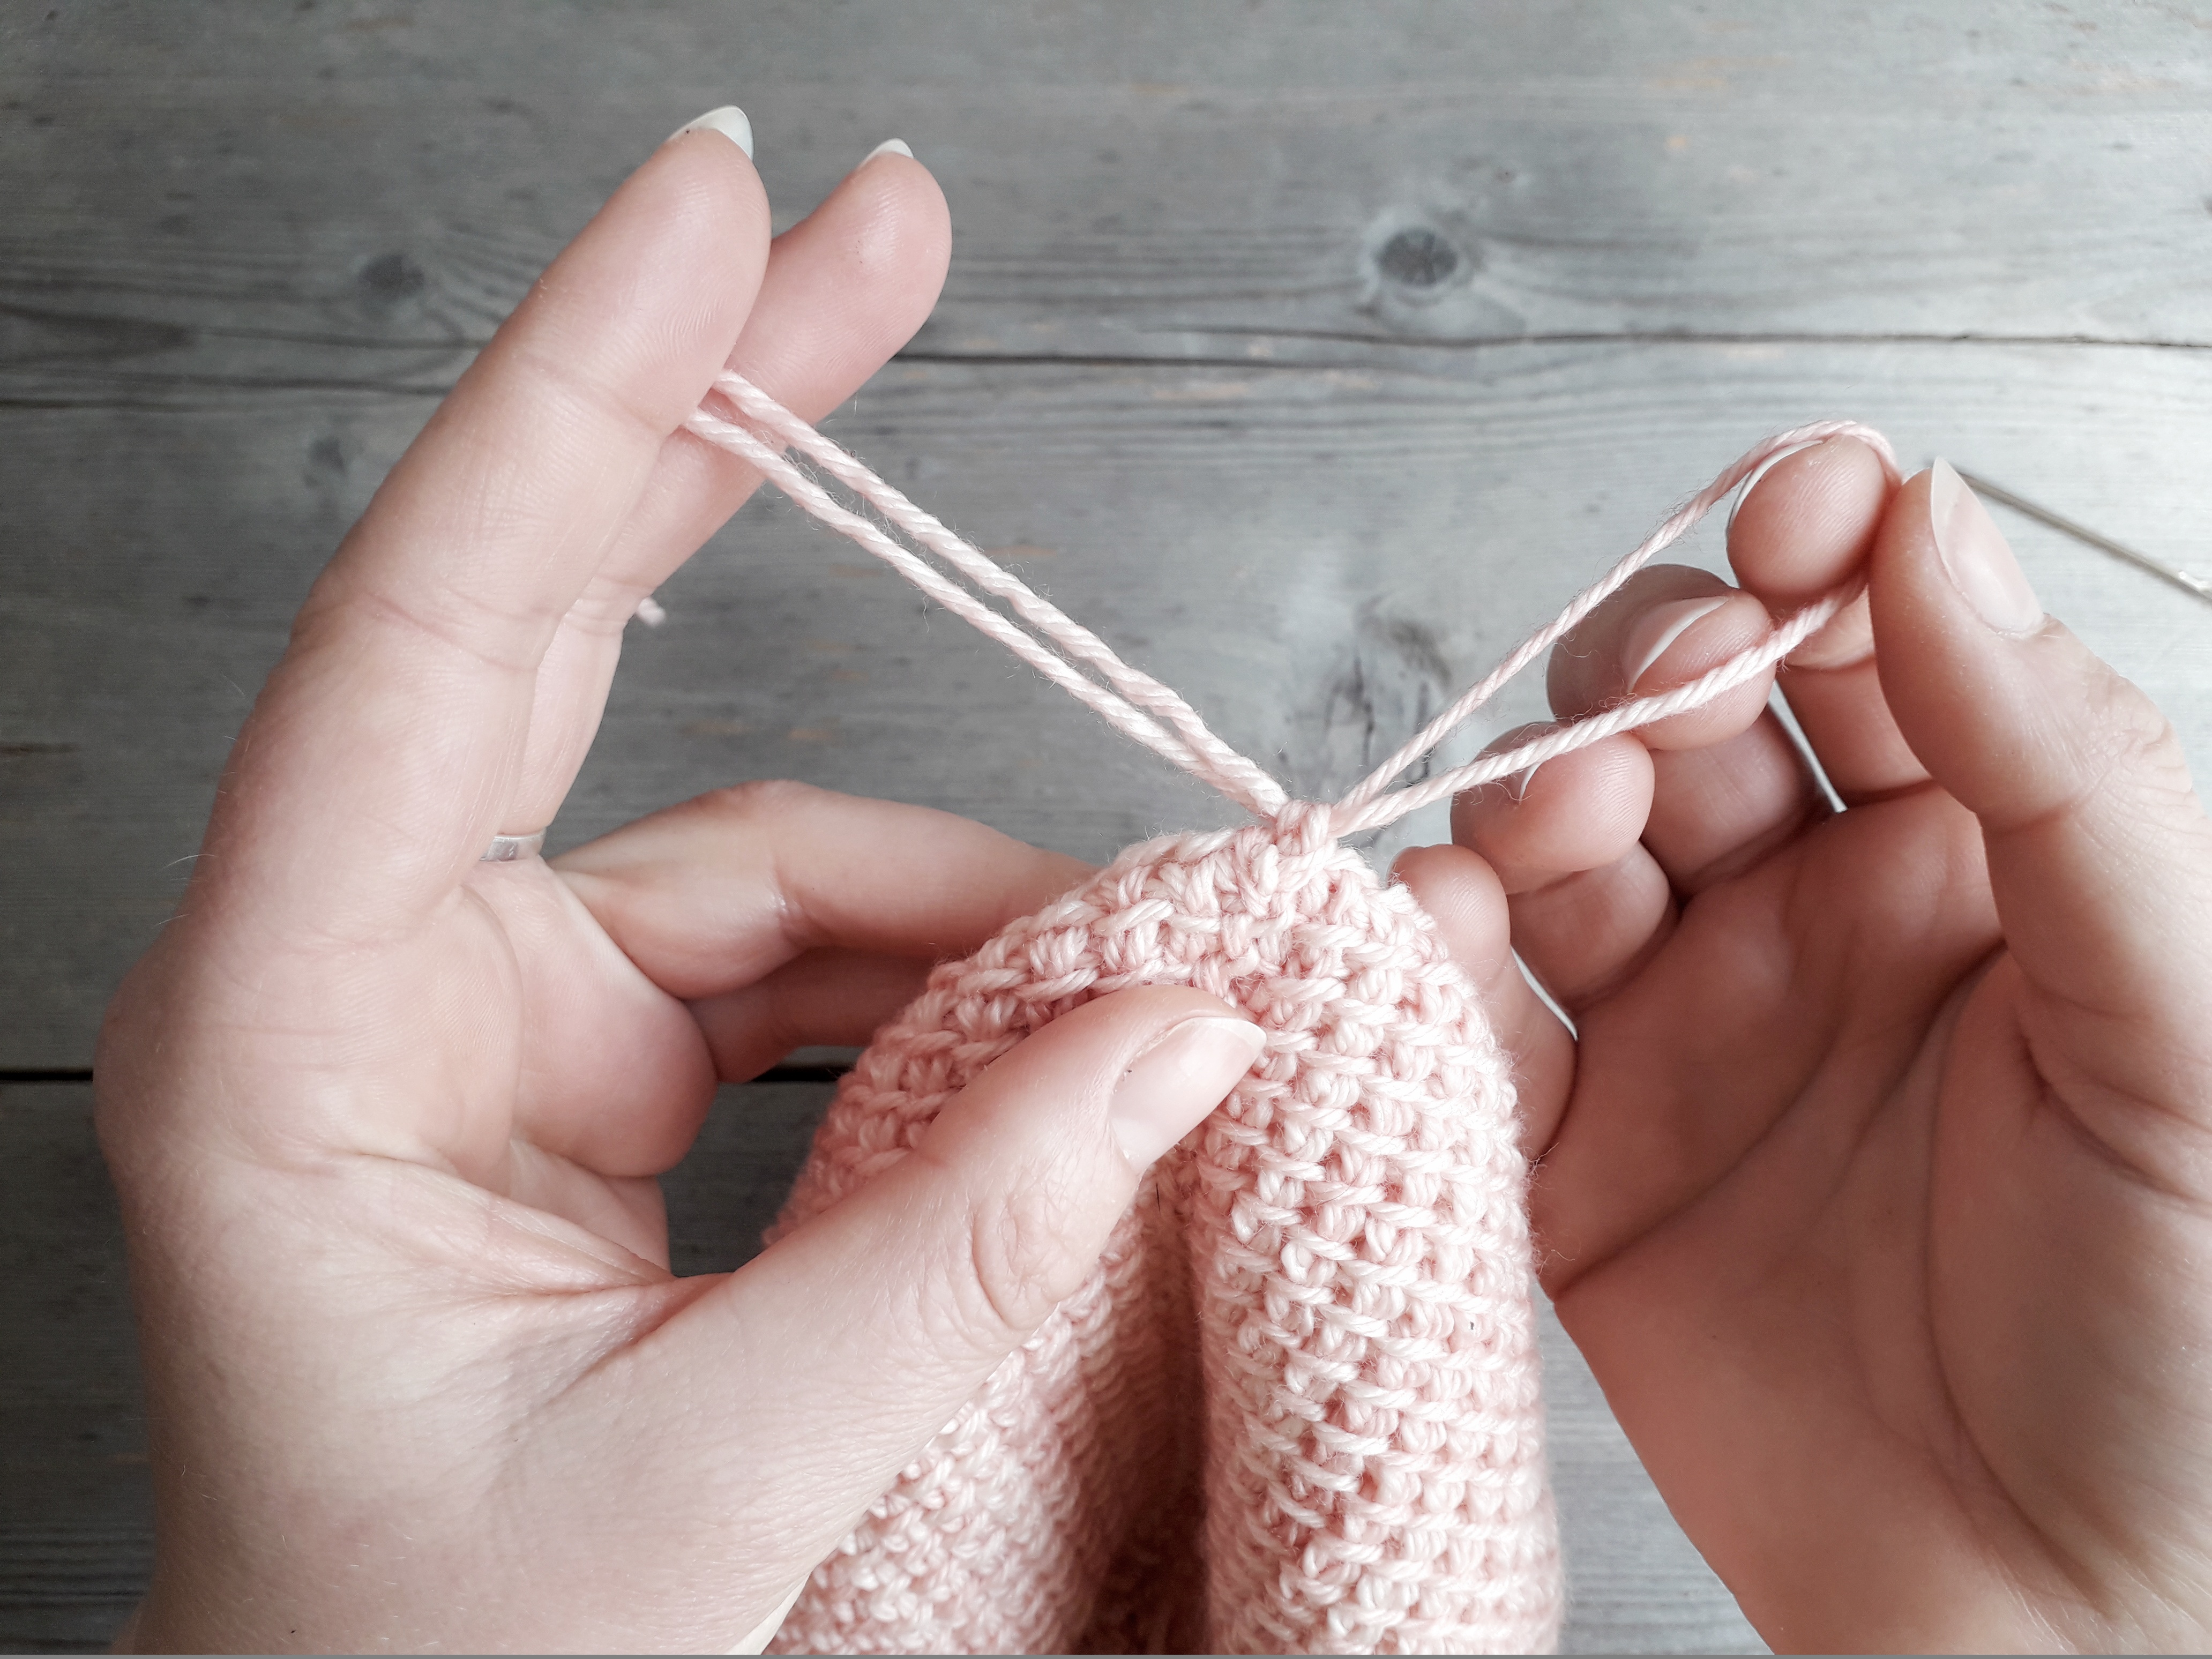
Thread ends through loop (pictured below), then pull ends firmly to tighen knot.
Note: Girl Guides, sailing people and macramé enthusiasts know this knot as the “lark’s head” knot.
(Guess which crochet designer is still very proud of her Brownie Badge for rope-tying and knots)

Once tightened, the two resulting ends can be threaded onto a sewing needle and woven in like regular yarn ends.
To settle the herringbone effect along the seam and to release any pressure it might be under, gently tug both ends.

Remember that tail we left at the very beginning? You can tighten that up now if it’s loosened and weave it in.
Once that’s done, sit back and admire your new seaming skills.
Well done!
Oh, hey, and, if you’d like to use this seam on fabric made from any other Tunisian Crochet stitch, all you have to do is replace the first row after your foundation row with a row of Tunisian Simple Stitch. Then you can make the rest of the project however you wish.
That row of TSS will be your seam.
Did you enjoy this tutorial? Tell me in the comments below!
And hey, tell your friends too!
— ALSO ON THE BLOG —
Discover more from Aoibhe Ni
Subscribe to get the latest posts sent to your email.
I love this and can’t wait to try it!
Hi thanks for sharing tthis
You’re wolcome!
I love it as a seam, so elastic and neat. I hope you enjoy it too!