Posted on 4 Comments

Country Life – August

I don’t really ascribe to any one religion. But if I had to define my belief system it’d be one based on the slow turning of the seasons in Ireland. I find there’s always something new to marvel at; Maybe it’s getting darker in the evenings, or it’s bright ’til the crest of midnight, maybe the swallows are back, or the blackthorn is flowering, or, inevitably the birds’ poop has turned purple with elderberries and I’ve discovered this fact because they’ve used my clean laundry as a toilet. Every day’s a marvel, I tell you!

And if I had to choose a time of year that was most sacred to me, it’s now; Autumn, Fall, Pumpkin Spice Season. Whatever you call it, it’s the time of year when the weather cools and the mind turns to thoughts of winter.

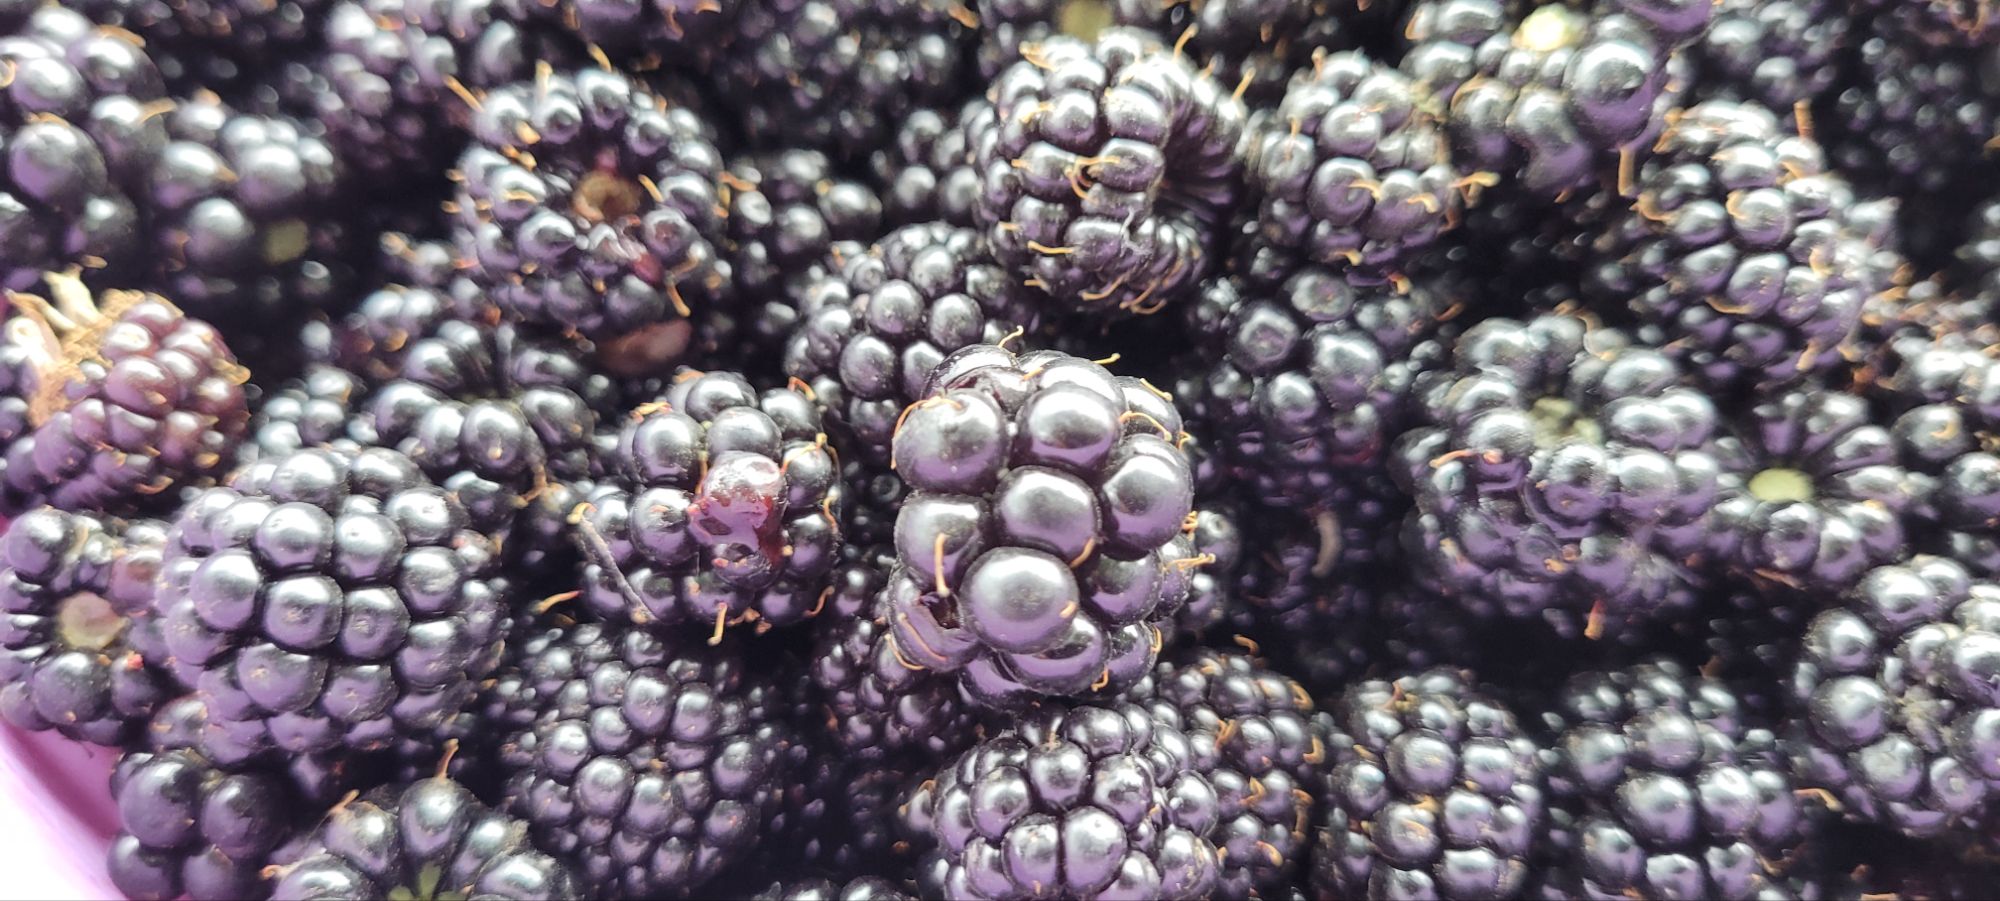
For me, that almost exclusively means foraging. And if I had to describe my religion’s most sacred ritual it’d be blackberry picking.

It’s a practice I was introduced to as a little girl. Standing on the grass verge of our country road with my Dad and my little sister, all three of us kitted out in polyester wind-breakers that snagged and crackled on bramble thorns, with woolly hats that spent more time caught in the hedges than on our heads. We each had a small container that we’d pop our pickings into, dumping occasionally into the bigger main bowl left on the ground.

Baby tub, Mammy tub.

The notion was that small pots were easier to manoeuvre into the thicket, which is fair logic. But it’s also useful if you stumble on uneven ground and your arms flail. Then, you’d only risk losing a few berries rather than the entire stash. Very practical.

I still follow this rule today, like a hymn passed down to me.

Picking berries in the open countryside appeals to me in a similar way to how knitting and crochet and all the other slow crafts I practice do. Picking each berry is like making a stitch. On the whole, an insignificant act, but it’s mindful and healing and given enough picks and enough stitches, you will inevitably find yourself with a sweater or a shawl, or a batch of blackberry jam.

I think there’s a good lesson to be had in that. Nothing magnificent materialises in a heartbeat. Things that are worth having are worth taking time over.

Something else blackberry picking reminds me is that each berry – however big or small or misshapen – is worth its space. I think we forget that wonky food is still food sometimes. We’re so used to perfect carrots and leeks and peppers lined up in the supermarket that we forget about all the food that wasn’t beautiful enough to make the shelf.

In the hedgerow, that hierarchy doesn’t exist, and I pick and eat the big and the small and the misshapen – just like the birds and the mice and the wasps do.

It took me two hours of solid picking before I cleared one side of my favourite spot today.

I did it in the rain, under grey skies and with the sounds of swallows and rooks and wood pigeons overhead.

It was just complex enough to keep my mind occupied on the task, but it allowed enough repetition to ensure my head could still amuse itself with random thoughts about greenhouse-building, a knitting pattern I’m currently working on, and my latest Patreon offerings.

Picking is hard work. All that reaching and balancing and almost falling into the thicket is a great little work-out. I joke that it’s the only form of yoga I’m willing to attempt.

The prickles on the brambles coupled with the backward-facing thorns on dog roses and the mad spikes on blackthorns mean every reach could lead to a nasty jabbing. Add to that, the myopia that hits when I see a lovely bunch and reach in, forgetting to check first if nettles have insinuated themselves among the more benign leaves.

I brushed against two nettles today. Small penance for the treasures I retrieved in return, though.

But. As tricky as it can be, and as itchy as my poor, nettle-stung wrist is now, and as drenched as I was when I returned home, I still arrived in the door triumphant with 2 and a half kilos of berries.

For those of you who speak American, that’s 5 and a half pounds, or enough to make 6 bottles of mead and 12 jars of jam.

Or… 12 bottles of mead.

Guess what I’m gonna be doing with my treasure.

Posted on Leave a comment

Butterflies

If you’re anything like me, you haven’t touched your winter sweater pile since the end of moth season.

The sweater pile, full of (yup) patterns I haven’t released, then wore too often to take photos, and now they’re just clothes.
And yes, I did make those shelves. That’s why they’re wonky, but I still love them.

And so now, at the dawn of autumn, and the promise of a good, honest, cold breeze, you might be thinking about taking that entire pile and dumping it in cold water with a little hand-washing soap to freshen them all up.

I’m here to tell you to stay that hand, folks.

Today, I have been given a well-learnt lesson in taking my time with my hand knits.

Butterflies.

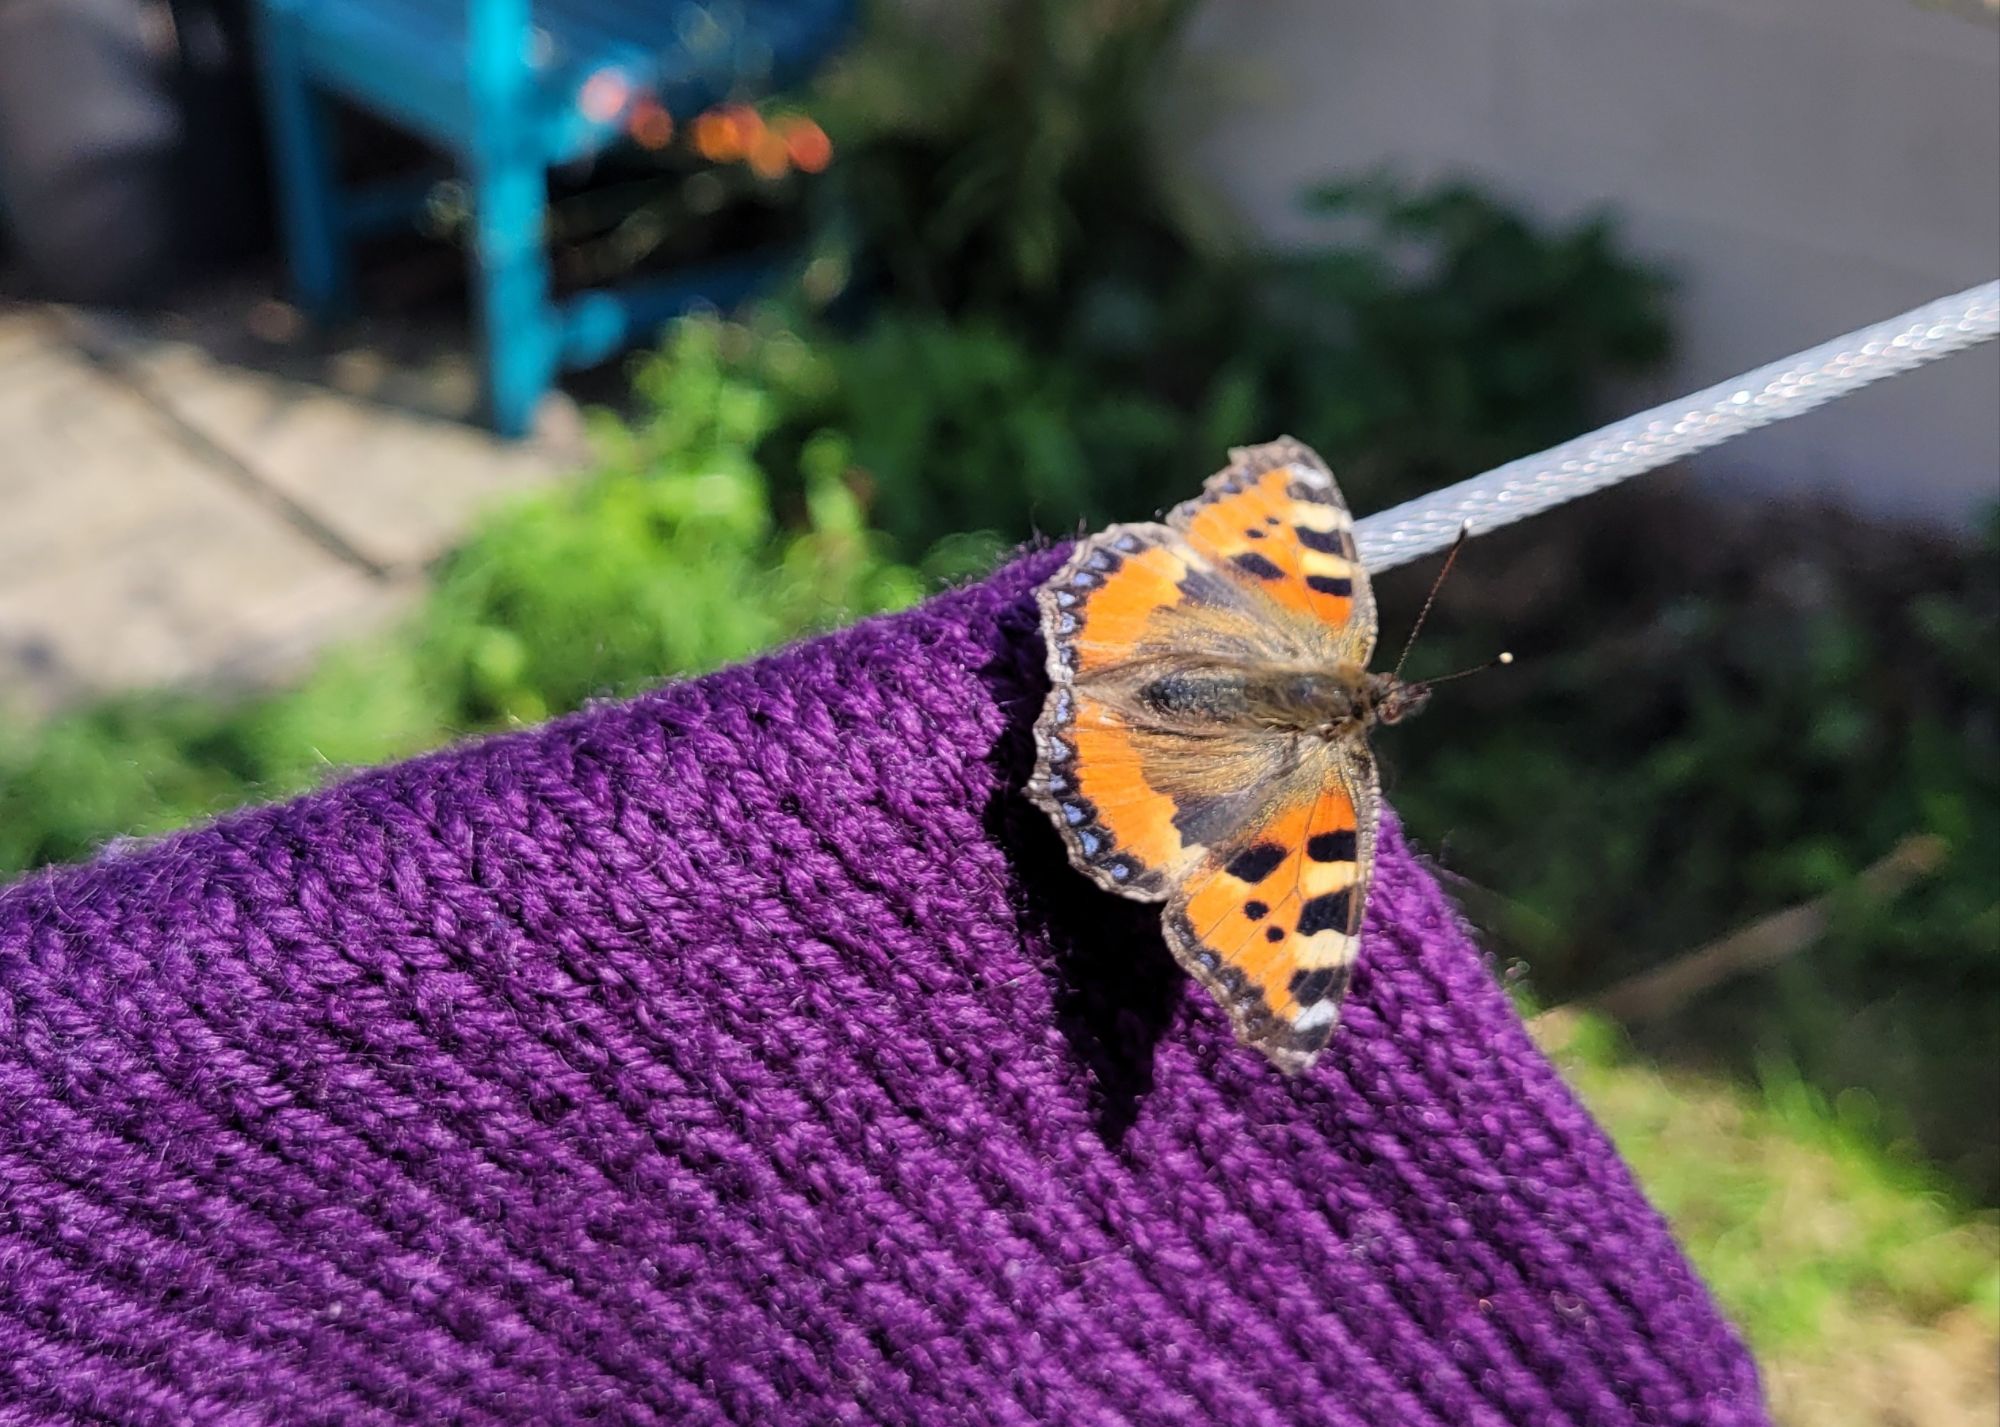
In my case, small tortoiseshells. These beautiful ladies like to flutter into our houses this time of year, you see, looking for a nice undisturbed spot to settle down and hibernate for the winter. And wouldn’t you know it, it appears my sweaters have become the local hot spot for sleepy tortoiseshells this season.

Five, in fact. All found snuggled into creases and folds of the first few jumpers of the top pile.

I didn’t take a photo of them in situ, I decided instead to get them outside on this nice warm, dry day so they can find somewhere better to bed down.

Ideally, I wouldn’t disturb them. I love knowing my home is filled with these little ladies, and the excitement that their reappearance causes in early winter when we turn the heating on and they all wake up thinking it’s spring is pretty life-affirming.

(Don’t worry. I catch them gently in my hands and pop them into a container where they can sleep the rest of the winter away in our very cold bathroom.)

It took this lot all of a minute to wake up in the sun’s rays and flutter off.

I hope they find a better spot to hibernate, and sure, if they end up fluttering back into my bedroom, at least now that my jumpers are all washed and drying on the line, they’ll have somewhere clean and fresh to slumber.

Products by Category

Posted on Leave a comment

Cross Stitch Direction Guide

A Note from Aoibhe Ni:
This tutorial has been created to specifically accompany my Multi-Crafts course on cpdcollege.com
If you are a Primary School Teacher in Ireland, and are looking for a series of fun, mid-summer courses for next year, drop on over. I have two craft courses available so far (a crochet course, and a multi-craft course), with more courses in production for the future.

How to keep your cross stitch texture even

  1. Begin anywhere and create first stitch.

Starting by pushing your needle up through A, sew down into B, up through C and down into D.

This will complete the first cross stitch.

Figure 1. The first stitch.

2. Once done, repeat these exact moves for the next stitch over.

It is important to work the A, B stitch first, and the C, D stitch second so that the stitch made by C and D is always lying on top of the stitch made by A and B. That way, all your stitches will be uniform.

Figure 2. The next stitch over.

3. Work the rest of the border using the established A, B, C, D sequence where possible.

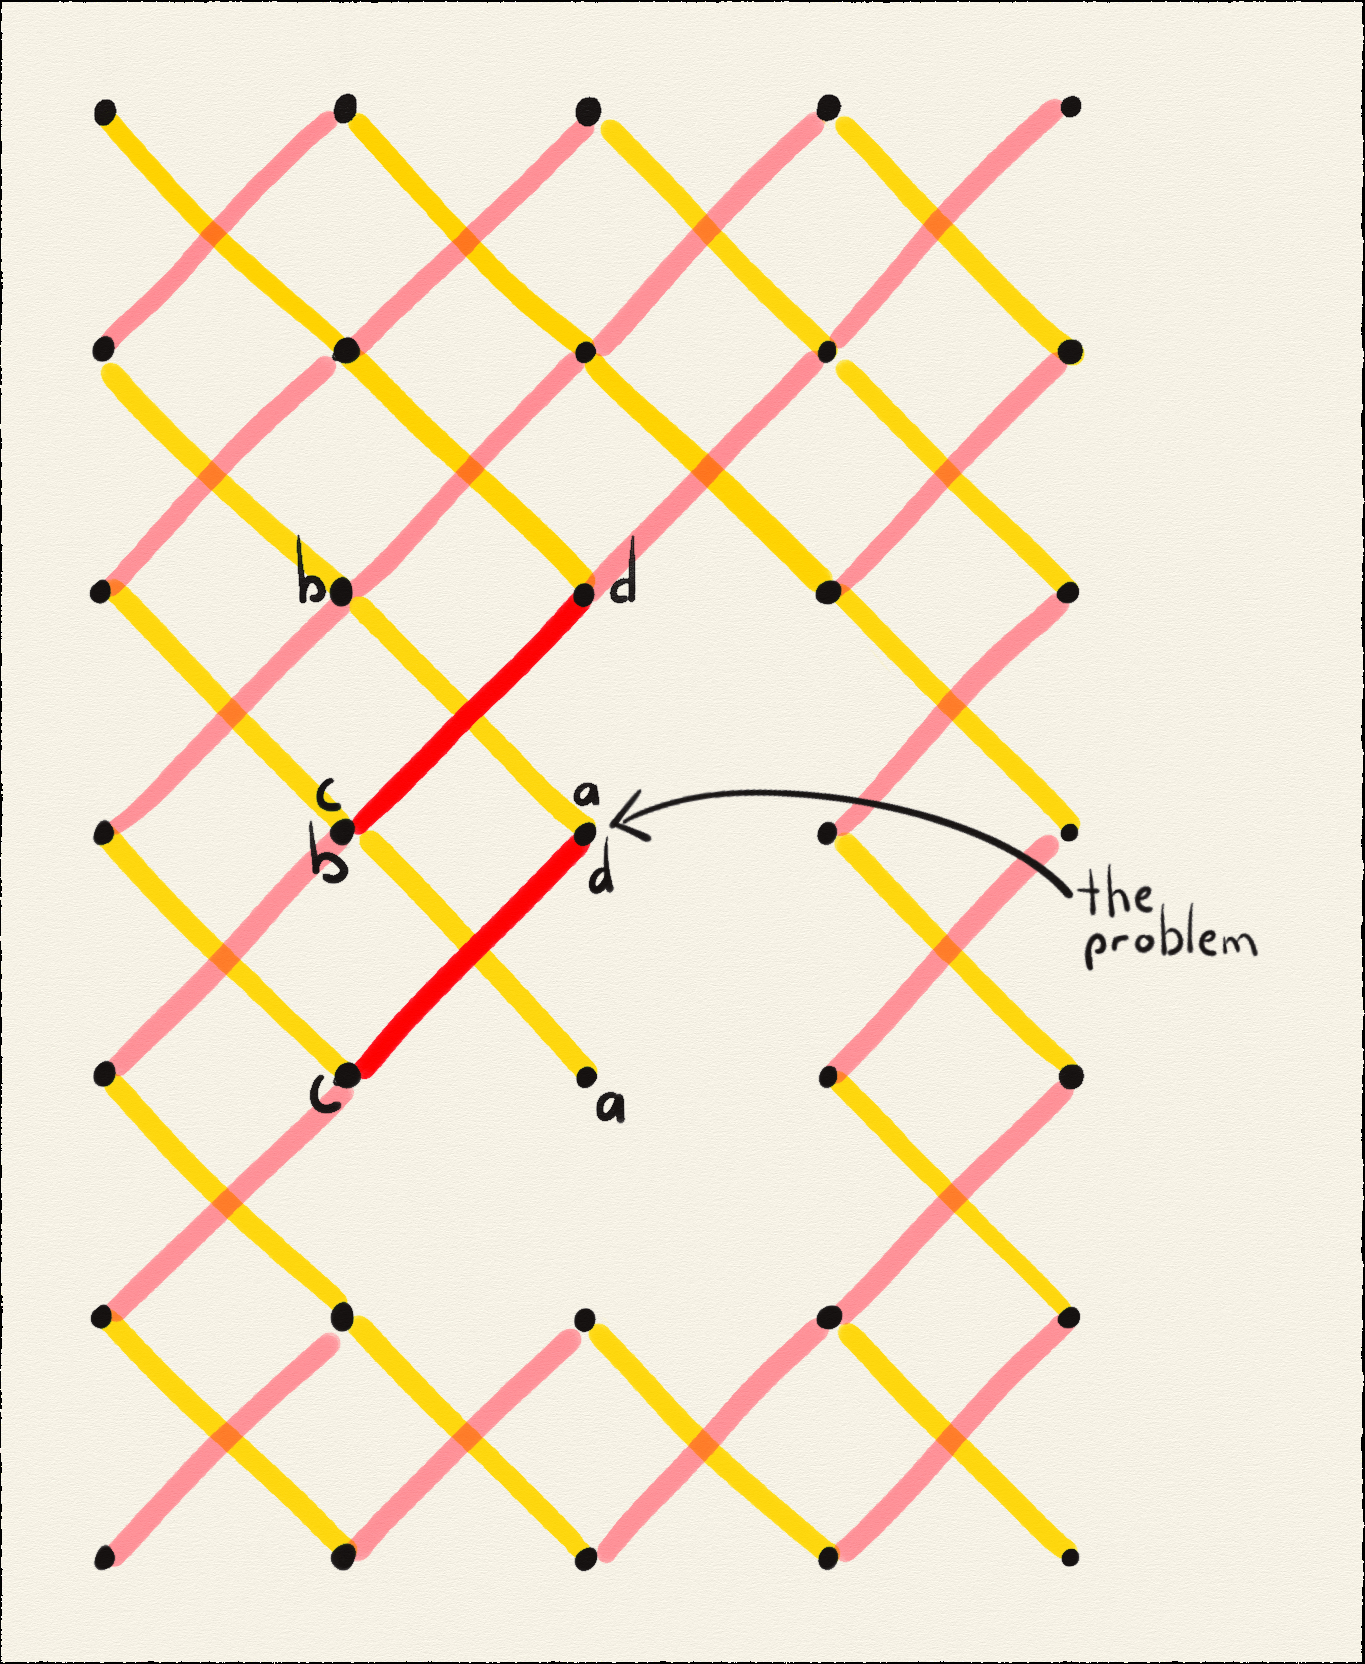
Remember, there will be times (like when you’re working a new cross on TOP of a completed one) when the D of the last stitch is the same hole as the A of the new stitch. If you were to work into A of the new stitch as usual, you’d just end up un-doing the D of the previous one.

In that case it is fine to either switch to doing B then A on the new stitch, or if you notice in advance, doing D then C on the previous stitch.

If you’re asking “when will I know which one to use?!” Trust me, you’ll know the second you un-do half of your previous stitch that you need to mix it up!

Figure 3. The border complete.

4. Now, we have to fill the middle.

The key to keeping your stitches uniform here is to examine your work and find an open square, like the one highlighted in the box below.

Figure 4. Beginning to fill the empty spaces.

5. Map out the A, B, C D sequence over the empty square.

Figure 5. The A, B, C, D of the empty square highlighted.

6. Work the first half of your cross from A to B, like you’ve done before.

Figure 6. A to B complete.

7. Then work the second half of your cross from either C to D, or D to C (depending on which works for your placement)

Figure 7. C to D (or D to C) complete.

8. Move your focus on to the next empty square, and map out your A, B C and D like before.

Figure 8. A, B, C and D of next empty square mapped out.

9. Stitch A to B as established.

Figure 9. A to B complete

10. Then work either C to D, or D to C to complete cross.

Figure 10. C to D (or D to C) complete.
11. Fill in remainder of panel by mapping out each subsequent empty square. Take your time with it. Some squares can seem trickier than others. Pay attention to your work so that you can catch any misdirected diagonals before you move on.

Figure 11. Panel completed. All A B diagonals are underneath their C D counterparts, ensuring an even texture to the completed cross-stitch panel.

Products by Category

Posted on 6 Comments

My Own Personal Sunshine

It’s a strange time to be a designer.

Very recently, I discovered that an annual job I had expected to be renewed wasn’t going ahead as usual. The Irish Department of Education essentially decided the knitting course I was prepparing for primary school teachers wasn’t a priority this school year.

And while this wasn’t a job I was wholly relying on – don’t go putting all your eggs in one basket, naturally – designing a craft course every year or two for the Department was something that I had begun anticipating as part of my project list. It was also a job that gave me a welcome financial bump towards the start of the year.

I’m now suddenly staring down the barrel of a much leaner year and that, my friends, is definitely giving me a dose of the awl anxiety.

To balance out this deficit, I’ll be working more hours than usual on designing new patterns, and I’ll be hustling more.

I have to admit the absence of ‘the hustle’ in my life the last few years has been a welcome respite. Advertising my work is not something that comes naturally and so, dipping my toes back into the social media stream is coming as a bit of an emotional shock.

As I scroll through my peer’s work, I can’t help but feel like everyone has become so much more advanced all of a sudden. It’s a disconcerting feeling.

I’m not just talking pattern-wise – though there is a sophistication there I was certainly not prepared for – but also presentation-wise. Reels, videos, social media graphics, colour-palettes, oh my! I feel very much like a tornado has lifted my cozy little home and dropped me in a bewildering, technicolour land without even the favour of squishing a witch to start me off.

I am standing here at the first yellow brick in that road, bewildered, I’m afraid.

I miss the days when a nice flatlay would do the job, or when Ravelry was actually a place people spent time. God, I miss those days and the lovely direct contact and feedback I could get from makers. I even miss the days on there when I’d get yelled at for using the “wrong” currency when posting about a new pattern, or for using “incorrect” terminology for something I invented.

In comparison, social media now feels more diffuse, more transient; it swipes your confidence then disappears too fast for you to yell at it. I’m not sure how prepared I am for so gossamer a feeling.

I keep having to remind myself that the thing that made me unique still does, and that all the flash and flare of a tightly edited reel is either something I can do without, or something that I will learn to appreciate. I keep telling myself that the things that inspired me still do, and they’re still there, awaiting my return.

In that spirit, I decided to look inward and consider where I was when I started this journey. 

As a young girl, I grew up experimenting with crochet in the depths of rural Ireland. It was the 80’s so, we had no internet, and we were isolated enough that craft books in any form were a rarity, so it was just me, the land around me, and my hook.

So, returning to my roots, I took a walk through solid, Irish countryside.

I breathed in, and out, in and out. My old bun bhrógaí ate up the tractor-marked tarmac and I focused on the hedgerows and verges all around me.

I enjoyed the earthy aroma of dairy cows newly released into their fields, I smiled at new lambs, and I said hello to the bumblebee queens scouting around for wildflowers. And much like them, I scouted, too.

The Irish landscape rarely concerns itself with providing massive, awe-inspiring sights. We have no Grand Canyons or formidable peaks. All our mountains were ground to a nub during the last glacial maximum. Rolling hills and soothing, curving mounds were left in their place as the ice retreated. We have clayey soil perfect for grass and deciduous trees, and wildflowers.

And it’s these wee beauties that soothe my soul this time of year.

creeping cinquefoil
common daisy
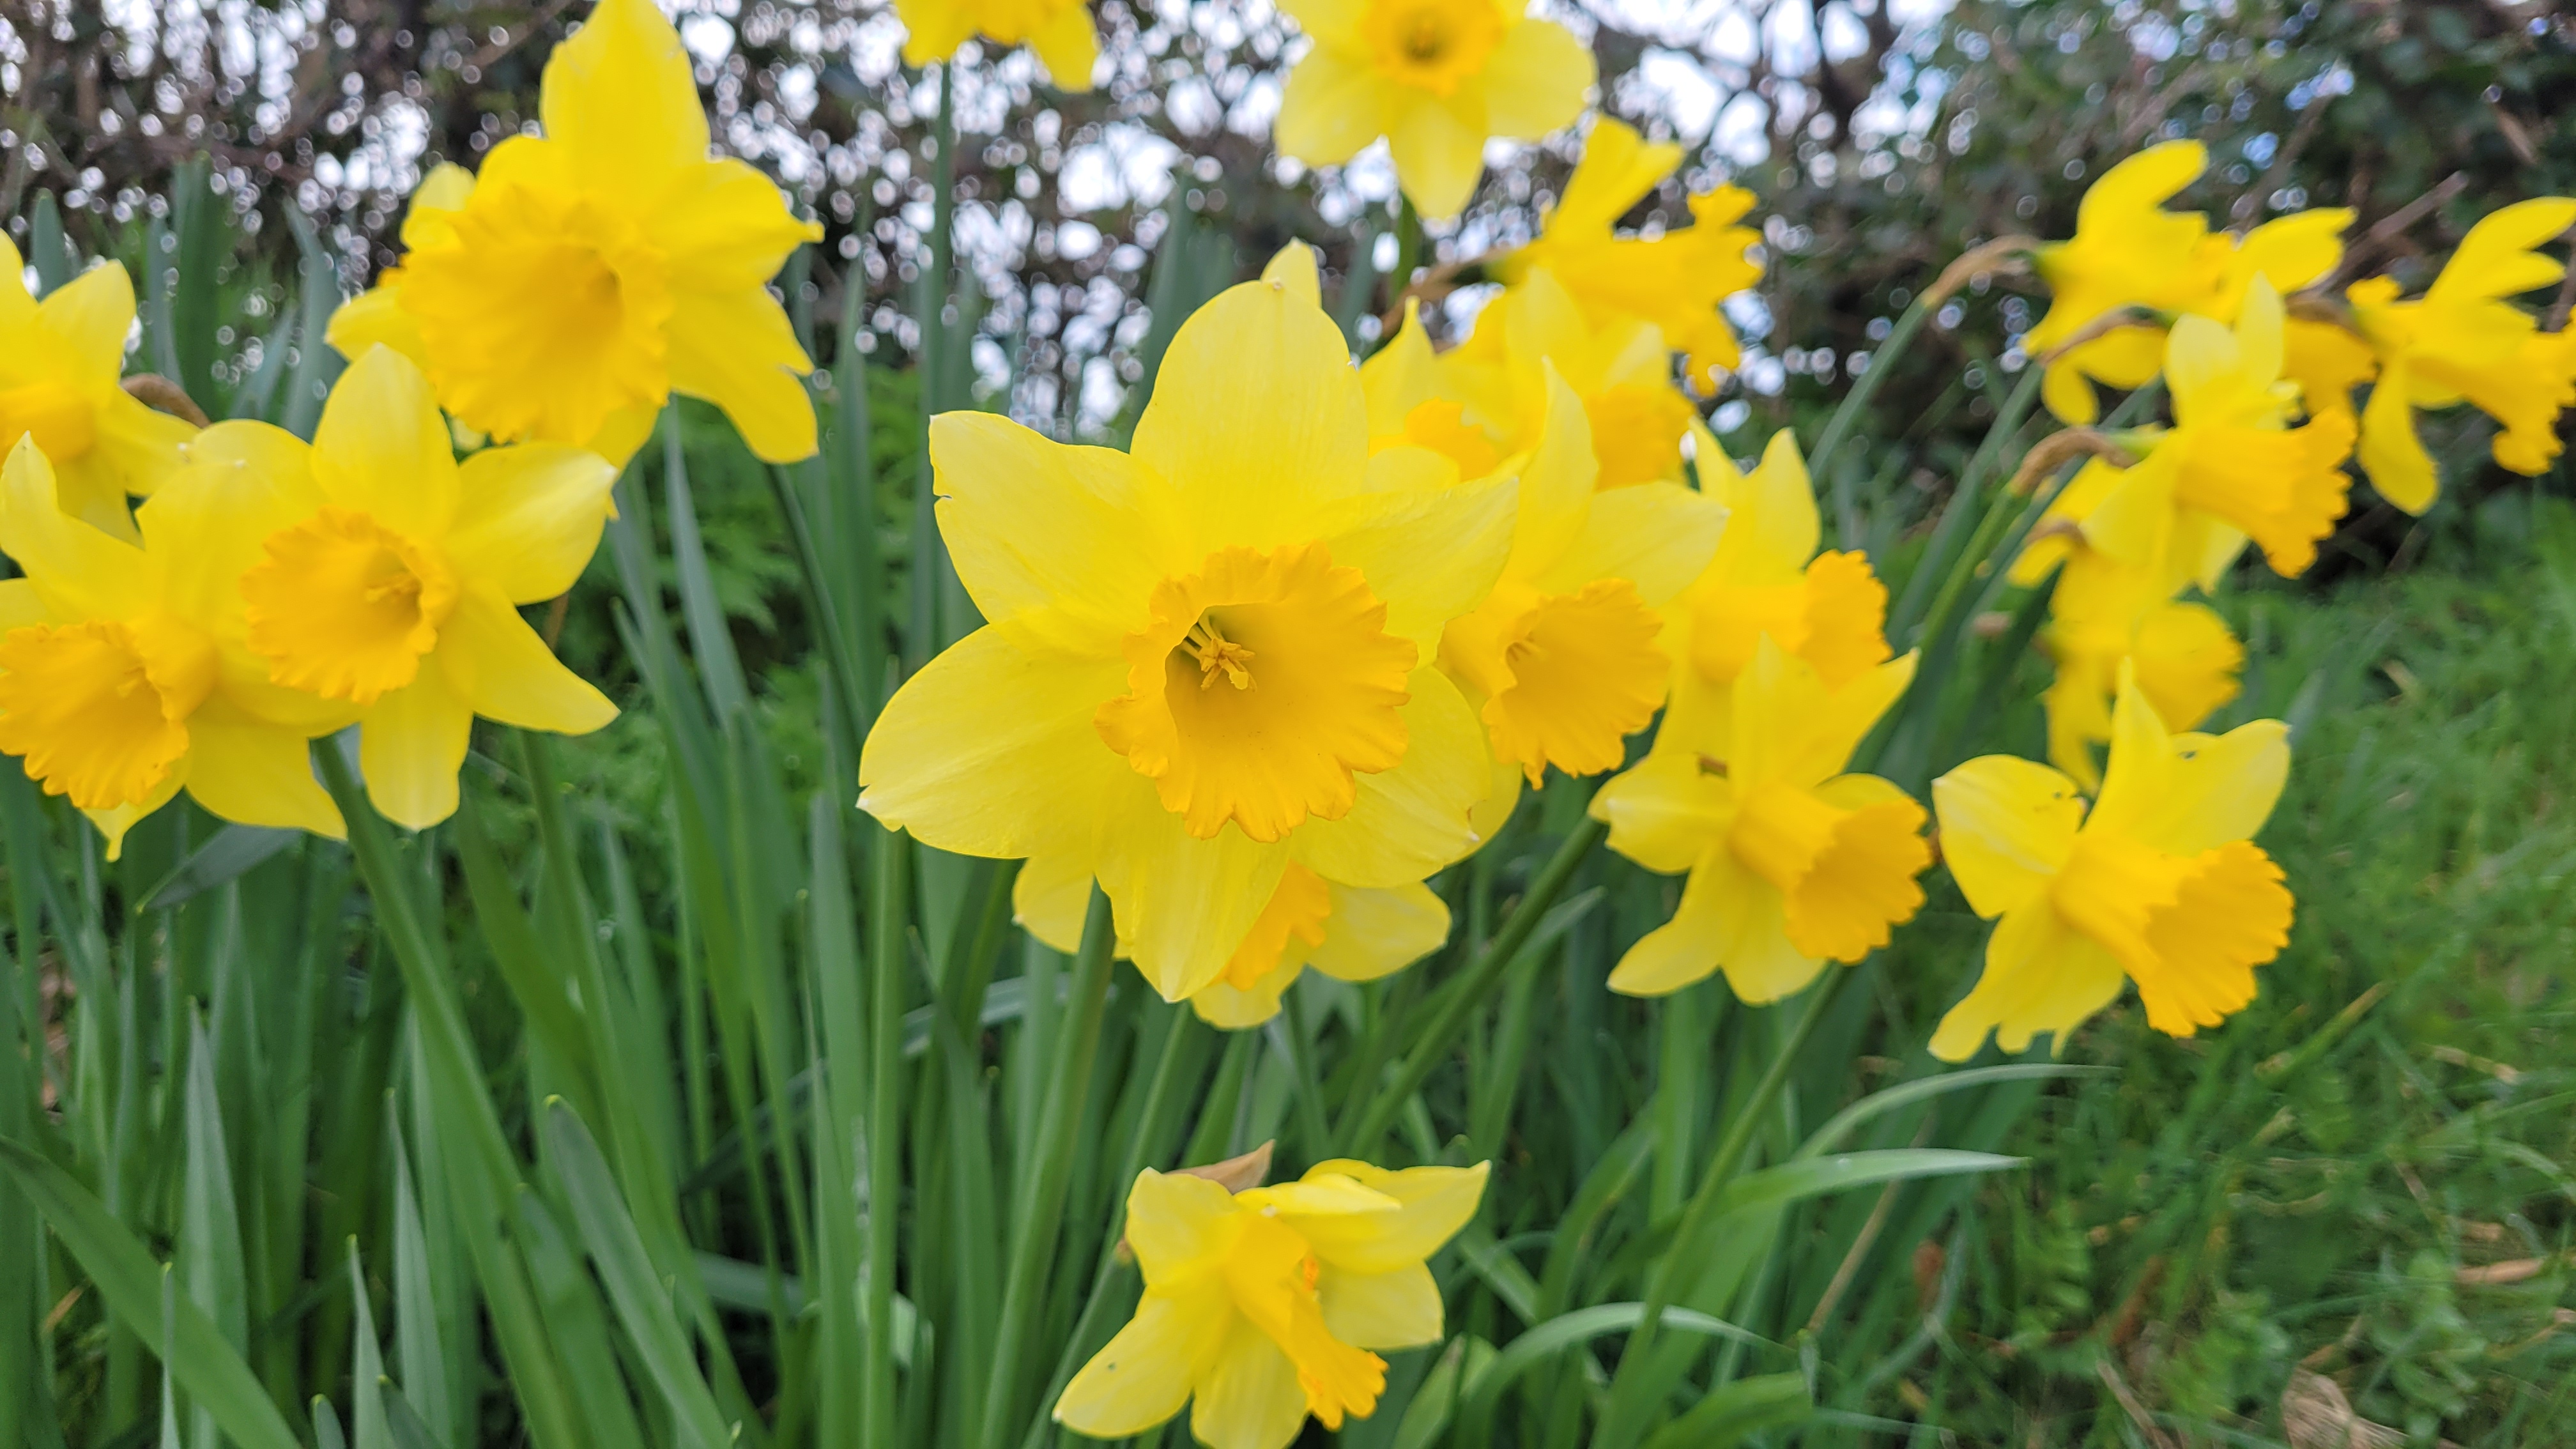
daffodil

Yellow. So much hope in that colour, isn’t there?

Between primroses and dandelions, cinquefoils and daffs, cowslips and oxlips, wild Ireland comes alive with yellow in early spring. I like to think it’s the island’s own attempt to make tiny little sunshines while the sky remains grey.

There’s a lot of comfort in that yellow, and a lot of defiance, too.

wild primrose
common dandelion
oxlip (a hybrid of primrose and cowslip)

I’m choosing to learn a positive lesson from all the yellow audacity surrounding me.

Maybe the sun isn’t shining right now and maybe the loss of that one big job feels like my own personal grey grey March sky, but I do have the power to fill my own hedgerows with sunshine.

And you know, maybe I’ll manage to find my own little niche in the social media madness by focussing on the small beauty of each stitch I make.

Maybe, much like my quiet walk in the countryside, people will find me and appreciate me just as much as I do each any every intractable little bloom.

Country Life – August

I don’t really ascribe to any one religion. But if I had to define my belief system it’d be one based on the slow turning of the seasons in Ireland. I find there’s always something new to marvel at; Maybe it’s getting darker in the evenings, or it’s bright ’til the crest of midnight, maybe…

Butterflies

If you’re anything like me, you haven’t touched your winter sweater pile since the end of moth season. And so now, at the dawn of autumn, and the promise of a good, honest, cold breeze, you might be thinking about taking that entire pile and dumping it in cold water with a little hand-washing soap…

Cross Stitch Direction Guide

A Note from Aoibhe Ni:This tutorial has been created to specifically accompany my Multi-Crafts course on cpdcollege.comIf you are a Primary School Teacher in Ireland, and are looking for a series of fun, mid-summer courses for next year, drop on over. I have two craft courses available so far (a crochet course, and a multi-craft…

My Own Personal Sunshine

My Own Personal Sunshine

It’s a strange time to be a designer. Very recently, I discovered that an annual job I had expected to be renewed wasn’t going ahead as usual.

Aoibhe’s Most Yellow Crochet Patterns

Posted on Leave a comment

Free Tunisian Crochet and Traditional Crochet Shamrock Patterns

Happy St. Patrick’s Day, everyone!

Chances are, wherever you are in the world, this coming weekend, you’re likely to encounter at least a couple of Irish people.

And those Irish people (and their kids ((and their kids’ kids neighbour’s dogs)) ) will likely be wearing something green, and singing lilting ballads about a lost love (or a lost shoe) that leaves you yearning to visit the beautiful island of Ireland.

Chances are, there’s an Irish pub somewhere in your closest city, and chances are on Paddy’s Day – the 17th – they’ll happily serve you a pint of black stout that’ll curl your toes. There’s also an excellent chance that that stout will have a three-leafed design poured into its foamy top.

That shape – the three-leafed shamrock – is a national symbol, and unlike our other national symbol, the harp, is much easier for school children and publicans to draw.

The shamrock is also something we wear pinned to our chests on the feast day of one of our three patron saints – Patrick.

And before we get to the crocheting the lovely little thing, I thought ye might all like a few facts about Ireland, and the day we’re all here to celebrate.

  1. The Shamrock is associated with Saint Patrick because according to legend, he used the three leaves of the shamrock to explain to the pagan Irish how one god could be made up of three aspects ☘️ (the father, the son and the holy spirit). In reality, the Irish were very well aware of what a three-fold deity was. They had plenty of their own. But we love the story nonetheless.
  2. 4-leafed clovers are not our thing. According to my Nanny, the 4th leaf “let the devil in”, so be aware and count your leaves carefully!
  3. Arthur Guinness – he of the famed black stout – chose the harp (a deeply rooted symbol in our culture) as a logo for his brewery long before the formation of the Irish state. So, when the Republic of Ireland was founded, the decision-makers found they couldn’t use it without their official documents being mistaken for beer-related business. They decided not to overthink it, they turned the harp to face the opposite direction and carried on creating the modern Irish Republic.
  4. Ireland has three patron saints.
    Patrick is one of them. We all know him. He was a very serious man, and he’d have haaated the party in his honour.
    Brigid is another. Half pagan goddess, half christian saint. Something for everyone, really. We love her, and now she has a bank holiday of her very own, so we love her more.
    And Colmcille – who very few people know anything about, probably because he spent most of his adult life in Scotland.
  5. Patrick is also the patron saint of Nigeria, and Montserrat. Pretty cool.
  6. It’s “Paddy‘s Day”. Not “Patty’s Day”.
    Patty is the female form of the name Patricia (and also the slab of meat one might put in a burger).
    Paddy is the male form of the name Patrick (and also a waterlogged field in which one might grow rice).

    If you wanna make an Irish person’s day brighter, use the right word. We’ll be ever so grateful.

If you wanna make my day brighter, stay til the end and see some of my Ireland-inspired patterns!


Pattern Info:

The hook I used for my samples was a 3.75 mm hook.
The yarn I used is a cotton DK (Rico, Ricomuri DK in colours 44 and 49 to be exact)

These patterns are written using UK stitch terminology.
UK dc = US sc.
UK htr = US hdc
UK tr = US dc

Traditional Crochet:

Step One: Make 3 chain stitches.


Step Two: Work 3 tr into first ch made (this ch will be the very centre of our shamrock), 2 ch, 1 ss into first ch made.

Step One complete
Step Two, just missing the final slip stitch
slip stitch complete

Step Three: Make 2 chains

In order, work Step Two, Three, Two.

Step Three complete
Second Leaf Segment complete
Third Leaf Segment complete

Bind off. Weave in starting yarn strand. Trim end strand to desired length.


Tunisian Crochet:

Step One: Make 4 chains, make a circle with 1 slip stitch into the 1st chain.

**Step Two: Make 4 chains.

Step Two
Step Three, Forward Pass complete
Step Three, Return Pass complete

Step Three: Forward Pass: Skip 1st chain and insert hook into 2nd ch.
YO and draw yarn through ch.
– 2 loops on hook

Insert hook into 3rd ch, YO and draw yarn through ch.
– 3 loops on hook

Insert hook into 4th ch, YO and draw yarn through ch.
– 4 loops on hook

Insert hook into ch-4 circle, YO and draw yarn through ch.
– 5 loops on hook

Return Pass:
*YO, draw through 2 loops* repeat until 1 loop is left on hook

Step Four, Forward Pass complete
Step Four, Return Pass complete

Step Four: Forward Pass:
*Locate closest “bar” on surface of previous stitch. Slide hook through this bar.
Yarn Over (YO), and draw a loop back through the bar and onto the hook* repeat 2 more times
– 4 loops on hook.

Return Pass:
*YO, draw through 2 loops* repeat until 1 loop is left on hook

Step Five, Forward Pass complete
Step Five, Return Pass complete

Step Five: Forward Pass:
*Locate closest “bar” on surface of previous stitch. Slide hook through this bar.
Yarn Over (YO), and draw a loop back through the bar and onto the hook* repeat 2 more times
Insert hook into ch-4 circle, YO and draw yarn through ch.
– 5 loops on hook

Return Pass:
*YO, draw through 2 loops* repeat until 1 loop is left on hook

Repeat Steps 4 and 5 one more time.
Complete first leaf segment by crocheting dc sts into each bar on the edge of the last st made. 1 ss into ch-4 circle. **

Step Four repeated
Step Five repeated
dc sts down side of last stitch, 1 ss into ch-4 circle

Repeat from ** to ** for each additional leaf segment.

Second Leaf Segment added
Third Leaf Segment Added and 4-ch stem completed

Make 4 ch for stem.
Bind off and weave in ends.

Aoibhe’s Ireland-Inspired Crochet Patterns

More From Aoibhe’s Blog

Colours by County

There’s more to Irish colour than green.

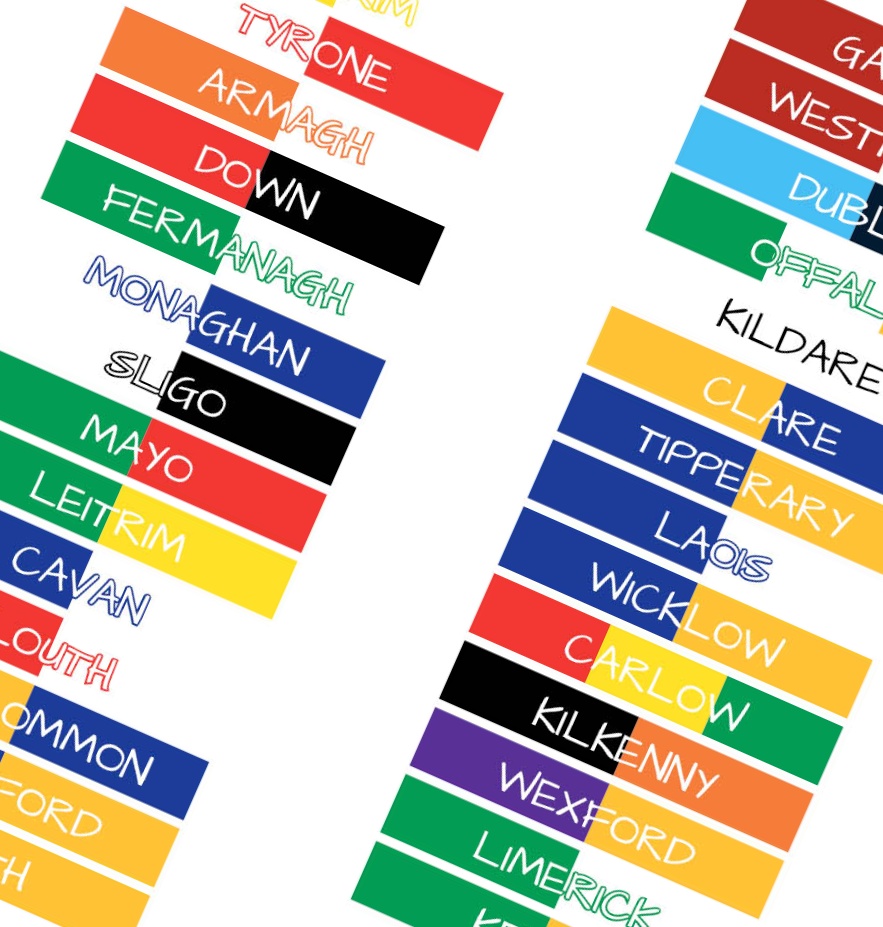
We may all wear “the green” on Patrick’s Day, but did you know that each county in Ireland has its own, unrelated colour scheme?

Keep reading

Crocheting left-handed

Crocheting left-handed.

My Mam is a leftie. I’m a rightie.

With patience and ingenuity, she taught me to crochet anyway. Here’s how I use those same qualities to teach lefties in my own classes.

Keep reading
Posted on Leave a comment

Colours by County

We may all wear “the green” on Patrick’s Day, but did you know that each county in Ireland has its own, unrelated colour scheme?

At local, regional, and national-level sporting events you’re as likely to see blue flags or maroon jerseys as you are to see any green at all.

That’s because every county in Ireland (32 in all) has their own flag and their own set of colours.

Most have two, some have three, one has… one.

Some share colours, some swap their order, and some (I’m looking at you, Dublin!), choose to be represented by the same colour twice.

Choosing county colours over the green white and orange of the national flag gives us all a wider patriotic colour palette.

So, this Patrick’s Day (17th of March), show your pride in Ireland by making and wearing something (ideally from an IRISH designer!) with your favourite county’s colours.

Do I have a favourite, you ask?

Of course not (cough-MEATH!-cough) I don’t play favourites.

By the way, if you’ve met me in person on one of www.knittingtours.com‘s wonderful Irish craft-centric events, then you’ve been to either Dublin, Kildare, Wicklow or Clare. And lucky you, too. They’re all gorgeous.

Posted on 2 Comments

Crocheting left-handed

My Mam is a leftie, a ciotóg, a southpaw.

I’m not.

But, still, she managed to shift her brain far enough to the right to teach me to crochet. She obviously did a pretty good job of it because now it’s my full time profession, my favourite past-time, and the thing that keeps me and my loved ones cozy in the colder months.

If she’d gotten frustrated with our duelling brains, or if she’d insisted I crochet left-handed, I doubt very much that my love for this artform would have grown much beyond an initial curiosity. It would instead have withered on the vine as it does for so many lefties in this right-centric world.

I have great sympathy for the frustration many of my left-handed students feel. Many share tales with me of their attempts to learn to crochet in school, or by the side of a well-meaning family member. Often, their efforts ended in failure because “I just can’t hold the hook correctly”, or “the yarn won’t stay where I need it to”, or worst of all “I’m just not good at it.”

That last one, I assure you, is a lesson many, many left-handed crafters learn as their teacher’s enthusiasm wanes.

And this is why I make darn sure to give lefties a welcome break in my classes. If someone is willing to learn, then I’m darn well not gonna be the one who puts them off, and if you feel the same – or if you have a young student you’re looking to teach – here are my top tips to helping you and them get past the left/right barrier.

A. Don’t speak in “right” and “left”.

Just immediately chuck that sort of language in the bin. It’s no use to you here.

Instead, sit side-by-side and say “inside hand” and “outside hand”. That will stop you from getting your rights and lefts mixed up, and your student will get smoother narration from you as a result. Both of your dominant hands can be on the inside, and your weaker hands can be on the outside. Or the other way around, depending on the order you sit in. Either way is fine.

Sitting side-by-side makes you natural mirror images of each other.

And you get to say things like “let’s hold our hooks in our outside hands”, “now we’re going to start our ‘yarn over’ on the inside, wrap it over the top of hook and travel to the outside…” etc etc etc. Try it, you’ll be surprised how much smoother it goes for you both.

B. Mirrors!

Lots and lots of videos are filmed by right-handed people. Lots of photo tutorials are too.

Some people take the time to offer left-handed versions, but it’s rare.

If you’re left-handed yourself – or are using diagrams and videos to teach someone who is – hold a small mirror at a right angle to the page or screen and look at the reflection. Instant left-handed content.

C. Learn to crochet left-handed yourself, you lazy baby!

Lefties have to navigate a world full of scissors that don’t cut, tin-openers that don’t open tins, and pens that smudge as they write. Sink taps and oven knobs and radio controls turn the wrong direction, dictionaries run through the alphabet from Z to A, and rulers count inches in reverse.

And don’t get me started on computer mouse buttons and corkscrews and knives and pencil sharpeners and golf clubs and even some crochet hooks!!!

The least you can do – you lucky right-handed weirdo – is to figure out how to meet them where they live in this one thing.

You don’t have to be good at it. You just have to be willing to try.

PS. This post was inspired by a future student of mine who emailed specifically to ask if my class is even worth attending because she is left-handed. My heart, oh fellow comrades in crafting, literally broke.

Posted on Leave a comment

My Scrap Mat Formula

Every few years my yarn stash gets “a little out of hand”.

Seriously, though. This is pretty much my entire stash. I bag by colour, not fibre content.

I know that phrase is often used as a dramatic understatement by someone whose yarn treasure could feed a dragon and its extended family for a long weekend, but for me, a few cubbies of half balls and random impulse buys is usually enough to set me on the path to a stash busting event.

I’ve been sensitive to any real build-up of yarn scraps ever since we had a clothes moths infestation a few decades ago. (thank you, rolled-up, hand-me-down rug we didn’t realise was covered in moth eggs until it was way too late)

And so, now, when it all gets a bit too mountainous in my studio, I sit on the floor and sort my odd balls and left-over bits into colour-themed hills.

I grade colour piles from “lots” to “not that much yarn, really”, and I get to work making a floor mat.

I find the process of crocheting with BIG yarn and a BIG hook, and the heave-ho that comes with a heavy, growing mass of fabric like this, to be very therapeutic. It’s exercise for my arms and shoulders, it’s a dopamine hit for my head, and it feels like “tidying” even as I’m just doing my favourite thing.

In the grand tradition of my mother’s colour rules, often I’ll eschew gradients or anything that’s overly harmonious. In this house, we like a colour clash. We invite in the orange and the pink and the lime green. We add navy and black and brown with no regard for colour theory. We put the weird green beside the other weird green.

“Dash it all!” I say, colour rules are made to be broken!

Originally, this one only went out to the edge of the red stripe, but it looked so much like a blind, infected eyeball and I HAD to add more stripes!

This is my most harmonious-coloured one and it’s also my oldest. It follows the fewest of my rules – but I love it anyway.

But, soberly… there are some other guidelines that don’t brook breaking;

First: I choose the two biggest colour-themed piles, and I hold on to one of them for the mat’s border. When we get that far out from the sun, it takes so much yarn to make one full round that you’ll need miles and mountains of fluff to make any sort of an impact. And I like a mat with a decent border. It’s art. It deserves a frame.

    The big pile that I keep close at hand gets used right away. I hold a strand or two from that pile at all times as I crochet. This ensures a cohesive colour element remains in play and gives the finished product an intentional look.

    This one – my latest – is a good example of the use of consistent colour throughout. Maroon is included in every single stitch up to the border, and that makes every other colour feel more at home.

    Second: Another important thing to remember is that fiber content matters. You do not want all your feltable wool residing in one big stripe and the rest of the mat made out of acrylic and cotton. The first time you accidentally wash it at 30 degrees, you’ll end up with a bunched up felted section that adds ridges and valleys to your mat that you will end up fighting against until the end of time.

      I speak from experience, folks. It’s no es bueno.

      Ask me how I know uneven felting can be a huge problem. Go on. I dare you.

      Instead, I ensure I have at least 20% or so wool running through the entire thing, and then I bulk that up with cottons, acrylics and whatever randos I have close by. Variation in feltable fibre content is fine, but I wouldn’t wiggle too far in one direction or the other.

      Then, I locate my trusty mat hook (a 9 mm wonder) and I start.

      That’s an M/13 for those of you in the US and a 00 for crocheters in Canada and the UK.
      Basically, if this thing was wooden, Buffy could use it as a vampire stake.

      In this case, I had one of those massive bumper balls of Aran-weight yarn that’s about 25% wool. It’s not good quality, but it is a nice maroon, so to start, I held that triple-stranded and gathered up a couple of strands of fingering weight yarn. That remained the thinkness I maintained throughout. About 3-4 Aran’s worth, or in technical terms aabout 4 wraps per inch.

      The notion is that every time one yarn ball runs out, I add another, and work my way through my busted stash until I’m done.

      I replace a DK with a few strands of fingering weight. Two DK strands can replace an Aran, or vice versa. Introducing a chunky yarn means I’ll have to drop a couple of Arans or a whole heap of 4-ply. You get the idea. I just keep building and using yarns as necessary to keep the stitches squishy and thick.

      The accepted rule for making a flat circle with UK double crochet stitches is to do 6 sts on the first round and to add 6 stitches evenly every round thereafter. So, first round is 6, second round is 12, third is 18, 24, 30, 36, etc., etc., etc. But, I think we all know if you follow that to the letter, you don’t end up with a circle, you end up with a hexagon.

      There’s the added complication that holding multiple strands at once will mean that the stitches in one round won’t be the same gauge as the stitches in the next. It’s important to try and keep it consistent, but alas, despite your best efforts you’ll still find that chunky boys on one round will inevitably give way to slimmer lads on the next. Lumpy stitches happen.

      So, 6 extra stitches per row simply does not compute in the real world.

      Instead, here is my pattern (of sorts):

      I start with 7 stitches, and I increase my stitch count evenly by seven for the first 6 rounds.
      So, 7, 14, 21, 28, 35, 42… (Essentially, I do 7 rounds-worth of increasing in the span of 6 rounds.)

      Then, for a round or two, I do no increases at all.

      This ebb and flow of tension in the increases means that I’m never UNDER the number of stitches I need – having slightly too few stitches is way worse than having slightly too many – and it ensures I can always pull back with a blank, no-increase round if things get a teeny bit out of hand.

      After every set of increase rounds (and their accompanying blank rounds) I tend to shift where I place my increases, too. That way, each set of increase rounds have their points off-set from the last, making for a more uniform circle.

      Eventually, when I begin to run out of balls that can span an entire circle (or when my theme colour starts to run out), I’ll switch entiely to that big pile of yarn I put aside at the start. Adding a few rounds of that sees my border complete.

      All there is then is to give it a gentle, cold wash to block and settle it all down, and then I plop it on the floor somewhere warm, reshape it and let it dry off entirely. (If you have wooden floors like I do, make sure you flip your wet mat and change its location while it dries, so you don’t damage your floor)

      My mats have been used for years and years to teach our dogs to sit politely, and once they understand what to do, we’ve flung the mats into our van to bring with us on doggy adventures to give them a familiar “den” wherever they go.

      Rosie, waiting for some broccoli. No kidding. She loved veggies.
      Henry, visiting us from
      my parent’s house.
      Korra, helping to flatten the lumps and bumps on the edge of the wonky mat.

      These mats have been used in the garden for my niece and nephew to picnic and play on, they’ve kept my feet warm when I cook in our cold, winter kitchen, too. They also add a personal touch and brighten up any room.

      Making them is a massive mood booster for me. The repetitive nature is soothing, and it feels like a useful thing to do when I’m worried about something else.

      This latest one, for instance, has helped me process the idea of welcoming a new rescue dog into our home.

      Vacancy: One dog buddy, please.

      I don’t know who that dog will be, but I can bet – much like Rosie and Henry and Korra before them – our new pup will enjoy snoozing and playing (and, let’s face it, probably piddling) on my crochet mats just as much as they did.

      And that, I think, is the best possible way to use up left-over yarn.


      Products by Category

      Posted on Leave a comment

      Testers Needed for Bríd

      Just a short note to spread the word, folks.

      I have finally written the pattern for my new (old?) shawl, Bríd.

      She is a circular shawl with a hole in the centre and a swirling vortex of segments all the way around. The segments and their curve add movement and drape, and the gently chevroned colour work at the edge is inspired by the tilt and contrast of bird feathers.

      Bríd can be worn multiple ways.

      For a full circle, you’ll need 520 m / 570 yards of your Main Colour (I have used Ériu Elements Luxury Irish Wool #1061 Ceremony) and 170 m / 186 yards for your Contrast Colour (#1053 Selkie)

      And you’ll need a 6 mm, regular length crochet hook. As with all my patterns, a long, Tunisian-specific hook isn’t needed, but avoid using a hook with an ergonomic handle.

      The main reason I’m keen to test this shawl is that, even though it is quite a simple shawl to make, the directions have to hop between traditional crochet terminology, to my lovely linked stitch nomenclature, then to regular Tunisian crochet terms to complete each segment.

      It’s the only way I can see to keep the pattern from becoming a million pages long. (That’s a slight exaggeration, but I am looking to ensure it’s efficient and doesn’t ramble)

      I think I just need the reassurance of a few testers to tell me it’s navigable, you know?

      If you’re interested in testing her, please comment below. I’ll reply with an affirmative if you’re in the pot.


      Top rated products

      No results found

      You can try clearing any filters or head to our store’s home

      Posted on 6 Comments

      The student that almost made me quit teaching crochet

      I’ve been teaching sundry traditional crafts classes for a good two decades now, and I pride myself on my patience, gentle encouragement and my ability to help struggling crafters improve at their own pace. I’m happy to repeat, I don’t show impatience, I centre joy and try to teach a love of the craft alongside the necessary skills to succeed.

      In fact, up until I met this one student – let’s call her Mary – I actively described myself as a teacher who never left a student behind.

      Thanks to Mary, I don’t make that claim anymore.

      Now, before you judge me for making fun of a struggling student, hear me out. Stick with me. I promise it’s worth it.

      Here’s how it went down.

      Mary’s adult daughter contacted me, asking if her, her sister and their mother could book me for a family crochet class. I love working with related students. The dynamic is always brilliant. There are family jokes, a little teasing, well-worn stories to tell, and a comfort between people that you just don’t get at a table full of strangers, so I said yes, I’d love to.

      They arrived at my studio, and for the first little while, all seemed normal. They were all beginners, so they all struggled with holding the hook, with managing their yarn, with making chains. But while the two sisters worked and progressed steadily, their mother didn’t.

      Now, being as I never let a willing student flounder, I focussed on Mary.

      Mary would wrap the yarn around the hook multiple times, and make a tangled, gnarling knot.
      I’d remind her she only has to wrap it once.
      After I undid the muddle and handed the hook and yarn back, Mary would wrap it multiple times again.

      After we’d done that dance for a while, Mary would pull the loops off the hook without wrapping at all, yanking the yarn in the process, thus losing all her stitches.
      I’d re-do the lost stitches so she had something to hold, I’d explain the single step I wanted her to take, then she’d do the same thing again.

      Meanwhile, the sisters had their own questions, and understandably, they were getting annoyed with me for not managing my time between them all. They wanted to progress, to increase, decrease, figure out why their edges looked a bit wonky. All good, solid beginner stuff they had an absolute right to learn in a first class. But the fact was, every time I turned my eyes from Mary, I’d hear “Oh…”, turn back, and something new and tragic would have happened to her crochet.

      Mary worried.

      Mary blamed herself.

      Mary’s daughters kept saying that she wasn’t good at this at all. Their impatience with their mother, and with me, was obvious.

      I comforted and reset Mary over and over.

      But despite using all my tricks, all my experience, every time I blinked, Mary made a mess.

      There was simply no escaping Mary.

      It was an hour and a half of this, folks. Ninety interminable minutes of “Not like that, Mary, like this,” “Do you remember what we said about the yarn over?”, “your hook needs to go in there, Mary.”

      Now, I know some of you are thinking “Poor Mary sounds like she’s got a cognitive issue.” I thought the same. I’ve taught many elderly people over the years, I’ve taught quite a few of them with memory issues, with dexterity issues, with signs of dementia. Usually a carer tells me in advance so I’m prepared. Usually, a carer won’t be impatient to learn much themselves if the focus is on their charge. As far as I’m concerned, progress looks different for different people, and for people in mental decline, I see progress as them being present at a class; anything else is a bonus.

      In this case, I got no volunteered info on Mary, so I soldiered on. I was all manner of patient, gentle, repetitive with Mary. If Mary wanted to learn, I was gonna teach her.

      It wasn’t until the end of class – as they were leaving – that the sister who booked me said to me “I don’t think this is gonna work out.”

      Reluctantly, I had to agree. I felt crest-fallen, though. I’d let them down. I’d taken three aspiring crocheters and in my care they’d chosen to quit. That broke my heart, it really did. I’d become the “bad teacher” I heard about so often from students who’d been told by less skilled tutors that they just didn’t have the talent to crochet. I hate the idea that someone would be dismissed like that, and yet, here I was admitting defeat with poor Mary.

      Then I heard the other sister out at the car – in a very loud voice – tell her mother that she “PROBABLY SHOULD HAVE TURNED HER HEARING AID ON”.

      Lads. Folks. Mesdames et Messieurs. My soul left earth for a moment while I digested this.

      The sister who I was speaking to shrugged and told me. “She likes to save the battery”.

      What the ever-living, actual fluff!

      MARY HADN’T HEARD A SINGLE BLESSED WORD I’D SAID. And…aaaand. The daughters knew she wasn’t able to hear, either.

      I could have cried.

      But, I am nothing if not a crafting optimist. They may have learnt next to nothing from that ninety minute madness, but I can say for certain, I surely did.

      I still promote myself as a teacher who never leaves a student behind, but I add an important caveat – MARY, TURN YOUR HEARING AID ON!


      Top rated products

      No results found

      You can try clearing any filters or head to our store’s home