Posted on Leave a comment

Quick and Cozy Makes for Autumn

Autumn in Ireland is a mad awl caper.
Yesterday it was 22 degrees and the sun was splitting the rocks. Today, we’ve got hail stones clattering against the skylight with a wild fury.

This time of the year, I find, is the hardest to dress for. There’s a saying in Ireland. “If you don’t like the weather here, wait five minutes!”

So, the solution inevitably becomes a question of layers:
Bring a hat you can take off if the sun god decides to return with a vengence. But don’t forget your shawl in case the north winds whip up a squall and send you shivering for shelter!

These are my 4 favourite patterns for “crazy weather crochet”.

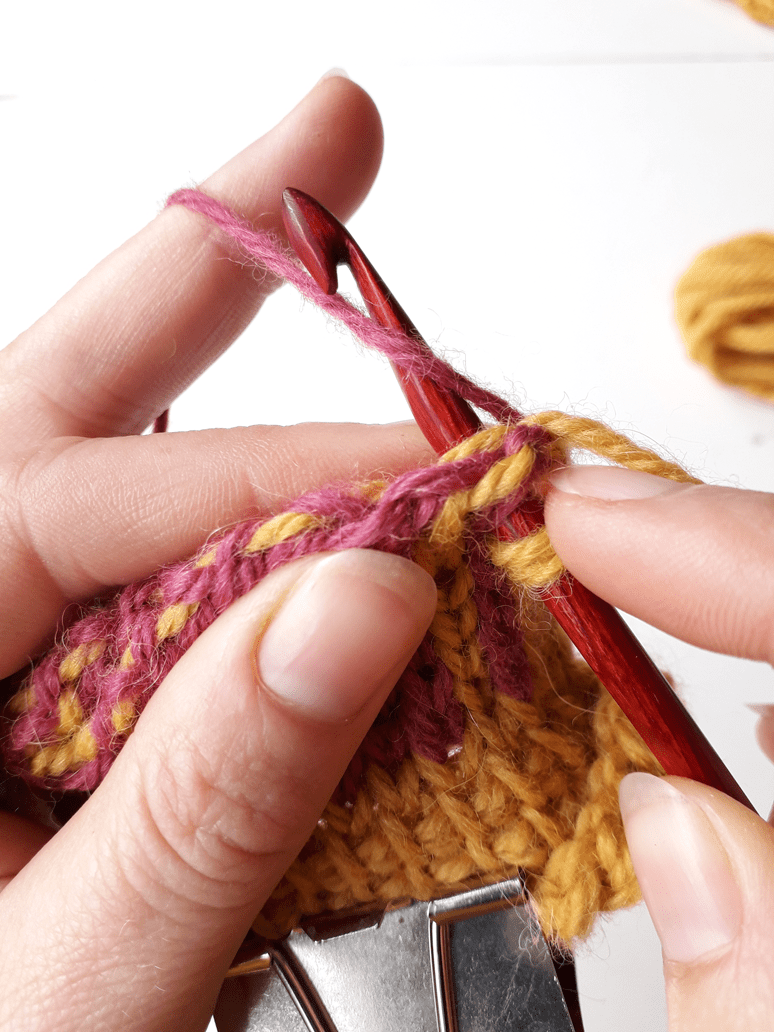
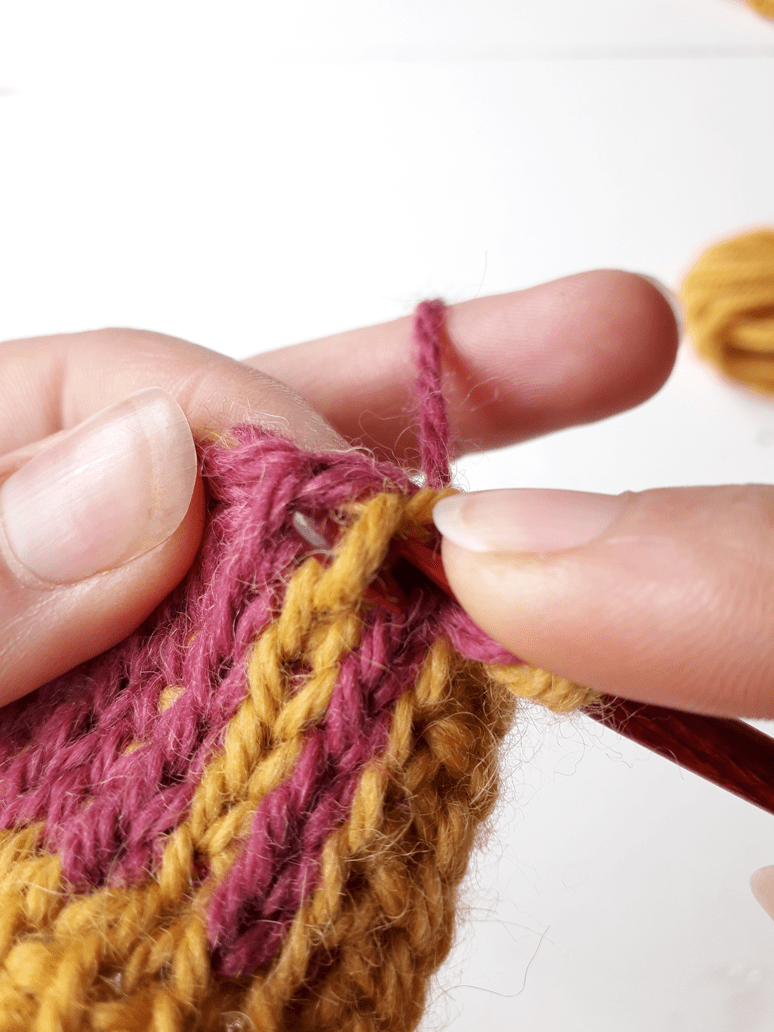
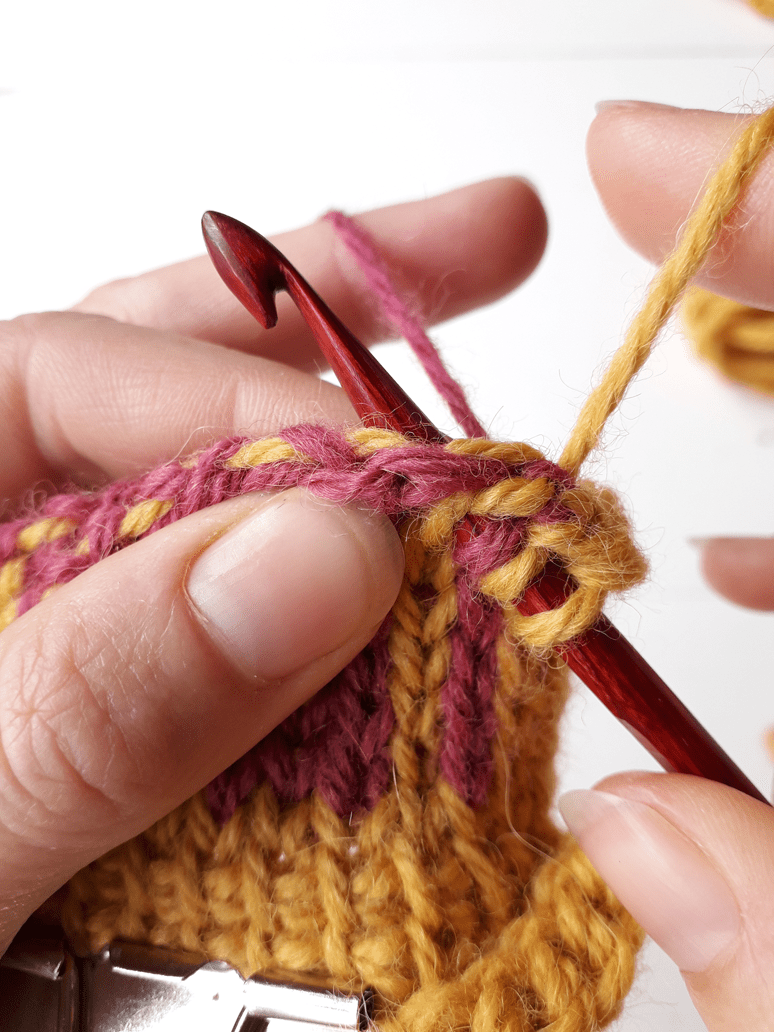
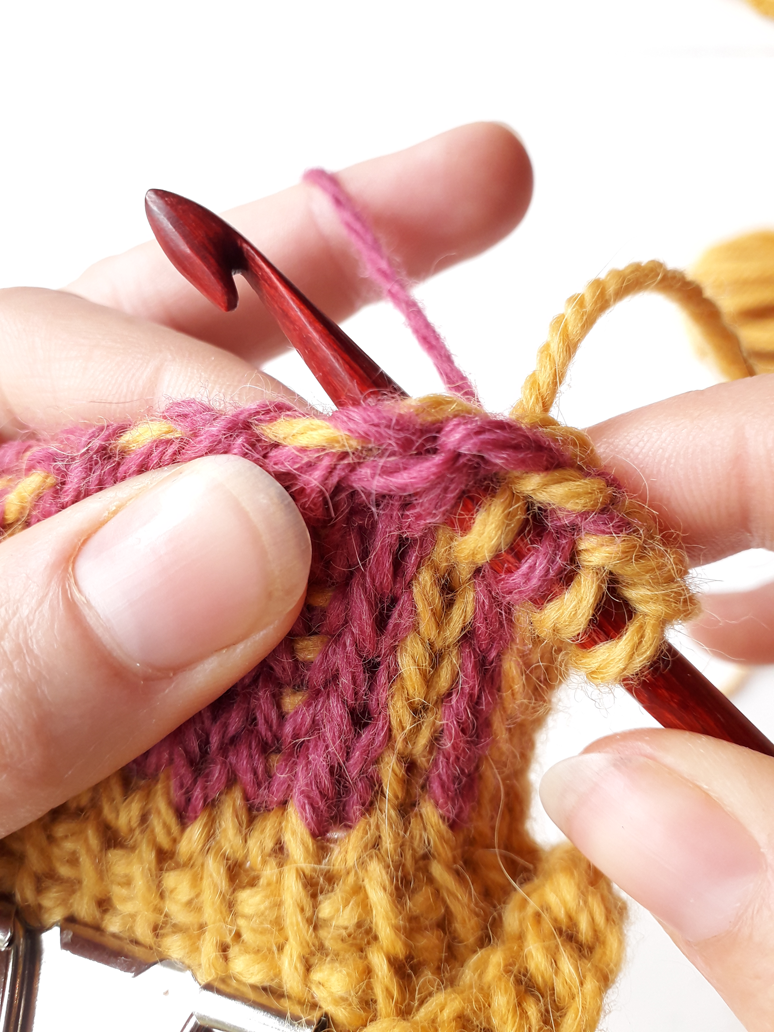
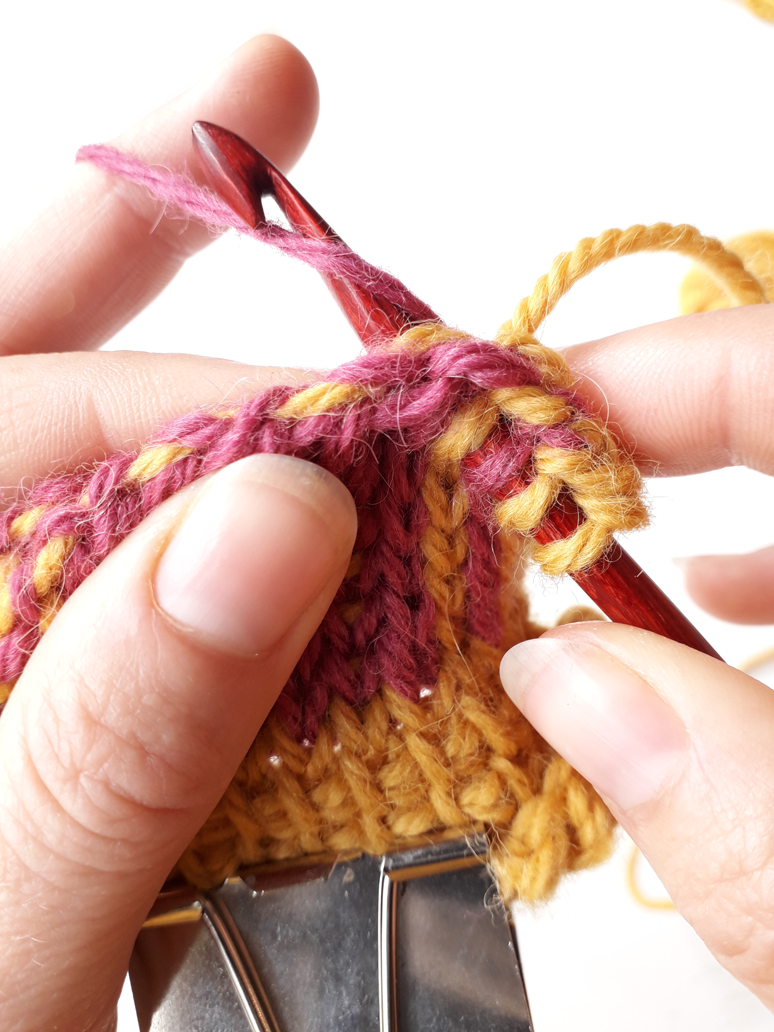
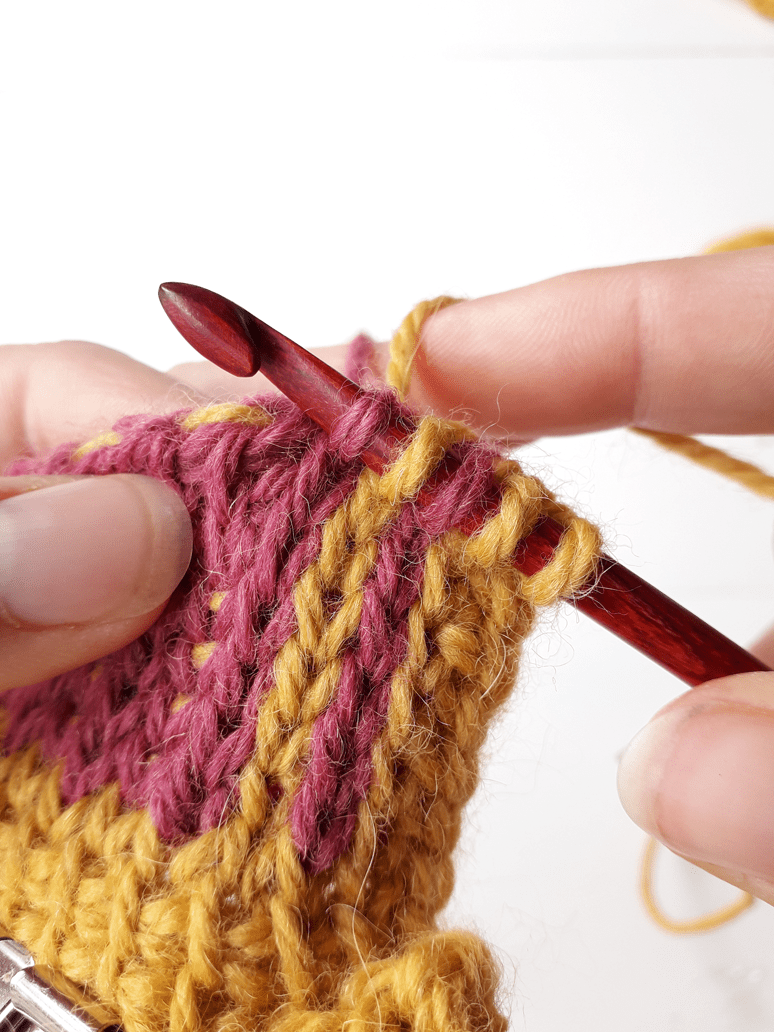
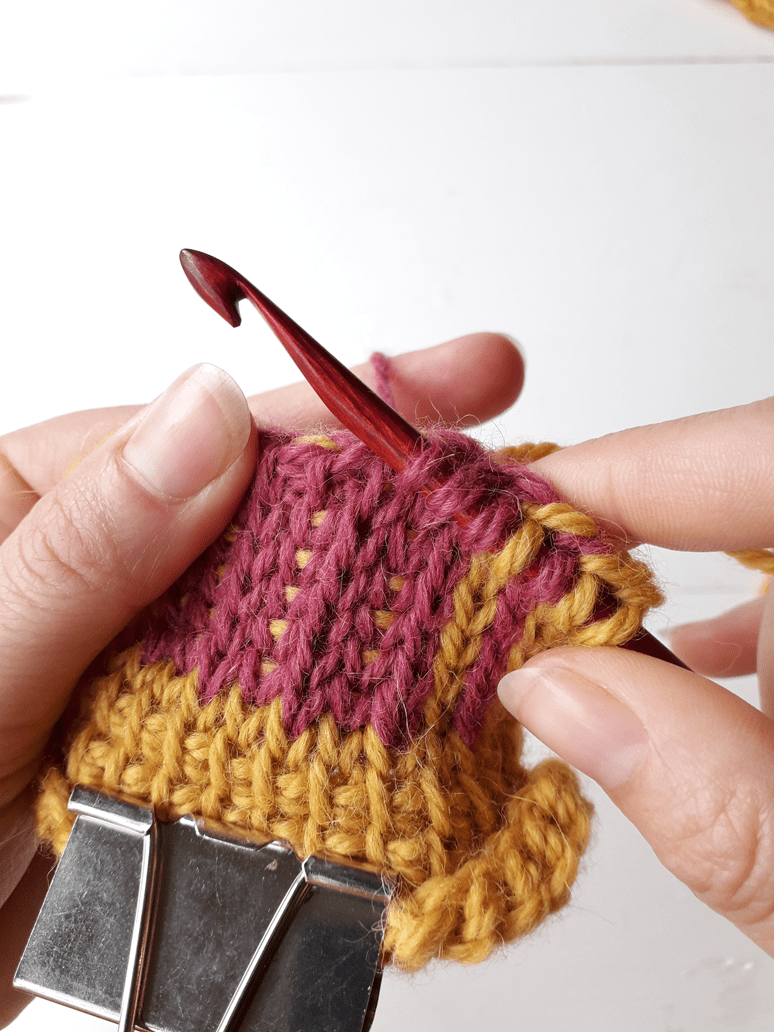
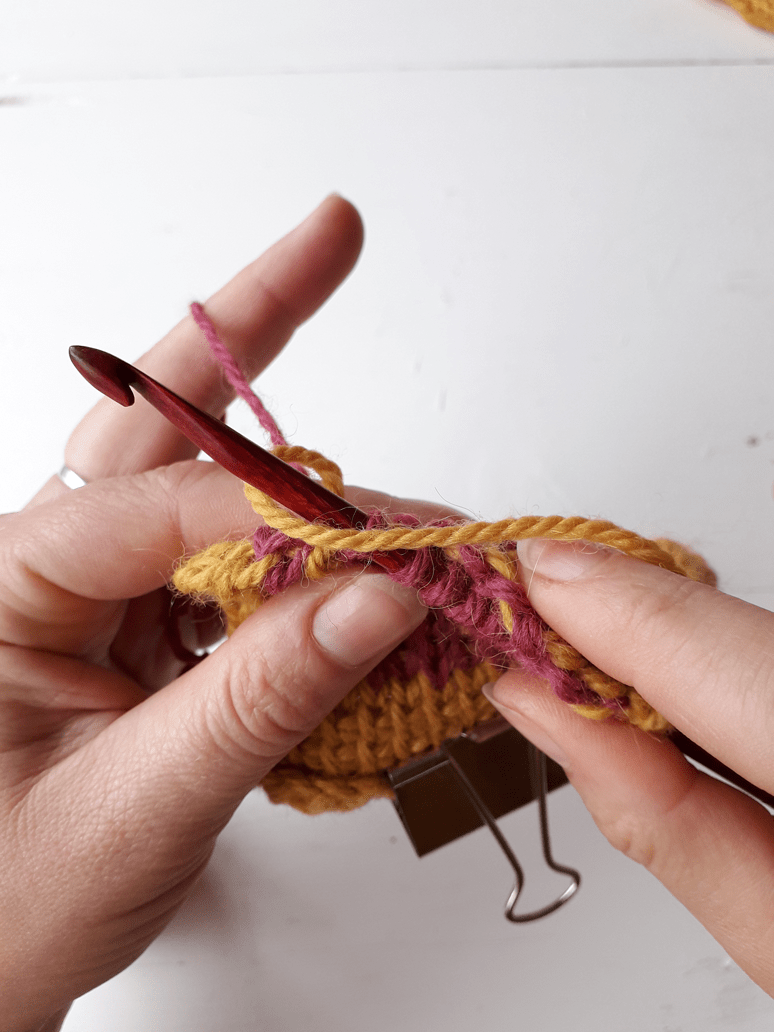
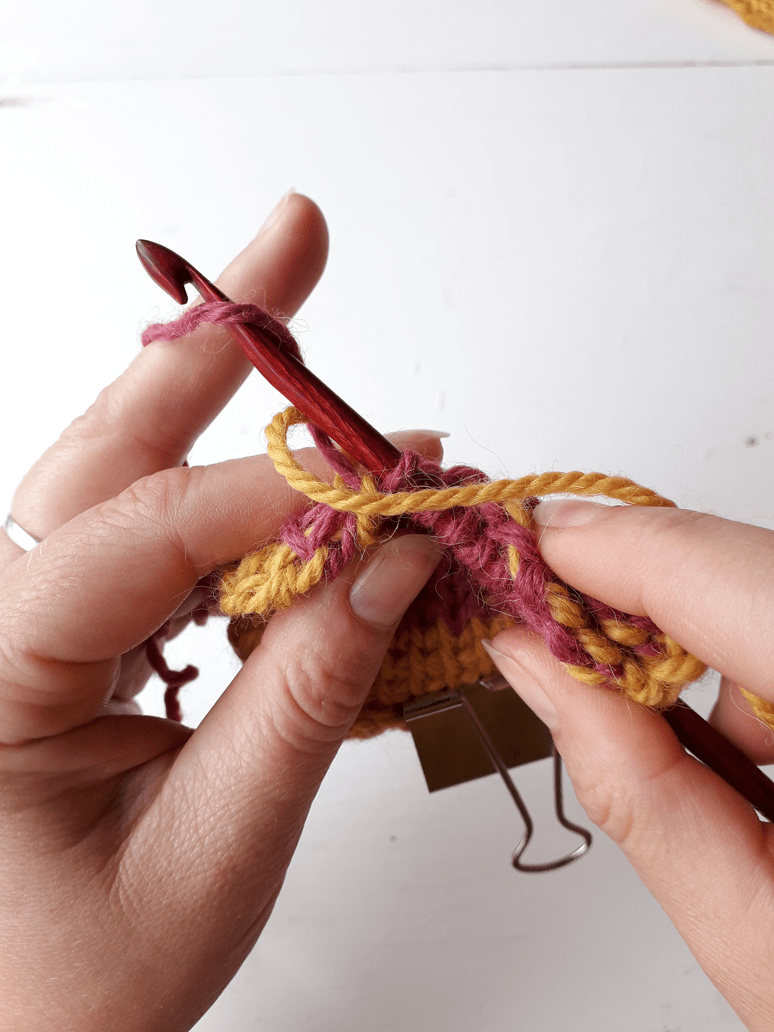
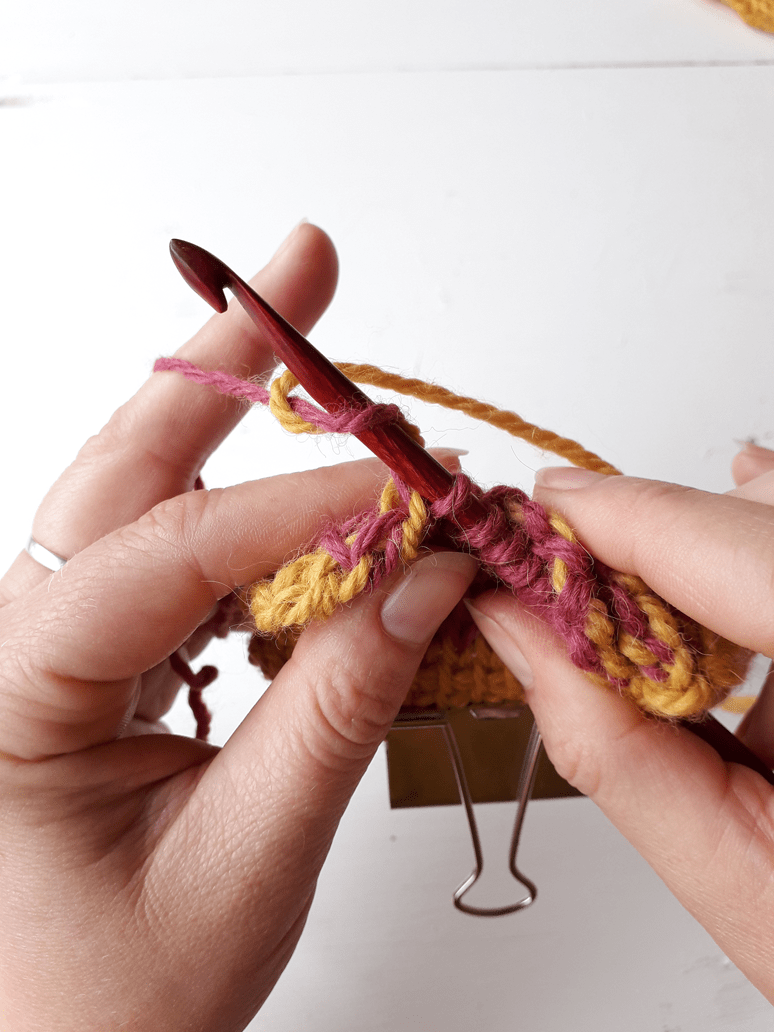
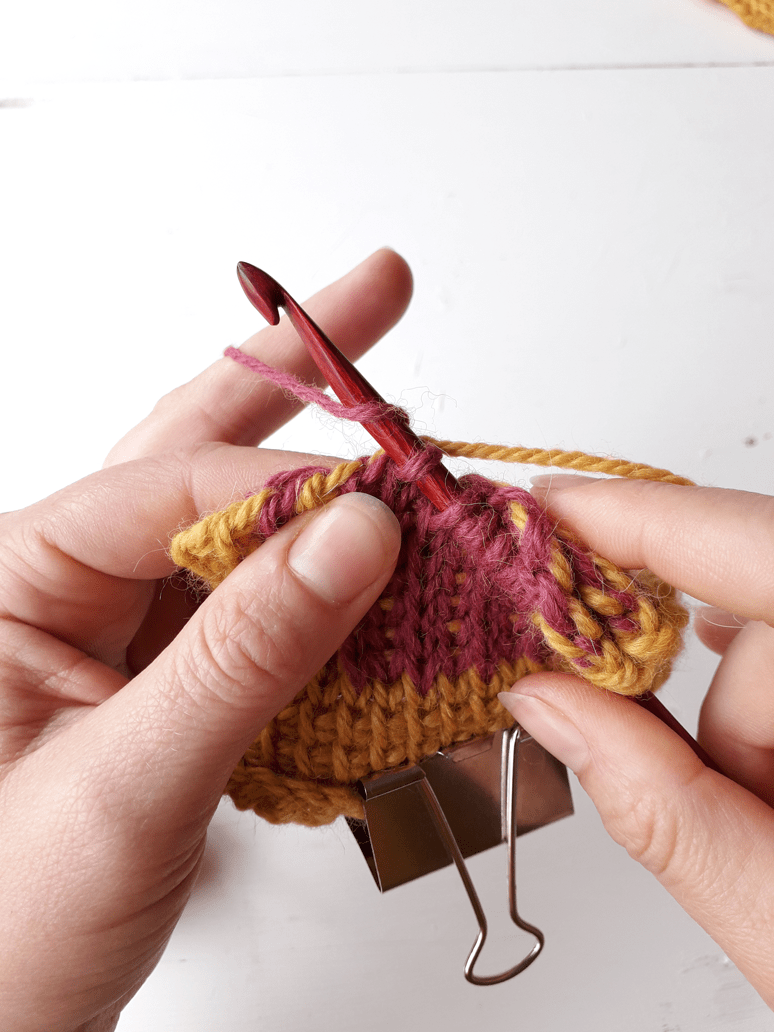
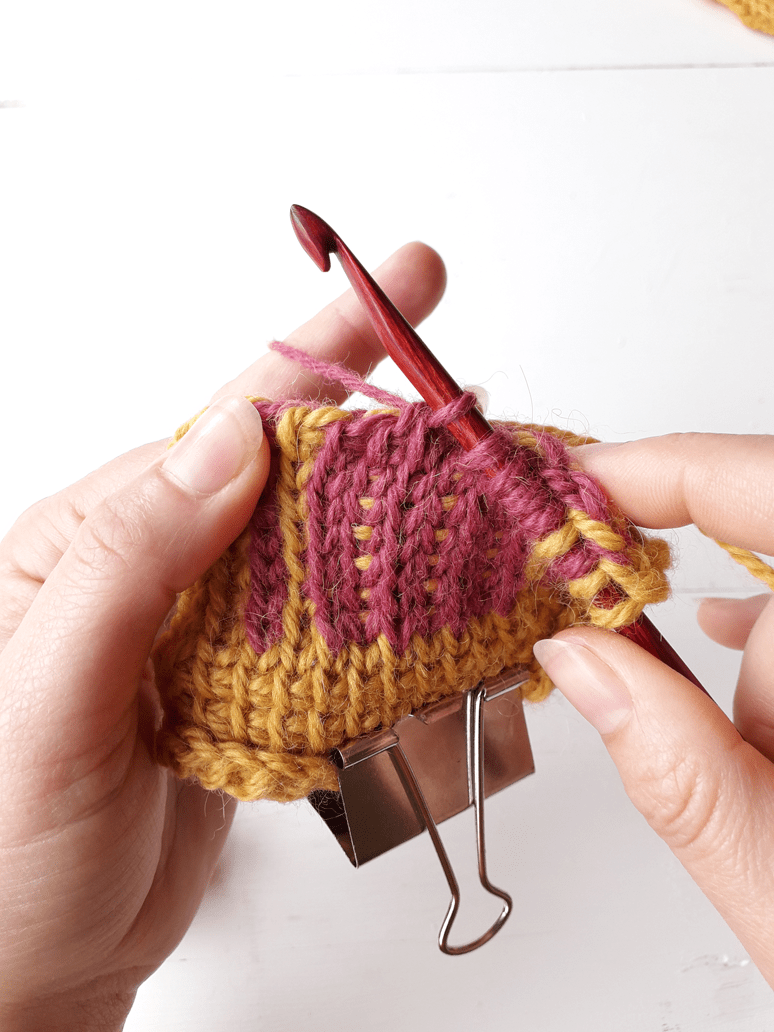
Sunny Hat (below left) is an elegant blend of a knitted garter stitch band and segments of Tunisian Simple Stitch.
Added bonus, you’ll find a crochet version of the knitted band here, if you’re not feeling knitterly inclined.
Use Dusty Dimples Dusty Sock yarn in colourway “Foxy” to get that gorgeous golden glow.

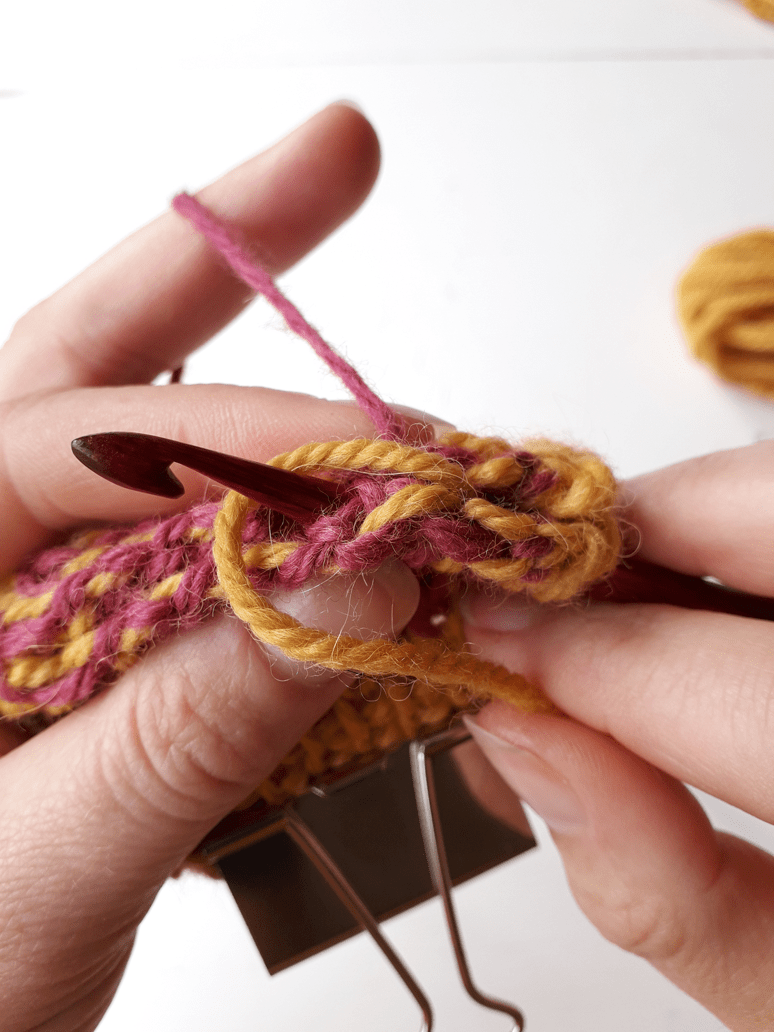
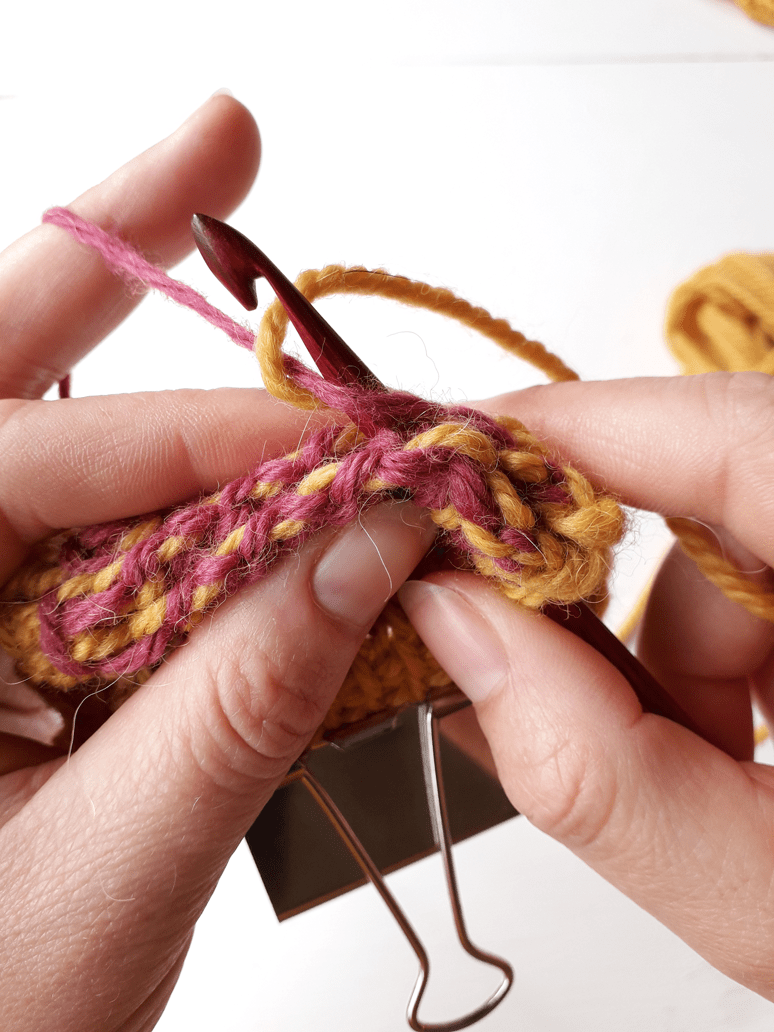
Red Currant Shawl (above right) uses Tunisian Knit Stitch and a 4.5 mm hook as a starting point, then the fun begins with a mosaic of interlocking Simple Stitch squares. You can use a variety of hook sizes on this one to add extra depth and drape to the finished product.
Mine is made with a firm favourite of mine, Fyberspates Scrumptious 4-ply.

Lop Top (below left) is the odd one out in this bunch – it uses ALL traditional crochet techniques. Yes! This autumnal tee is made using Back Loop and Front Loop single crochet stitches.
I made mine with Twilley’s Of Stamford DK yarn.

And Morrigan (above right) is my absolute hero whenever there’s a sudden outbreak of bad weather.
Made with a lace weight wool, it’s light and portable, but it packs a punch nevertheless.

Make this one with Cushendale Lace yarn for some added ruggedness. Morrigan is the outer layer you’ll never leave home without.

Posted on 2 Comments

Duplicate Stitch / Swiss Darning


So, there you are, humming along, row after glorious row of Tunisian Crochet colourwork tumbling off your hook, and you pause for a moment to admire your progress.
And that’s when you notice it.

“Oh god. I have a stitch out of place”.

Worse still, it didn’t just happen. It was the result of a momentary lapse in concentration two days ago! ack!

And you’re left with an unenviable question; “Do I frog, or do I live with it?”
Neither option is very satisfying is it?

But luckily, my Mam taught me a third option when I was barely old enough to hold a pair of knitting needles. She called it “Swiss Darning”, which I think sounds elegant and fancy. I’ve heard it more commonly called “Duplicate stitch” these days, which has the virtue of being clear and descriptive.
Whatever you chose to call it, trust me, you’ll be singing its praises.

Here’s how it works:


Examine your fabric and identify the problem
There should be white horizontal stitches to the left, and the white lines to the right should be one stitch shorter.

Thread a blunt needle (a bodkin) with a strand of the yarn you’re using.
Pro Tip: If you can’t find a blunt needle, use a regular sharp darning needle and sew backwards with it. Be careful not to jab yourself, though!

In this case, I’m using Drops Flora in Denim Blue.

Getting Started

Secure your yarn at the back of your work. This will save you from accidentally sewing through your tail and making a mess of the wrong side of your fabric.

Bring bodkin to front of work at base of the stitch you wish to hide. Pull yarn through to front.
Push bodkin under next stitch up. Make sure bodkin passes cleanly thorugh BOTH strands of the stitch.
Draw yarn through stitch. Half of the white stitch is now hidden.
Clever, huh?
Push bodkin back though the base of the white stitch.
Pull yarn to back of work. Hey presto!


I repeated the process on the next two horizontal lines above, and then I got to fixing the missing white stitches on the left side of the work, too.

Bring bodkin to front of work at base of the stitch you wish to hide. Pull yarn through to front.
Push bodkin under next stitch up. Make sure bodkin passes cleanly thorugh BOTH strands of the stitch.
Draw yarn through stitch. Half of the blue stitch is now hidden.
Push bodkin back though the base of the blue stitch.
Pull yarn to back of work. And we have a white stitch where once there was a blue one!

Far better than all that frogging and cursing, am I right?

Oh, hey! And, this also works for knitting, too.
In fact, it was originally developed to add small colourowork detail to stocking stitch knitted fabric… so if you’re a knitter with basic skills, you’ve now learnt a fantastic way of sprucing up your knit stitches too!


Ogham is on sale right now.
Get your PRE-ORDER DISCOUNT NOW!

Posted on 4 Comments

Catching Floats in Tunisian Crochet Stranded Colourwork – Part 1


A note or two on this exercise:
1. Don’t be alarmed by the giant bull clip on the end of my fabric! It’s just there to counter this thick fabric’s tendency to curl.
2. The middle (Yellow) block of colour is where we will be catching floats.
3. I started with 15 chains and worked a few rows of 13 TSS before I got stuck into the stranded colourwork TKS section

In this example I have worked a few individual stitches before we get to the float-catching section of the exercise.
These are worked using alternating yarns like so:

A. Insert hook TKS-wise into 1st st, Yarn Over with Main Colour (MC) and pull loop through onto hook – 2 loops on hook.

snuggle hook under bar
push out to back of fabric
yarn over with Main Colour & pull yarn through fabric

B. Insert hook TKS-wise into 2nd st, Yarn Over with Contrast Colour (CC) and pull loop through onto hook – 3 loops on hook.

snuggle hook under bar
push out to back of fabric
yarn over with Contrast Colour (CC) & pull yarn through fabric

C. Insert hook TKS-wise into 3rd st, Yarn Over with MC and pull loop through onto hook – 4 loops on hook.

snuggle hook under bar
push out to back of fabric
Yarn Over with MC & pull yarn through fabric

Here’s the lay of the land right now:

Exercise 1 – Catching Contrast Colour Floats on the Forward Pass.

Are you ready?

We will be crocheting with MC and “catching” the CC yarn as a “float”.
The resulting stitch will be MC (yellow) but the back of the st will have the strand of CC (pink) running through it.

insert hook TKS-wise into next stitch
Yarn Over with CC
Yarn Over with MC
return CC to back of fabric
draw MC through fabric

The next MC st along can be completed as usual.

insert hook TKS-wise into next stitch
Yarn Over with MC
Draw Yarn Over through fabric

There is no need to catch a float with every single stitch.
Usually, I just catch every even-numbered stitch in a block of colour. You may choose to do it less frequently if you prefer, but if you are making mittens, I recommend you catch your floats pretty frequently so they don’t snag on wiggly fingers or chipped nails.

Once you’ve worked across the colour block, continue by working a TKS with CC, a TKS with MC and draw up a final loop in chain with MC.
Your hook will look like this:


Exercise 2 – Catching Main Colour Floats on the Return Pass.

To begin, work the following:
With MC, YO and draw yarn through 1 loop, YO and draw loop through 2 loops.
With CC, YO and draw yarn through 2 loops.
With MC, YO and draw yarn through 2 loops.

That’ll get us here:

Now, luckily, the Return Pass floats are caught with the exact same motions as the Forward Pass floats.
Let’s go through it visually:

Yarn over with CC
With CC still on hook,
Yarn Over with MC
return CC to back of fabric, and then draw CC through 2 loops

The next stitch is worked as normal:

Yarn Over hook
Draw Yarn Over through two loops

Again, as with the Forward Pass, you don’t need to do this every single stitch, but I recommend you at least do it every few stitches. I catch my return pass floats every second stitch when I’m working mittens.

From this point on, the rule is as follows: Yarn Over with the colour that is displayed SECOND from the hook.
In the case of the photo below, the next Yarn Over would be CC (Pink):

When complete, this is what the Right Side will look like:

As for the Wrong Side?
Aaah, look at all those lovely caught floats!


Ogham is on sale right now.
Get your PRE-ORDER DISCOUNT NOW!

Posted on Leave a comment

Catching Floats in Tunisian Crochet Stranded Colourwork – Part 2

A note or two on this exercise:

  1. Don’t be alarmed by the giant bull clip on the end of my fabric! It’s just there to counter this thick fabric’s tendency to curl.
  2. The middle (Pink) block of colour is where we will be catching floats.
  3. I started with 15 chains and worked a few rows of 13 TSS before I got stuck into the stranded colourwork TKS section

A. Insert hook TKS-wise into 1st st, Yarn Over with Main Colour (MC) and pull loop through onto hook – 2 loops on hook.

snuggle hook under bar
push out to back of fabric
yarn over with Main Colour & pull yarn through fabric

B. Insert hook TKS-wise into 2nd st, Yarn Over with Contrast Colour (CC) and pull loop through onto hook – 3 loops on hook.

snuggle hook under bar
push out to back of fabric
yarn over with Contrast Colour (CC) & pull yarn through fabric

C. Insert hook TKS-wise into 3rd st, Yarn Over with MC and pull loop through onto hook – 4 loops on hook.

snuggle hook under bar
push out to back of fabric
yarn over with MC & pull yarn through

D. Insert hook TKS-wise into 4th st, Yarn Over with CC and pull loop through onto hook – 5 loops on hook.

snuggle hook under bar
push out to back of fabric
yarn over with CC & pull yarn through

Here’s the lay of the land right now:

from right to left:
Loop on hook at the beginning (Main Colour), TKS (MC), TKS (Contrast Colour), TKS (MC), TKS (CC)

Exercise 1 – Catching Main Colour Floats on the Forward Pass.

This is where it gets fun!

We will be crocheting with CC and “catching” the MC yarn as a “float”.
The resulting stitch will be CC (pink) but the back of the st will have the strand of MC (yellow) running through it.

insert hook as for TKS (see above)
bring MC to front of fabric
Yarn Over with CC
return MC to back of fabric
add a little tension to MC and then draw CC through fabric

The next CC st along can be completed as usual.

insert hook TKS-wise into next stitch, and Yarn Over with CC
draw Yarn Over through fabric

There is no need to catch a float with every single stitch.
Usually, I just catch every even-numbered stitch in a block of colour. You may choose to do it less frequently if you prefer, but if you are making mittens, I recommend you catch your floats pretty frequently so they don’t snag on wiggly fingers or chipped nails.

Once you’ve worked across the colour block your hook will look like this:

the little blips of yellow you can see through the pink stitches are the floats I have caught. They are really only visible here because I have used a slightly bigger hook than recommended for this yarn so you can see clearly what I’m doing. Those blips are far less visible when you’re working with the correct hook size for your tension.

Working the end of the row will leave us with this layout on our hook:


Exercise 2 – Catching Main Colour Floats on the Return Pass.

To begin, work the following:
With MC, YO and draw yarn through 1 loop, YO and draw loop through 2 sts.
With CC, YO and draw yarn through 2 loops.
With MC, YO and draw yarn through 2 loops.
With CC, YO and draw yarn through 2 loops .

That’ll get us here:

Now, luckily, the Return Pass floats are caught with the exact same motions as the Forward Pass floats.
Let’s go through it visually:

bring MC to front of fabric
Yarn Over with CC
return MC to back of fabric, and then draw CC through 2 loops

The next stitch is worked as normal:

Yarn Over with CC
draw Yarn Over through 2 loops

Again, as with the Forward Pass, you don’t need to do this every single stitch, but I recommend you at least do it every few stitches. I catch my return pass floats every second stitch when I’m working mittens.

From this point on, the rule is as follows: Yarn Over with the colour that is displayed SECOND from the hook.
In the case of the photo below, the next Yarn Over would be MC (Yellow):

When complete, this is what the Right Side will look like:

As for the Wrong Side?
Aaah, look at all those lovely caught floats!


Ogham is on sale right now.
Get your PRE-ORDER DISCOUNT NOW!