Posted on 6 Comments

Of loss and love and renewal

We’re two weeks into the New Year already.

My new Brรญd.

And now that my new and improved Brรญd shawl sample is complete, it’s time to get cracking on Ard Rรญ.

Now, despite the gorgeous colours and stunning texture of Tara St 4-ply by Townhouse Yarns, I have found myself reluctant to get going.

Firstly, losing the original was a real blow. I loved that shawl. I loved that exact shawl. Not just the pattern, not just the look of it; the physical piece that existed in my universe.

Because you see, I have a lot of emotion wrapped up in that first Ard Ri.

Firstly, there’s joy. A lot of joy.

It was one half of a two-shawl collaboration with a wonderful knitwear designer named Julie Dubreux (she who Knits in Paris I’m certain you’re familiar.) We got together, decided to make two shawls – hers knit, mine crochet – using the same exact yarns and a similar starting point for inspiration. Julie was a wonder to work with. Encouraging and enthusiastic, open and creative. I started us off, she kept us going. I 100% love this lady. Top class human. No notes.

Left: Aoibhe Crochets in Meath. Right: Julie Knits in Paris.

So, whenever I took my Ard Ri out of my trunk during class I’d thank my collaboration with her for its inception.

Ard Rรญ also embodied pride in my work.

During each trunk show and each class I could 100% guarantee a gasp from my audience when I fourished its folds away. Like a stand-up comedian taking a sip of water, I knew to hold for a beat as it was examined by the sea of eyes in front of me. Comments abounded; it looked like it was covered in wine bottles (truly a pandemic design, then), it looked like an art deco background, a halo, something vaguely pharaonic when held upside-down. It was described as Afro-futuristic a few times, too.

And I – theatre kid that I am – lapped up the commentary.

But then, there’s also a lot of slower, sadder feelings residing in its fabric, too.

It was my first creation mid-pandemic. My first project started and completed while cooped up in my home, vulnerable and isolated, cloistered and forgotten while the world around me grew more and more dangerous to my unprotected, diabetic body. Every stitch included a little of the thought “this could be the last thing I design”. Maybe that’s why I made it so grand and enveloping and mighty. Maybe it was my shield.

And to top it all off, we’d only just lost our beautiful dog, Rosie. So, when Townhouse Yarns asked me name one of the colourways, I named the golden one “Rosie’s Gold” in her memory. It’s golden, like the flecks in her brown eyes, and it’s warmed by the blush of pink on her chin.

Rosie: Still profoundly missed every single day. What a beauty! (and those teef bubbles! <3)

I spoke to those original golden skeins and told them all about my lost dog, whispering into them as I wound them into cakes, and then I crocheted that grief straight into the fabric. I’m sure I’m not the only one who weaves memories of their life into their work. Intentional or no, I’m sure you do, too.

And maybe that’s why my Ard Ri re-make has been a tough project to start into; each stitch ahead of me on the road contains the loss of a beloved buddy, the fear of the first months of the pandemic, but also now, the loss of the original object holding on to all that emotion.

Perversely, this new one will also guard the newer grief at losing our second dog, Korra – no less dear than Rosie had been.

Our stunning Korra Bear. (Anyone wanna name a yarn colourway after her?)

Grief comes in threes, they say, and though there have been other losses and shocks and trials between Rosie and the Pandemic and Korra, no others are so connected to this pattern. So maybe that’s it for a while. Parhaps Ard Ri can now rest and let some other, newer shawl take care of the future.

And maybe as these new stitches describe an old, retrodden path, I can use it like a spell to wrap and bind and dance around these three griefs, and maybe the shawl that results will be a new sheild, tempered by what went before.

And maybe, as before, when I unfurl it in class, the fascination and glee it inspires will prove to be just the medicine my broken heart needs.

Ard Ri begun anew. A smile I wasn’t expecting.
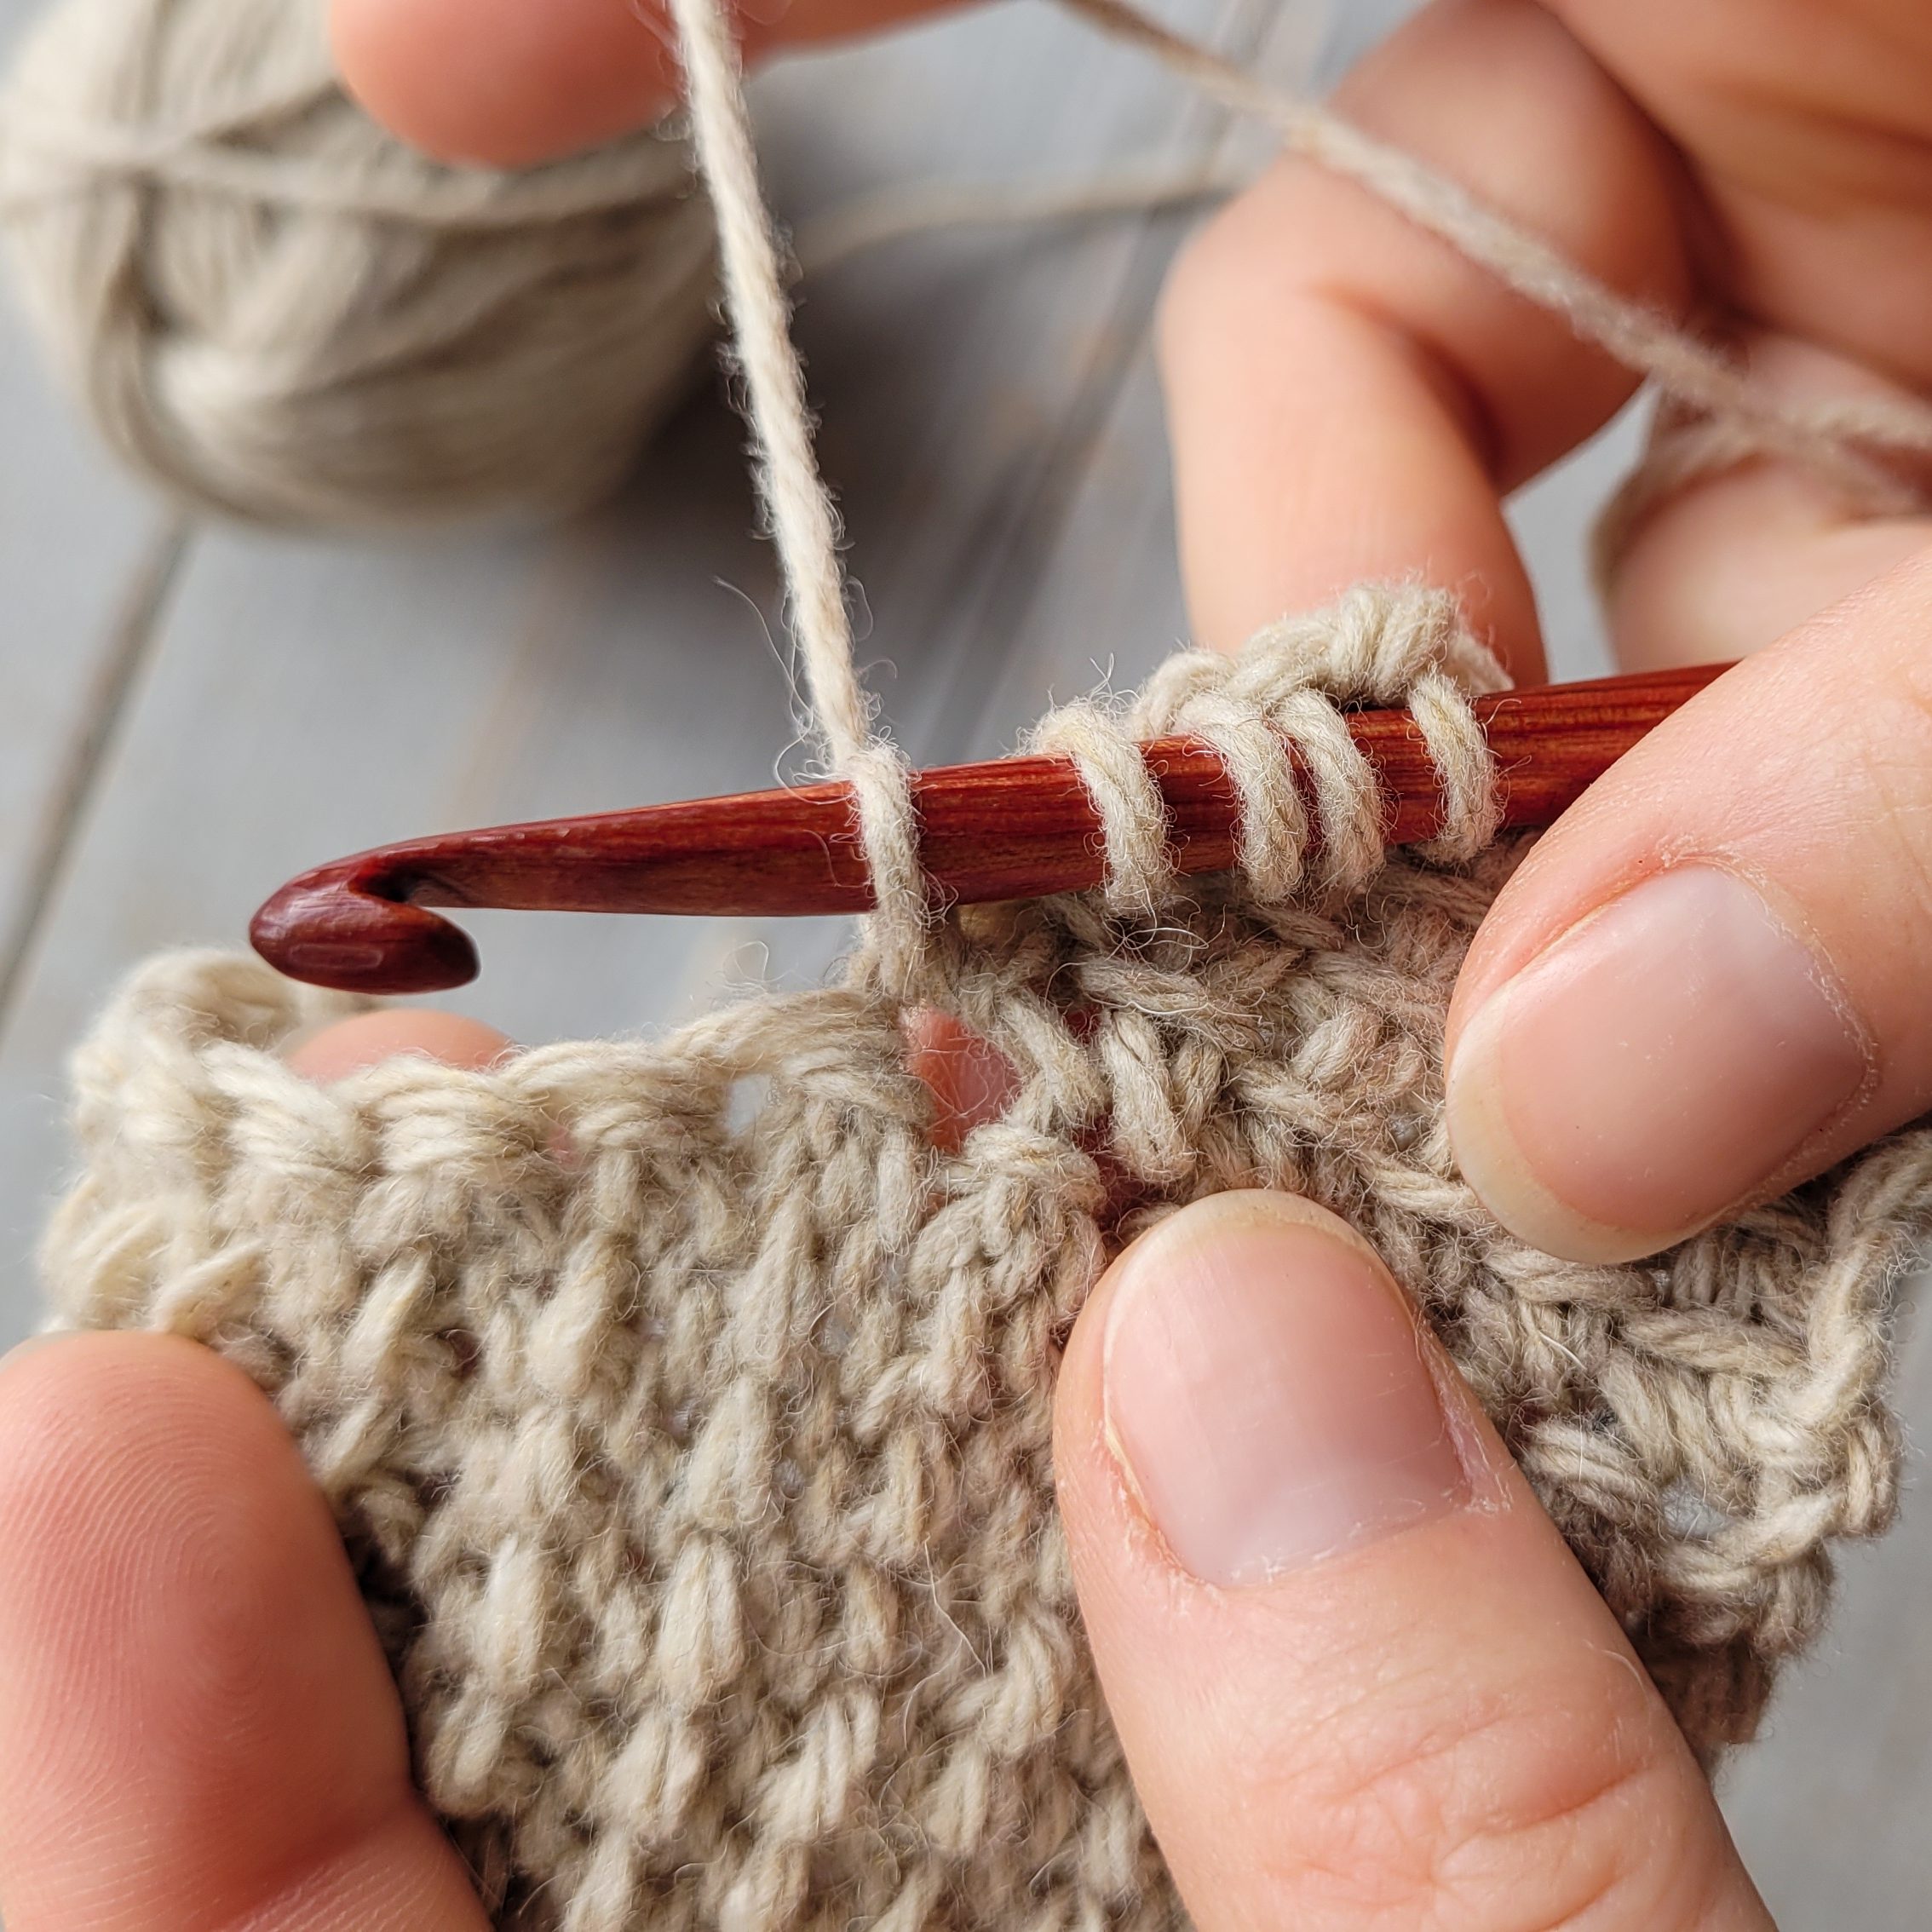
The ball on the right is the little bit I had left over from making the original. I used it for the first full row. A suitable first step on the journey, I think.


Top rated products

Posted on 2 Comments

Brรญd’s New Day

The holidays were busy here at Yarn Towers.

I managed to eat three Christmas dinners within the space of 24 hours – not unusual since I cook two of them, and refuse to miss my mother’s cooking on top of all that – but any snatches of time I had to spare were spent remaking my Brรญd shawl.

I know I said I was gonna take a break from it to work on Ard Rรญ, but honestly, the chugging along on Brรญd was remarkably soothing, and the regular repeats were something I could do a little of even after the longest day.

So, all through Solstice, and Christmas, and New Years I chipped away at it.

The sun, lowering on Solstice night
The first of three Christmas dinners
A beautiful tortoiseshell butterfly. Her timing was perfect. New Year, new life. (Don’t worry. She’s now back to hibernating happily in our coldest room)

Sometimes, I did three in one evening, sometimes I did one, but slowly and surely, she grew until I had a mass of fabric gathering on my lap, each new panel added more twisting and righting to each turn of my work.

It seemed that the second half took less time than the first, though that might have been because much of it was done in that wobbly, weird mush of time between Christmas and New Years that no-one seems to be able to keep track of.

My original stash.
Four Ceremony, one Selkie
First Five Panels
15 panels complete.

(In fact, maybe that’s the key to solving second sock syndrome and sleeve island. Leave those projects until the last week of December and do them then?)

And now, as of yesterday, I have 32 panels complete.

My original was a broad, sweeping half circle, but I found that blocking it – and keeping the end panel’s shapes consistent with the rest – was a challenge.

The original Brรญd – now lost forever in the Spanish postal system.

So, this time, with a slightly altered pattern in hand (and a colour swap that I am thrilled I went for), I opted to make a full circle, and seam it prior to blocking. That way I ensured all the panels came out the same.

Brรญd 2.0 pinned down and drying on my studio floor

In the end, a full circle required 32 panels, so that’s what I did.

All told, I used 170 m of the lush, blue Selkie colourway, and 520 m of the glowing goldenrod that is Ceremony.
In real terms, that means you’d need one skein of Selkie and three of Ceremony if you wanted to do the same, and you’d have enough of both left over afterwards to make a hat or something, too.

Next step for me is to wait patiently for it to dry in the middle of my studio floor, then decide if I like it as a circle (doubled over to make a neck warmer), or if I’ll tink the seam and make it a long, curving scarf like its predecessor that I can fasten with a shawl pin (read: crochet hook).

Which do you think would work best?


Top rated products

Posted on Leave a comment

Aoibhe’s (Almost) Invisible Tunisian Crochet Seam – for the Wrong Side

Tunisian Crochet seams can often look botched and ugly.

Here’s how to make your Tunisian Crochet garments and accessories look seamless!

Start With Some Tunisian Crochet

In this case, I have made a lovely piece of Tunisian Simple Stitch which I’m going to seam along the first and last rows.

Keep the last row you made closest to you, with the Right Side facing outwards.

Setting Up the Seam

The first thing we’re going to do, is add a little slip stitch to the two corners of our seam. This will ensure the edge of our work is smooth.

  1. Find the V on the edge of your FIRST row and add a slip stitch to it.

2. Insert finger between sides to help control your work.

Now, we can get to the real seaming business:


This seam is made by “zipping” one side of your fabric to the other.
We will be pulling each bar/line on the LAST row through each bar/line on the First row, and securing it there with a UK dc / US sc.

Here’s how:

  1. Locate the nearest line/bar on the FIRST row

2. Insert hook into it

3. Locate the nearest line/bar on the LAST row

4. Insert hook into it

5. Secure LAST row loop with hook and…

6. Draw LAST row loop through FIRST row loop

First ‘zip’ complete

Time for a little traditional crochet!

* This seam won’t hold without a little help, so we’re going to add a UK dc / US sc st onto the loop left on the hook.
Let’s do it!

1. Yarn Over.

2. Draw Yarn Over through one loop

3. Yarn Over again.

4. Draw Yarn Over through both loops

Repeat the “zip and secure” sequence for each pair of bars/lines on your seam until you get to the end.

It will look like this at this stage.

The inside of a completed (Almost) Invisible Seam.

There’s just one final thing to do; slip stitch into the two corners to smooth out the edge.

Here’s how:

1. Insert hook into both corners.

2. Yarn Over.

3. Draw Yarn Over through everything else on hook.

Bind off. Weave in ends. You know the drill.

Then, when you flip your fabric the right way out, you notice your seam is (almost) invisible, nice and strong and flexible!

A completed (Almost) Invisible Seam

SIDE NOTE: You may ask, “Hey, Aoibhe, why not use a slip stitch throughout the seam? Surely that’d take less time, use less yarn and sit flush with the fabric, right?”

And I’d say, yes, it would. Technically.

But also, slip stitches have zero stretch and zero chill.

Tunisian fabric has a lovely level of 4-way stretch, and if you add a non-stretchy seam to one part, it’s bound to cause shaping, comfort and blocking issues.

So, while a double crochet is, indeed, a little bigger, uses a little more yarn and takes more time to do, it’s still a better choice over all.

Back To Top


Like what you see? Check these out!

Posted on Leave a comment

Aoibhe’s (Almost) Invisible Tunisian Crochet Seam – for the Right Side

Tunisian Crochet seams can often look botched and ugly.

Here’s how to make your Tunisian Crochet garments and accessories look seamless!

Start With Some Tunisian Crochet

In this case, I have made a lovely piece of Tunisian Simple Stitch which I’m going to seam along the first and last rows.

Right Side in, Wrong Side out. Last Row furthest away from you.

Setting Up the Seam

The first thing we’re going to do, is add a little slip stitch to the two corners of our seam. This will ensure the edge of our work is smooth.

  1. Find the V on the edge of your FIRST row.

2. Insert hook, from front to back, into it.

3. Yarn Over

4. Draw the Yarn Over through work and through loop on hook.

Now, we can get to the real seaming business:

This seam is made by “zipping” one side of your fabric to the other.
We will be pulling each bar/line on the LAST row through each bar/line on the First row, and securing it there with a UK dc / US sc.

Here’s how:

  1. Locate the nearest line/bar on the FIRST row

2. Insert hook into it

3. Locate the nearest line/bar on the LAST row

4. Insert hook into it

5. In order, from left to right:
LAST row loop, FIRST row loop, loop that was already on the hook.

6. Draw LAST row loop through FIRST row loop

First ‘zip’ complete

Time for a little traditional crochet!

* This seam won’t hold without a little help, so we’re going to add a UK dc / US sc st onto the loop left on the hook.
Let’s do it!

1. Yarn Over.

2. Draw Yarn Over through one loop

3. Yarn Over again.

4. Draw Yarn Over through both loops

Repeat the “zip and secure” sequence for each pair of bars/lines on your seam until you get to the end.

It will look like this at this stage.

A completed (Almost) Invisible Seam

There’s just one final thing to do; slip stitch into the two corners to smooth out the edge.

Here’s how:

1. Insert hook into both corners.

2. Yarn Over.

3. Draw Yarn Over through everything else on hook.

Bind off. Weave in ends. You know the drill.

Then, when you flip your fabric the right way out, you notice your seam is (almost) invisible, nice and strong and flexible!

A completed (Almost) Invisible Seam

SIDE NOTE: You may ask, “Hey, Aoibhe, why not use a slip stitch throughout the seam? Surely that’d take less time, use less yarn and sit flush with the fabric, right?”

And I’d say, yes, it would. But also, slip stitches have zero stretch and zero chill.

Tunisian fabric has a lovely level of 4-way stretch, and if you add a non-stretchy seam to one part, it’s bound to cause shaping, comfort and blocking issues.

So, while a double crochet is, indeed, a little bigger, uses a little more yarn and takes more time to do, it’s still a better choice over all.

Back To Top


Like what you see? Check these out!

Posted on Leave a comment

No-Gap Base Increase

How to increase the height of your Tunisian Crochet column, without leaving a hole in your fabric.

This is so quick to do. You’ll love it.

Start With Some Tunisian Crochet

In this case, I have a layer of crochet done, and have started into a second layer.
The layer I’m working on is three bars high.

If you want to do the same, go ahead, I can wait. It’s no bother. I can just go make a cup of tea.

A layer of linked stitches.

Work the Downward Pass

Pick up loops in all the bars, as you have done for every column of the row so far. Don’t work into the next base just yet. We’ll get to that in a second.

Do you see the hole at the base of your PREVIOUS column? Work your hook into it.

  1. Loops picked up. Hole at base of previous column visible to the left of thumb.

2. Hook into hole at base of previous column.

Yarn Over, and draw a loop through fabric.

This adds a loop to hook that wouldn’t have been there otherwise (an increase)

  1. Yarn Over

2. Extra Loop

Now, we continue the Downward Pass by working hook into NEXT base:

Hook worked into NEXT base along.

Yarn Over, and draw a loop through to front of fabric:

  1. Yarn Over

2. Pull through

Work Tunisian Crochet Upward Pass as usual

* Yarn Over, pull through two loops * repeatedly until one loop is left on hook.

The three bars are now accompanied by a fourth (at the bottom of the column).

You are now working with four bars where before, you only had three.

Here’s what a completed, taller layer will look like.

A three-bar layer has been transformed into a four-bar layer. Lovely job!

And here’s the whole thing in motion:

Back To Top


Like what you see? Check these out!

Posted on 2 Comments

How to Start Your Pax Shawl

Ah, Pax.
Pax, my beloved Tunisian crochet shawlette.

This is my most popular pattern (as much because I’ve priced it to be accessible to anyone wanting to learn Tunisian lace crochet, as because I kept it complication-free purely to keep the pattern simpler for beginners).

Occasionally, I get questions about it, though, and the majority of them are to do with starting out.
Usually, I reply to beginner crocheters’ questions individually, but I thought “How great would it be if I updated Pax with a new photo tutorial?” It is 11 years old at this stage, and could do with sprucing up… so…

If you’ve got a copy of Pax, a crochet hook at the ready, and you’re not sure how to begin, let me help you out.

Today's Yarn, by the way, is Drops Flora.

It's a wool/alpaca blend that I'm currently obsessed with. It's warm, has great stitch definition and a wide range of colourways. 

And my hook, as always is a beechwood KnitPro Symfonie - this one's my trusty 5 mm.

Make Some Chains

OK, so the pattern calls for way more chain stitches than this.
I’ve made 20 chains here to demonstrate the technique, but you will be making way more when you start your own Pax adventure.

4-ply yarn and a 5 mm hook

Have you picked up your copy yet?
Click Here!

The First Stitch.

First things first, we need to take a look at our chains.
We’re going to skip the chain closest to the hook, and work instead into the second chain along.

Find the second chain…
Push hook through top loop of chain
Hook is now completely through loop on second chain

Yarn Over on your hook, and draw that Yarn Over back through the chain.
This will give you two loops on your hook –

  • The loop furthest from the hook head was there already.
  • The loop closest to the hook head is your first Tunisian Simple Stitch.
Yarn over

Draw through chain

The Forward Pass

We then do the same for the next chain along.

Important Note for Beginners: We ONLY skip the very first chain in Tunisian crochet. No other chains are skipped from this point on.

Find the next chain along
Push hook through
Yarn over…
Draw Yarn Over through chain

Every time we repeat this process, we add a loop to the hook.
When we have added ten stitches, we’ll have eleven loops in total (that includes the one that was there from the beginning)

11 loops = 10 stitches

For this tutorial, this completes our “Forward Pass”.

In Tunisian Crochet, we have two “Passes” per row of work.
The “Forward Pass” that we have just completed sees loops being added to the hook.
The “Return Pass” will see us remove stitches as we work until we are back to one loop on the hook.

Between the Forward and Return Passes in Pax we have an extra dance step to do, and it involves the next chain along on our string of chains.

Working the “Base”

I want you to identify the next chain along, work your hook into it, Yarn Over, and draw a final loop onto your hook.
A note on this loop: It is created the exact same way as all the loops before it, but its job is very different. It’s not counted as a stitch because it is, in fact, the base of the column. This will become clear as we work on.

There are now 12 loops on the hook
That’s 1 at the start, 10 Tunisian Simple Stitches, and 1 base loop

The Return Pass

The Return Pass is easily my favourite bit of this whole process.
It require far less concentration and is oddly satisfying.

All you have to do to complete the entire Return Pass is to *Yarn Over on your hook, and draw it through two loops* repeatedly, until you are left with one loop on your hook.

Yarn Over
Drawing through two loops
After the second repeat you start to see the row/colum forming in your hook’s wake


When you’re at that point, you’ve completed your row/column!

Foundation Row/Column complete

As you can make out in the above photo, the row/column we have completed has ten little rung or lines evenly spaced down its length. In the above photo they are vertical, look like little fence posts, and start at my right thumb nail and travel down the fabric to my left thumb nail.

We’re going to use these lines to anchor our second row/column.


Processingโ€ฆ
Success! You're on the list.

Row/Column 2

Slide hook through the first of these lines, like a bolt locking a door.
We stay on the Right Side of the work for this. There’s no neeed to push through to the Wrong Side at all from hereon in.

Original loop on hook (right) and vertical line (left)

Then, same as before, we simply Yarn Over, and draw the yarn over through the line, giving us two loops on the hook.

Yarn Over
Draw through

Then, we find the next line along, and slide the hook through that.

Next line along

And we do the same thing – Yarn Over, pull through.

Yarn Over
Draw through – 3 loops on hook

Now, it’s just a matter of carrying on down, picking up loops using each of the available lines.

Ten loops added to hook for a total of eleven loops

With the Forward Pass complete, we work The Base into the next chain along:

Hook in next chain along…
Yarn Over
Draw through – 1 more loop added to hook
There are 12 in total now

With that taken care of, we get to do the Return Pass for the row/column.
That’s *Yarn Over, draw through 2 loops* repeatedly until 1 loop is left on hook.

2 rows/columns complete

Row/Column 3

With another whole row/column complete, this is what you’ll be looking at:

3 rows/columns complete

More Rows/Columns

After another few completed rows/columns, you’ll start to notice your dangling chains aren’t so dangly anymore. Each row/column uses up one at its base, and adds some strength to that edge of your shawl and helps ensure the completed shawl blocks into a gentle curve.

6 rows/columns complete

I hope this tutorial helps you get started on your own Pax Adventure!

You can find the pattern (using both UK and US crochet terms) here:

Well done!


And remember, small, independent businesses like mine can only make it work through word of mouth, so leave a review if you liked this pattern, tell a friend if you loved it, and don’t forget to tweet about it too!

Thank you.


Thanks for reading.

And thanks to all my Patreon Supporters, without whom tutorials like this one would not exist:


Join My Patreon Family Here!

Marie Saur, Kathleen Robins, Jolin Lang, Sylvea Allington, Sherry Lynn Cekala, Marion Muir, Gwen Coltrin, Sarah Mcfall, Subethjimbob, Gillian Balharry, Michelle Ganoff, Liz Lowe, Heather Lane, Lisa Walsh, Cecilia M Mencias, Isabeau Suro, Ellen Krawiec, Caragh Barry, Wonne, Woolly Wormhead, Konni Wuppertalerin, Deanna Nielson, Mary A Maddy, Sue Horsburgh, Samantha Locke, Teresa Baker, Thea Hutchings, Mariag, Rachel Moutrie, Kris Park, Susan Baughman, Jill Shanmugasundaram, Sarah Davis, Patricia M Fragaszy, Tamara Millyard, Lisa Hendrick, Fran Oberne, Amanda Blohm, Kate Hulme, Emily Owen, Ann Ryan, Kim Tijerina, Ursula Moertl, Kristin, Seyren, Tanja Osswald, Ursula Mayr, Judy Baldwin, Concetta Phillipps, Liss Allen, Maire, Beate Siefer, Kristen, Edi, Julie Marz, Sammy Campbell, Flootzavut, Kathlyn Smith, Regina Schweinsberg, Lora O’Brien, Anne Johannessen, Cheidner, Jasminetea182, Medora Van Denburgh, Heather Longino, Mary, Annie Wells.


Posted on Leave a comment

Sewing up you Reoite Gloves

Once you have your Reoite Glove panels complete, and the vine details added with either a crochet hook or an embroidery needle, it’s time to sew them up!
This tutorial will take you through the process.

What You Will Need

Panels 1 and 2 are laid out in the image below, as is the afterthought thumb.
I’ll be sewing up a right-handed glove in this tutorial, using the right-handed snow flower panel and my stitch markers set for the thumb on my right hand.

Panel 1, the afterthought thumb, Panel 2, my right hand and a bodkin

Have you picked up your copy yet?
Click Here!

A note on needle choices.

Below, I have a blunt-ended darning needle known as a bodkin. I prefer to use a bodkin for seaming up a piece because the blunt end won’t split a strand of yarn when I’m passing it through the fabric. This gives a neater finish to a piece of crochet.

bodkin!

To Begin

Align the stitch marker on your thumb with the lower stitch marker on Panel 2.
Then, thread your bodkin and pass it through the two marked stitches.
Add a few more stitches to give this join a bit more strength.

align these two markers
bodkin through both marked stitches

This is what we end up with:

thumb tacked to Panel 2

When you sew up the rest of the seam, you get a little thumb flap off the edge of Panel 2, like this:

Once again, add a few extra stitches to the last stitch, then weave the end in on the wrong side of the work.
I like to travel back down along the stitches I have just made:

Adding Panel 1

Now that the thumb has been attached to Panel 2, it’s time to add Panel 1 to the party.

The image below is a little misleading, and I apologise for that. The intention was to ensure you knew how to orientate the panels (with the last row of each panel at the knuckle end of the glove), but I really should have put Panel 1 on the OTHER side, with the thumb itself in the middle.

I’ll fix this when I have another glove made up, but for now, let’s press on!

With the Wrong Sides of panels pressed together, start at the cuff end and seam the thumb side of both panels together up to the lower stitch marker.

seaming…
seaming…
more seaming…

When your seaming reaches the lower stitch marker, work through marked stitch AND the stitch at the point of thumb.

stitch marker marking the point where the thumb is included in the process

I recommend you run a few extra stitches into this spot for neatness and strength. This join is the one that will get the most wear.
Seam up the open portion of thumb to Panel 1.

panels 2 and 1 seamed on thumb side, and thumb and panel 1 open
thumb seamed to panels 1 and 2

Processingโ€ฆ
Success! You're on the list.

Completing The Thumb

Fold glove in half along completed seam.

fold…
…fooooold…
…folded!

Add a few stitches to top edge of thumb where indicated below:

right there
thumb stitches in place

Those stitches add a bit of a gusset to the thumb and makes the opening fit far better.

Then, carry on seaming Panels 1 and 2 together above thumb.

…last few stitches…
…and done!

Lovely stuff!
Time to weave in your ends, then admire your handy work and get another strand of yarn ready.

Flip your glove like a pancake, attach yarn to cuff end of open seam, and start sewing!

open seam
seaming in progress
seam complete

Once all your ends have been sewn in (or, more likely tucked inside and hidden from view, amirite?) your gloves are ready to be worn and admired by friends and strangers alike!

Well done!

And remember, small, independent businesses like mine can only make it work through word of mouth, so leave a review if you liked this pattern, tell a friend if you loved it, and don’t forget to tweet about it too!

Thank you.


Thanks for reading.

And thanks to all my Patreon Supporters, without whom tutorials like this one would not exist:


Join My Patreon Family Here!

Marie Saur, Kathleen Robins, Jolin Lang, Sylvea Allington, Sherry Lynn Cekala, Marion Muir, Gwen Coltrin, Sarah Mcfall, Subethjimbob, Gillian Balharry, Michelle Ganoff, Liz Lowe, Heather Lane, Lisa Walsh, Cecilia M Mencias, Isabeau Suro, Ellen Krawiec, Caragh Barry, Wonne, Woolly Wormhead, Konni Wuppertalerin, Deanna Nielson, Mary A Maddy, Sue Horsburgh, Samantha Locke, Teresa Baker, Thea Hutchings, Mariag, Rachel Moutrie, Kris Park, Susan Baughman, Jill Shanmugasundaram, Sarah Davis, Patricia M Fragaszy, Lisa Hendrick, Fran Oberne, Amanda Blohm, Kate Hulme, Emily Owen, Ann Ryan, Kim Tijerina, Ursula Moertl, Kristin, Seyren, Tanja Osswald, Ursula Mayr, Judy Baldwin, Concetta Phillipps, Liss Allen, Maire, Beate Siefer, Kristen, Edi, Julie Marz, Sammy Campbell, Flootzavut, Kathlyn Smith, Regina Schweinsberg, Lora O’Brien, Anne Johannessen, Cheidner, Jasminetea182, Medora Van Denburgh, Heather Longino, Mary, Annie Wells.


Posted on Leave a comment

Creating Reoite’s vine detail – Binding Off

Click here for a guide to creating the vine detail with a Crochet Hook.
Click here for a guide to creating the vine detail with an Darning Needle.

Using just a bodkin (a blunt darning needle), here’s how you secure your beautiful vine.

Let’s Get Into It!

Whether you made your vine using the crochet or the embroidery methods, you will finish up at this exact point.

With a short strand of yarn left, thread your bodkin.

Ready to secure the vine detail on Reoite Gloves

Have you picked up your copy yet?
Click Here!

Embroiderers:
In the image below, my needle is resting on the spot where I would insert it IF I was making another petal stitch.
DON’T go in there.

DON’T go in here

Instead, lift the last petal made up a little and insert bodkin into the fabric in front of it.

Go in here instead.

From the Wrong Side, pull yarn to tighten loop.


Processingโ€ฆ
Success! You're on the list.

pull…
PULL…
…and done.

That little stitch will hold the last petal in place without adding any bulk to the end of your vine.
But we now must secure that end on the Wrong Side of the glove so it doesn’t come loose.

weaving your bodkin into the fabric on the wrong side is enough to hold the strand in place

After that, carefully trim the end.

Once all your ends are woven in and your pieces have been gently blocked (if you’re into that sort of thing), it’s time to sew up your panels to complete your gorgeous new gloves!


Thanks for reading.

And thanks to all my Patreon Supporters, without whom tutorials like this one would not exist:


Join My Patreon Family Here!

Marie Saur, Kathleen Robins, Jolin Lang, Sylvea Allington, Sherry Lynn Cekala, Marion Muir, Gwen Coltrin, Sarah Mcfall, Subethjimbob, Gillian Balharry, Michelle Ganoff, Liz Lowe, Heather Lane, Lisa Walsh, Cecilia M Mencias, Isabeau Suro, Ellen Krawiec, Caragh Barry, Wonne, Woolly Wormhead, Konni Wuppertalerin, Deanna Nielson, Mary A Maddy, Sue Horsburgh, Samantha Locke, Teresa Baker, Thea Hutchings, Mariag, Rachel Moutrie, Kris Park, Susan Baughman, Jill Shanmugasundaram, Sarah Davis, Patricia M Fragaszy, Lisa Hendrick, Fran Oberne, Amanda Blohm, Kate Hulme, Emily Owen, Ann Ryan, Kim Tijerina, Ursula Moertl, Kristin, Seyren, Tanja Osswald, Ursula Mayr, Judy Baldwin, Concetta Phillipps, Liss Allen, Maire, Beate Siefer, Kristen, Edi, Julie Marz, Sammy Campbell, Flootzavut, Kathlyn Smith, Regina Schweinsberg, Lora O’Brien, Anne Johannessen, Cheidner, Jasminetea182, Medora Van Denburgh, Heather Longino, Mary, Annie Wells.

Posted on Leave a comment

Creating Reoite’s vine detail – Crochet Method

Once you have your Reoite Glove panels complete, there’s one last detail to add before they’re sewn up.
There are two different ways to achieve this lovely petal stitch detail on your own gloves.

If you’re handy with a darning needle, click here for the Embroidery Version.

Using just your crochet hook, here’s how you create this gorgeous, textured vine effect.

First Things First

Here’s what we want to achieve.
You can either work with the same colour yarn as the rest of your glove for a subtle effect, or you can spring for a contrast colour yarn to really show off your new skills. For this tutorial, I’ll be using a contrasting yarn so that you can see exactly what I’m doing at every stage.

Completed Reoite Gloves (left) and a Reoite in progress with contrasting colour vine detail (right)

Have you picked up your copy yet?
Click Here!

So, first, we’re going to need a good, old-fashioned slip knot.
This creates the loop we will put on our hook in a moment.

(If you don’t know how to make a slip knot, click here.)

Slip knot and yarn loop

Insert hook into dead centre of cuff edge of fabric (see pattern for a chart to guide you).
Then add loop to hook while it is still inserted in fabric.

insert hook
add loop

Draw loop through to front of fabric. Don’t worry if your loop is still loose. We’ll fix that next.

draw loop to front

Pull ball end of yarn and the loop on your hook with tighten. Pull gently but firmly until loop is snug (but not tight) on your hook.

pull ball end of yarn
loop is now snug on hook

The First Stitch

From the Right Side of your fabric, press hook through to Wrong Side at the point indicated on the pattern’s chart.

Then Yarn Over from Wrong Side, and draw loop through to Right Side. You’ll have two loops on your hook.

yarn over
draw loop through fabric to right side

Draw loop closest to hook tip through other loop. You’ll be left with one loop on your hook, and a petal stitch in your fabric.

Tip. Crochet loosly. These petal stitches have zero stretch to them, so be sure to add a little slack as you crochet.


Processingโ€ฆ
Success! You're on the list.

Adding More Petal Stitches

Let’s go through the sequence again…

Find next spot on pattern’s guide
push hook through to wrong side
yarn over
draw loop through fabric to right side
and draw loop closest to hook through other loop

After a few more repeats, this is what it will look like:

four petal stitches complete, and one on the way

Keep working like this, with the pattern guide as reference.

four petal stitches complete, and one on the way

Once you have completed your entire vine, cut the yarn on the Wrong Side of the fabric, then loosen the loop on your hook until the end pops through to the Right Side.

pull…
pull…
…and POP!


For a photo guide on Binding Off, click here.


Thanks for reading.

And thanks to all my Patreon Supporters, without whom tutorials like this one would not exist:


Join My Patreon Family Here!

Marie Saur, Kathleen Robins, Jolin Lang, Sylvea Allington, Sherry Lynn Cekala, Marion Muir, Gwen Coltrin, Sarah Mcfall, Subethjimbob, Gillian Balharry, Michelle Ganoff, Liz Lowe, Heather Lane, Lisa Walsh, Cecilia M Mencias, Isabeau Suro, Ellen Krawiec, Caragh Barry, Wonne, Woolly Wormhead, Konni Wuppertalerin, Deanna Nielson, Mary A Maddy, Sue Horsburgh, Samantha Locke, Teresa Baker, Thea Hutchings, Mariag, Rachel Moutrie, Kris Park, Susan Baughman, Jill Shanmugasundaram, Sarah Davis, Patricia M Fragaszy, Lisa Hendrick, Fran Oberne, Amanda Blohm, Kate Hulme, Emily Owen, Ann Ryan, Kim Tijerina, Ursula Moertl, Kristin, Seyren, Tanja Osswald, Ursula Mayr, Judy Baldwin, Concetta Phillipps, Liss Allen, Maire, Beate Siefer, Kristen, Edi, Julie Marz, Sammy Campbell, Flootzavut, Kathlyn Smith, Regina Schweinsberg, Lora O’Brien, Anne Johannessen, Cheidner, Jasminetea182, Medora Van Denburgh, Heather Longino, Mary, Annie Wells.

Posted on Leave a comment

Creating Reoite’s vine detail – Embroidery Method

Once you have your Reoite Glove panels complete, there’s one last detail to add before they’re sewn up.
There are two different ways to achieve this lovely petal stitch detail on your own gloves.

If you’re handy with a crochet slip stitch, click here for the Crochet Hook Version.

Using just a bodkin (a blunt darning needle), here’s how you create this gorgeous, textured vine effect.

First Things First

Here’s what we want to achieve.
You can either work with the same colour yarn as the rest of your glove for a subtle effect, or you can spring for a contrast colour yarn to really show off your new skills. For this tutorial, I’ll be using a contrasting yarn so that you can see exactly what I’m doing at every stage.

Completed Reoite Glove (left) and a Reoite in progress with contrasting colour vine detail (right)

Have you picked up your copy yet?
Click Here!

So, first, thread your bodkin with an armspan of yarn.

While you will need about 3 meters of yarn to complete the entire vine it’s not wise to work with a strand of yarn that length from the beginning. The end will get ragged and tatty, and it will catch on your yarn with every stitch. You’ll end up fighting with it more than embroidering with it. It’s better to cut a length you can easily manage and then secure your end and start with a new strand when you run out.

(This tutorial on Binding off a Petal Stitch will help when you need to bind off)

From Wrong Side to Right Side, insert needle where indicated in pattern (the location of your first stitch changes depending on the size of glove you’ve chocen to do).

Setting up for the first Petal Stitch.

From Right Side to Wrong Side, insert bodkin into same hole you chose to set up stitch.
From Wrong Side to Right Side, come out one square up, and at a diagonal.

draw loop to front

Draw yarn in front of bodkin so it sits between fabric and the bodkin itself.
This creates a loose loop which will become the first “petal stitch” in a moment.

Take tip of bodkin and pull it out of the fabric.
As you pull, you’ll notice the loose loop you created in the last step tighten…

yarn wrapped in front of bodkin
bodkin removed from fabric

…and tighten, until a little petal shape has been created.

pull to tighten loop

first petal now sits on top of fabric

The Second Petal

From the Right Side of your fabric, press bodkin through fabric from within the petal loop.

Pick up yarn again and draw it in front of bodkin so it sits between fabric and the bodkin once more.

yarn wrapped in front of bodkin
Bodkin removed from fabric and loop pulled to tighten

Once loop has been tightened, you’ll see you have a second petal stitch completed.


Processingโ€ฆ
Success! You're on the list.

Adding More Petal Stitches

Let’s go through the sequence again…

bodkin inserted inside previous petal
and out to Right Side again, according to pattern guide
yarn wrapped in front of bodkin
bodkin pulled through fabric with loop tighening
…tighter…
…and done!

Keep working like this, with the pattern guide as reference.
For a photo guide on finishing off, click here.


Thanks for reading.

And thanks to all my Patreon Supporters, without whom tutorials like this one would not exist:


Join My Patreon Family Here!

Marie Saur, Kathleen Robins, Jolin Lang, Sylvea Allington, Sherry Lynn Cekala, Marion Muir, Gwen Coltrin, Sarah Mcfall, Subethjimbob, Gillian Balharry, Michelle Ganoff, Liz Lowe, Heather Lane, Lisa Walsh, Cecilia M Mencias, Isabeau Suro, Ellen Krawiec, Caragh Barry, Wonne, Woolly Wormhead, Konni Wuppertalerin, Deanna Nielson, Mary A Maddy, Sue Horsburgh, Samantha Locke, Teresa Baker, Thea Hutchings, Mariag, Rachel Moutrie, Kris Park, Susan Baughman, Jill Shanmugasundaram, Sarah Davis, Patricia M Fragaszy, Lisa Hendrick, Fran Oberne, Amanda Blohm, Kate Hulme, Emily Owen, Ann Ryan, Kim Tijerina, Ursula Moertl, Kristin, Seyren, Tanja Osswald, Ursula Mayr, Judy Baldwin, Concetta Phillipps, Liss Allen, Maire, Beate Siefer, Kristen, Edi, Julie Marz, Sammy Campbell, Flootzavut, Kathlyn Smith, Regina Schweinsberg, Lora O’Brien, Anne Johannessen, Cheidner, Jasminetea182, Medora Van Denburgh, Heather Longino, Mary, Annie Wells.